Give your customers more choice, and boost your conversions, with ThriveCart’s flexible product and pricing options. This guide walks you through how to create up to six pricing choices per product, from one-time payments to subscriptions and split-pays.
You’ll also learn how to customize the visual layout of your pricing options in the checkout editor, highlight preferred plans, and tailor the experience to fit your brand. With ThriveCart, offering multiple product variations has never been easier or more powerful.
ThriveCart lets you easily create up to 6 different product or pricing options on your checkout so your customer can choose what they’re purchasing.
These can be used for offering your customers different variations of a product, different plans, different payment methods and more.
Your fulfillment, automation rules, commissions, and more can be uniquely set based on these pricing options, so that they only fire based on the customer’s selection. See our article and video on this here.
This help desk article is broken into 3 sections:
- Setting up multiple product options
- Choose a pricing option type
- Setting the front-end visual look of your options
Setting up multiple product pricing options
It takes just a few clicks to get these options set up and to get started you need to edit your product settings or create a new product then go to the Product > Pricing tab.
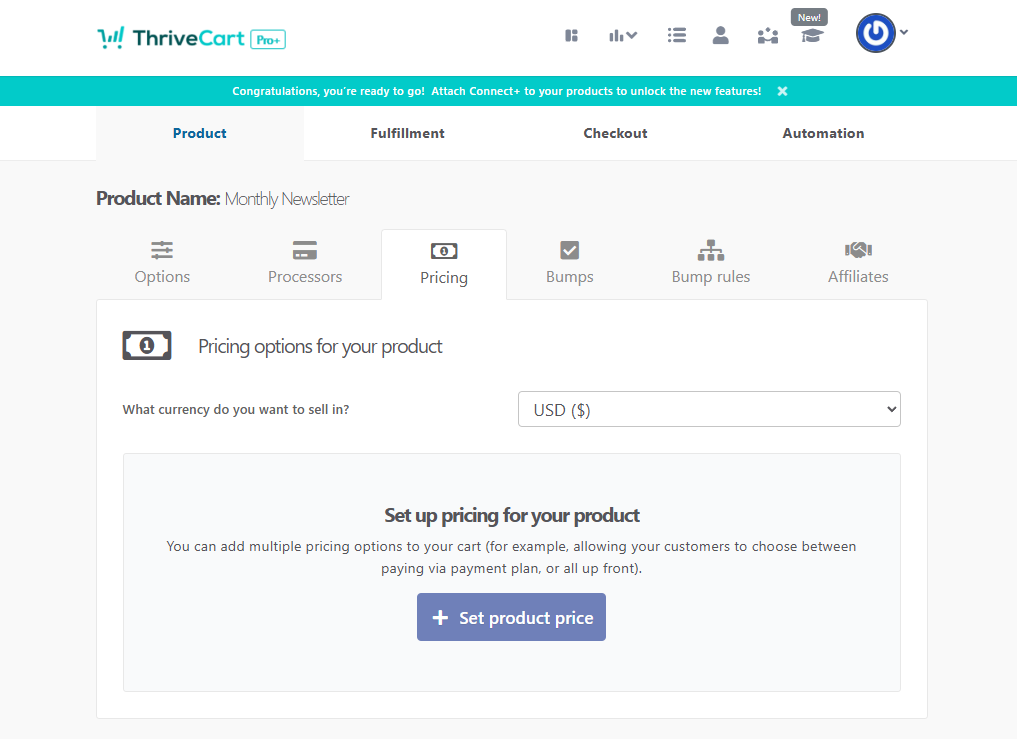
From this screen, you can set the currency your product will be charged in and then the option to create the different payment options.
To create your first pricing option, click +Set product price, where you will see a modal to create your pricing option:

From here you can:
- Choose the pricing option type
- Set a price
- Create a trial period (if applicable – see more on creating trials here)
- Choose whether to send the customer purchase email after purchase.
- Limit quantities available for this pricing option (see more on setting limits and out-of-stock rules here)
- Set where in the world the product is available (see more on restricting countries here)
You’ll see a summary of what the customer will be charged, which is helpful when setting subscriptions or recurring payments with trial plans.
After creating your first pricing option for your product, if you wish to offer different prices or multiple pricing plans, you can easily do this by clicking the Add pricing option button located at the bottom right of the area.
You can then add a different pricing option to your product and you can easily mix and match one-time pricing, with subscriptions, split-pay, or pay your own price, offering up to 6 different pricing options at checkout. Giving you a ton of flexibility in how your products are set up.
Choose a pricing option type
- One-Time Fee: If you are collecting a single payment from your customers, you’ll want to choose this option, where you can set a single price. One-time fee pricing options can have a trial period set on them, which is automatically a free trial.
- Subscription (ongoing): If your subscription or membership is an ongoing commitment without an end date. Choosing this option will ensure that payments are collected until the customer cancels.
Trials can be set with our built-in numbers in the dropdown, or by choosing “custom” to set your own trial length.- You can set a free trial by setting “Today’s price” to $0.00.
- You can set a paid trial by setting the “Today’s price” to your desired amount.
- Recurring payments will all be billed at the price set in the first box (“Monthly price”, “Annual price”, etc. based on the billing frequency you’ve set)
- Subscription (limited): If you have a set number of payments to collect, you’ll want to choose this option. The number of rebills set will be collected in addition to the initial (today) payment – so if you’re wanting to collect 6 total payments, your rebill number would be set to 5.
- Trials can be set similarly to the ongoing subscriptions steps detailed above.
- Recurring payments are handled the same as ongoing subscriptions.
- Split Pay: Similar to a limited subscription, but with fewer settings to choose from for a quicker and easier setup. Split pay is available for 2, 3, 4, 5, or 6 payments and the amounts will all be the same as the initial payment. If you’re wanting additional functionality or customization, set a limited subscription for customizable numbers of recurring payments and the ability to set a trial.
- Pay Your Own Price: This option allows customers to pay what they like. You can set minimum payments so that they must pay at least a set amount, but customers will have the option in check out to type in a custom amount higher than your minimum. You can add notes to thank customers if they enter higher than a specific amount, but for more details on setting this pricing option see our guide here.
For a more in-depth guide for setting recurring payment options, please see our create a recurring subscription guide here.
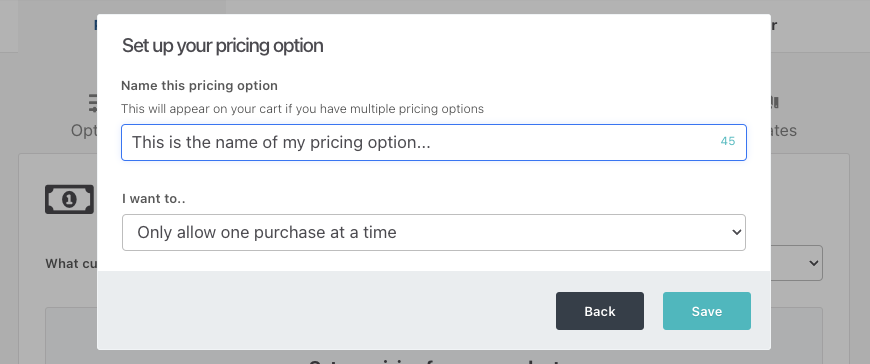
Once you’ve chosen and set your pricing option, you can click ‘Next’ within the modal. On the second step of creating a pricing option, you also have the ability to customize the name. By default, we’ll populate this based on the pricing settings on the screen before, but you can edit this to show exactly what you need to like this example below:
Hot Tips
- By default, the first pricing option in the list will be selected when someone visits the cart.
- You can reorder pricing options by clicking the 3-line icon next to the pricing option and dragging it up or down.
- You can mark a specific pricing option as ‘preferred’ and this will make it the option selected by default when someone visits the cart.
- You can send customers to the checkout and have a specific option pre-selected with a URL variable.
Setting the front-end visual look of your options
Your pricing options in the editor have various options, including:
- Display Buy Now Pay Later (BNPL) breakdowns when using Stripe Enhanced, Stripe Connect+, or PayPal Enhanced, which will show when available to your customers
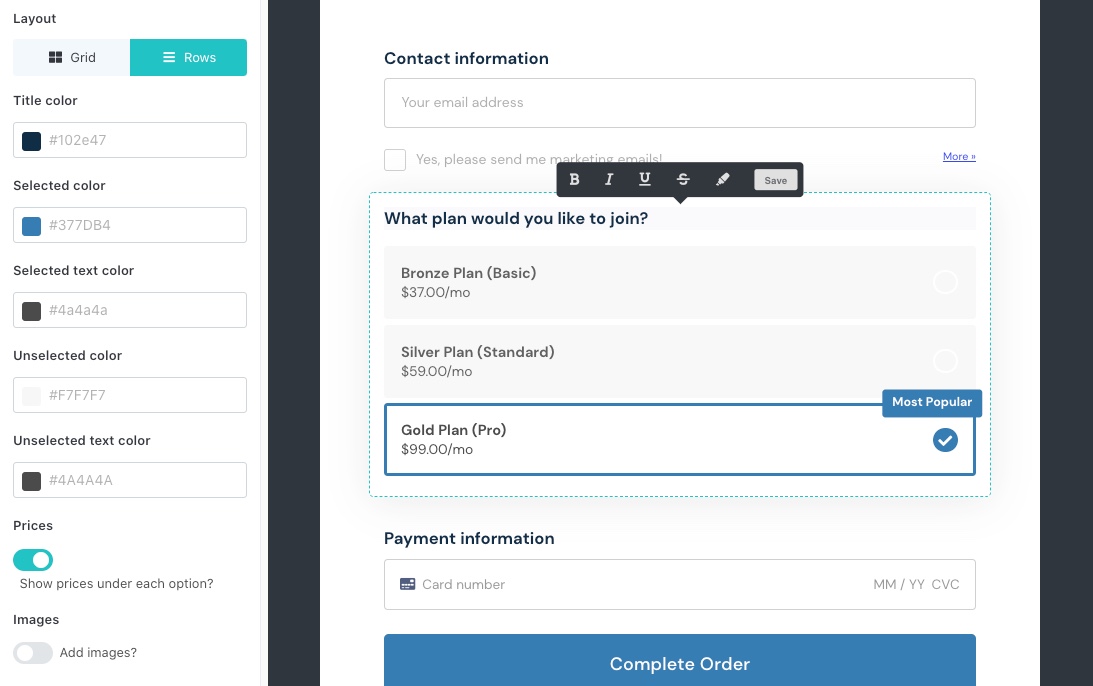
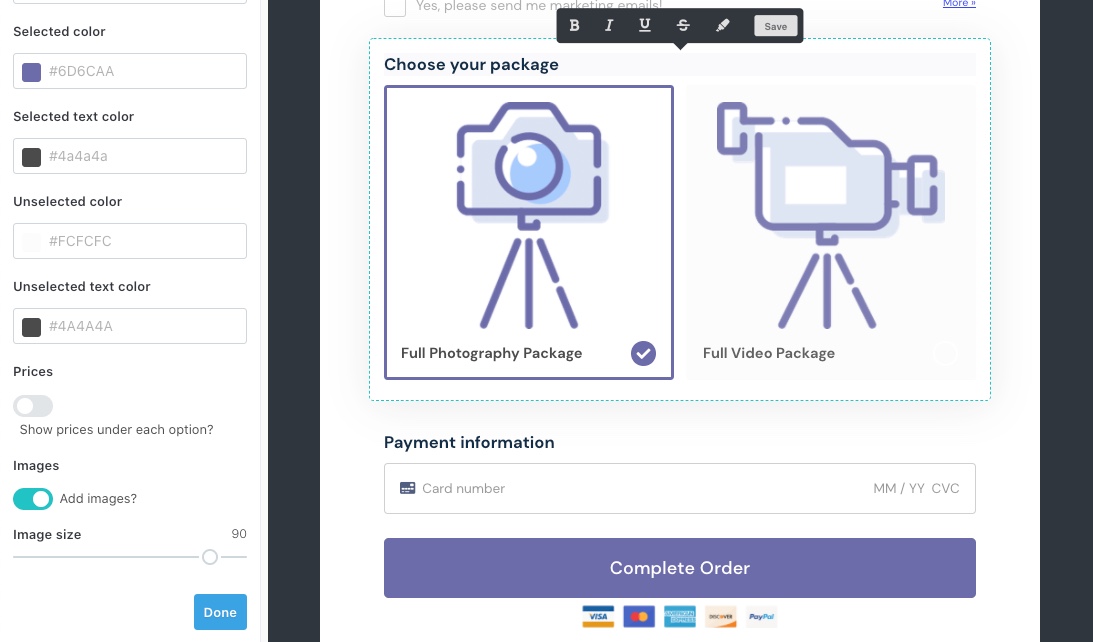
- The ability to show options in a 2-column grid
- The ability to show them as individual rows
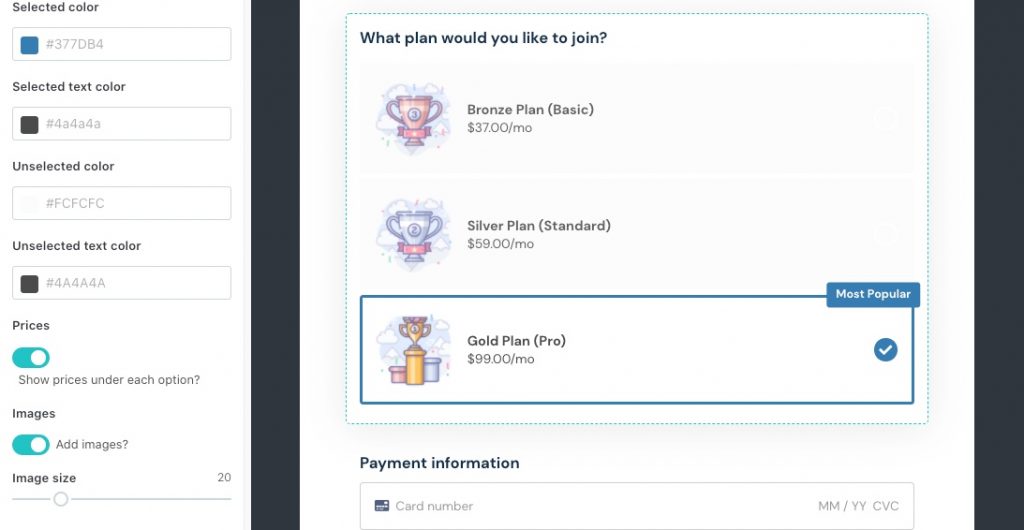
- The ability to include an image with the pricing option
- The ability to show or hide the pricing on the option (pricing will always be broken down in the order summary area)
- Various color options
All of this is editable in your cart editor when selecting the pricing options element. See below for examples.
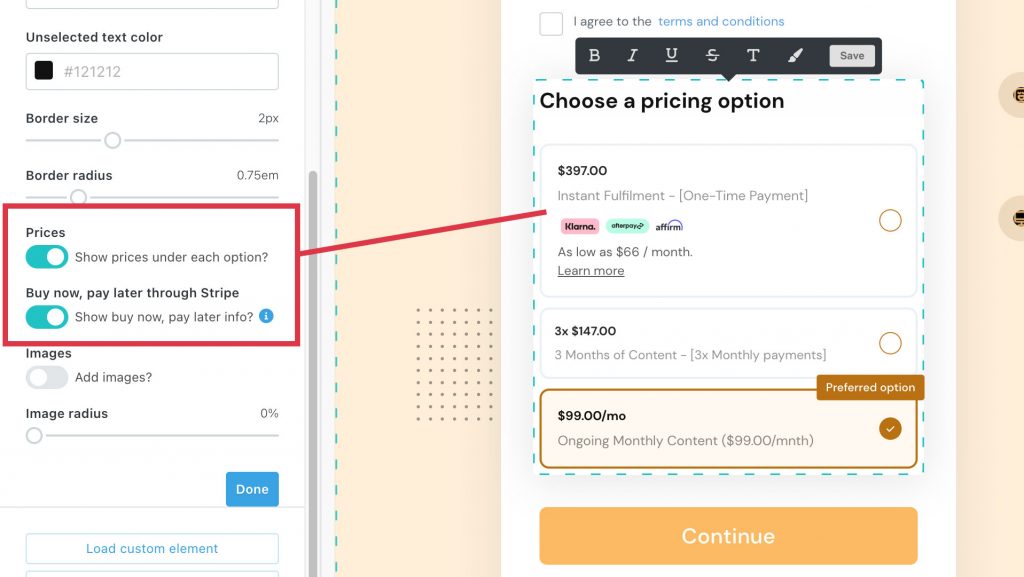
You can choose to showcase the Buy Now Pay Later (BNPL) options available for each pricing option. When a BNPL option is available to customers, it will then show a small preview of that pricing breakdown directly underneath the pricing option itself, helping customers choose those pay-in-full options that they may not have chosen previously.
Stripe will still determine the options available to your customer in checkout, and so the options seen in checkout are simply previews of how those options may look.
BNPL options will then only show when they are available for that pricing option. In the example above we can see a one-time payment pricing option with the BNPL breakdown available. Subscriptions will not showcase those BNPL options, but you can still enable images and set those additional settings: