Learn allows vendors to easily sell their training and content to customers through highly flexible courses containing modules and lessons. Each of which has a wide range of super-powerful drip-feeding options – giving you complete customisation on how your content is delivered to your students.
Project & Course Management
When creating courses, you’ll keep everything organised in what is known as projects. Projects are not student-facing and they’re used internally for your organisation
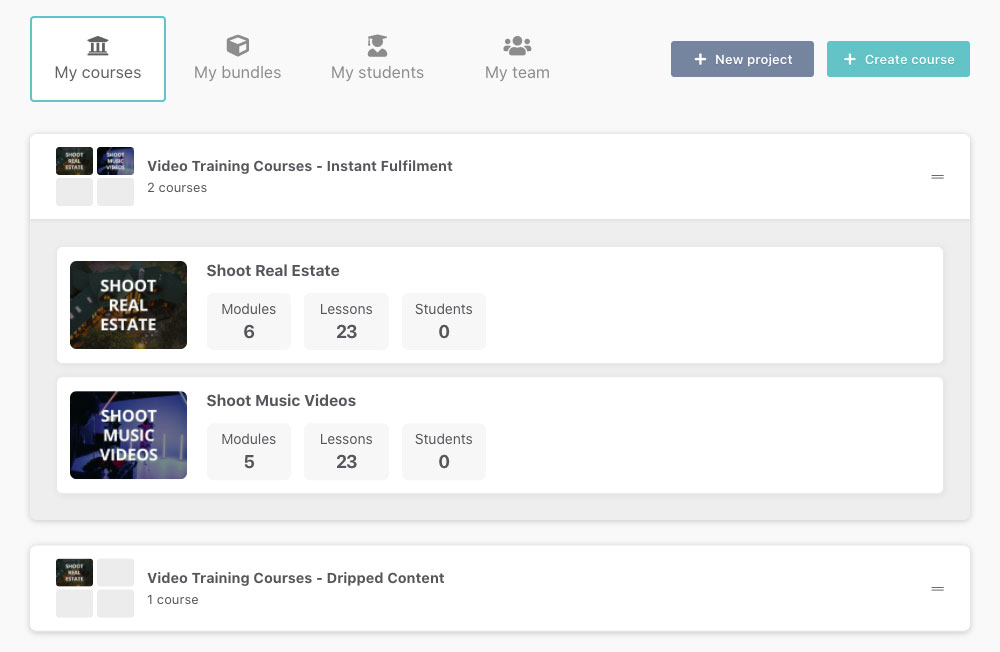
You can create any number of projects as you like, along with any number of courses. You can easily clone courses and/or move them between projects for easy organisation.
Course Content Access (Instant/Drip Feed)
Learn gives you incredibly powerful functionality with how you can deliver your course content to your students.
You can choose from ‘instant’ access, giving the module or lessons to your student as soon as they’ve paid, or you can drip feed content out using a wide range of methods.
What’s more, you can mix and match this in your course. Meaning different lessons or modules could be drip-fed out at different times or methods.
Supported methods for drip-feeding modules and lessons include:
- Releasing modules/lessons every day, week, month, or year after their purchase.
- Releasing modules/lessons on a specific day of the month
- Releasing modules/lessons on specific fixed dates
- Releasing modules/lessons after a trial period
- Releasing modules/lessons after specific rebills
We have a more in-depth guide on content drip scheduling found here, but as you can see, you have a huge amount of flexibility in how your content is dripped out to your students, and remember, these can be mixed and matched within your course giving you a super high level of flexibility.
Course Content (workflow best practice)
When creating your course, you’ll typically have everything already planned out and any content already written in your word processor.
You can easily copy content into your lesson editor and then save your lesson as a draft or publish it. While this will not copy over any formatting such as bolding or bullets, the text can be pasted into your lesson and then formatted within the text box editor directly.
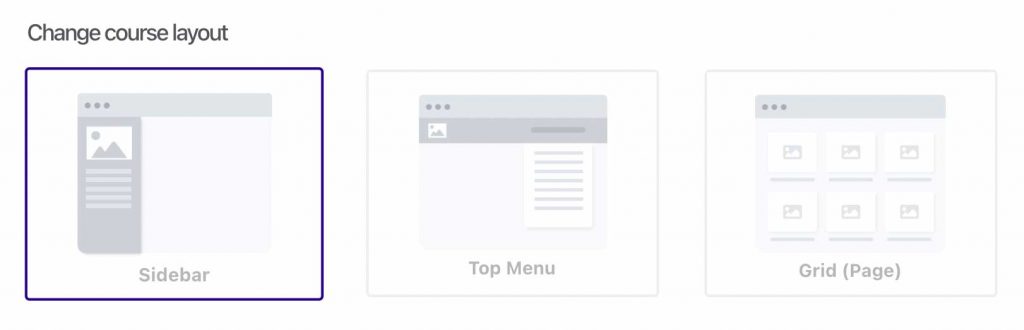
When it comes to your course layout and lesson design, Learn offers several design types with a full range of customisation options. See our helpdesk article here on course layout and lesson design.
Students
The student area in your Learn account allows you to easily review and manage the different students you’ve enrolled.
You can search for students via name or email, filter by specific courses, and enrollment date. You can filter by their status, or event applied tags (tags are a Learn+ feature).
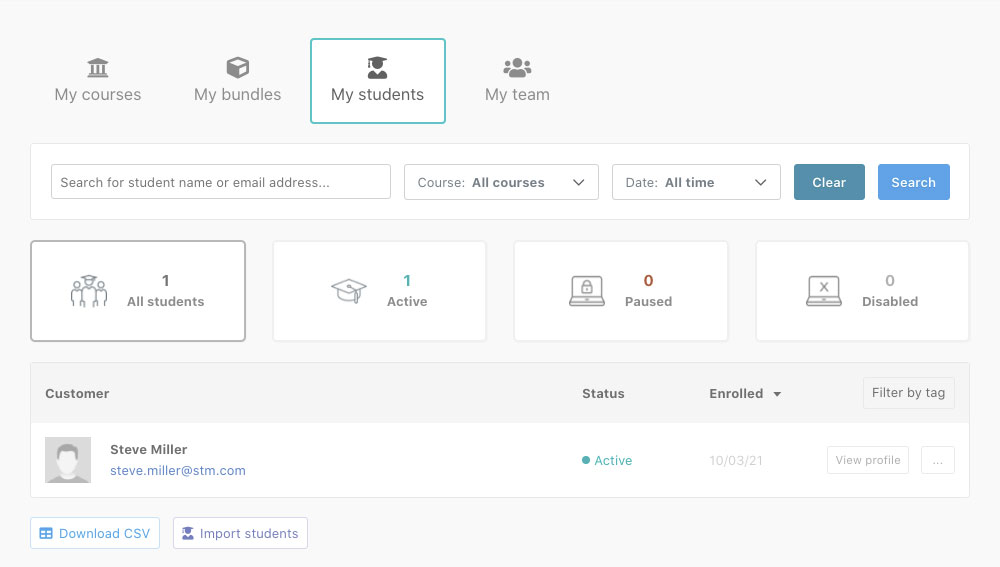
Viewing a student’s profile gives you even more options with the ability to pause, disable or unenroll access to courses
Student Enrollment Status Action Types
Pause – Prevents student from getting access to future dripped content, but the student can still login and retains access to content that they had already had access to before they were paused.
Suspend – This is the same as pausing the content. Your student will be able to log in but will not see any new content that has been dripped after they have been suspended.
Revoke – This is the same as disabling access.
Unenroll – Removes a student from the course entirely. They are no longer enrolled in the course and course details are entirely removed from their profile. They will be unable to access any course content. If they purchase again, they will be treated as a new student.
Disable – The student remains enrolled in the course, but their access is revoked. Their progress and enrollment history remain intact, and if they purchase the course again their existing enrollment is re-enabled based on where they left off.
Adding customers to your courses
Adding your customers and students to your courses is handled the same way as any other membership platform fulfillment. Via your product’s fulfillment tab.
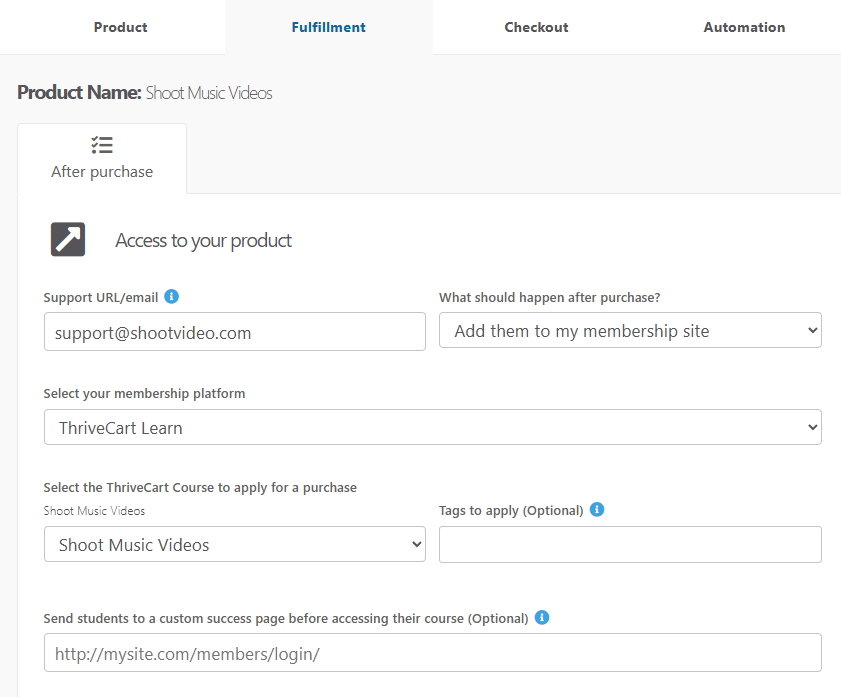
You can then choose between your courses or bundles and apply them to the customer based on things like what pricing option they choose and then if there is a bump off enabled on the checkout, choose what course that uses for fulfilment. Upsell fulfillment is then handled in the funnel settings.
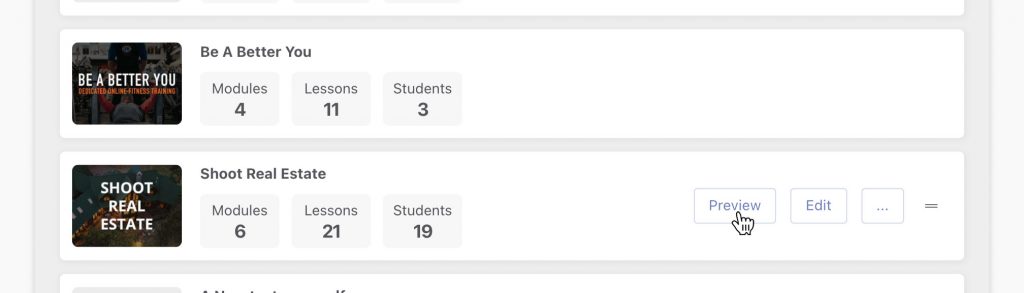
Previewing your Course area
To preview your course, you can simply hover your cursor over a course in your dashboard and click the Preview button.
This will open up the course showing all content (including future drip content and anything in draft mode) allowing you to go through and check how everything looks. You can also go back to the course dashboard and navigate to other courses in this ‘preview’ mode.
If you’re wanting to see how your course area and the course(s) look to customers and students when they purchase, then the best thing is to actually go through your funnel as a customer with your product set up in test mode. See this helpful guide on testing your funnels and integrations. This way you can see the full checkout and onboarding sequence, and how your course shows to new customers (before content drips out, for example).
How do students access your course and content
The ThriveCart hosted success page will have a link to access the course, they’ll be presented with a registration form where they can enter a password of their choice (name and email will be prefilled based on the purchase information).
Your student will also have been sent an email with a link to access their course which takes them to the login page.
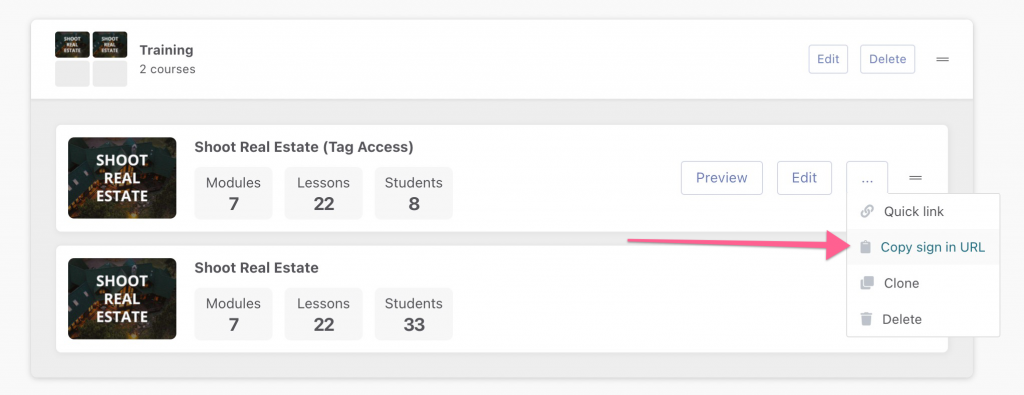
You can also get the Login URL for a course from your dashboard. Hover your cursor over a courses’ […] menu dropdown and click ‘copy sign in URL’.
Remember you can customize the login page for your courses so you may wish to direct customers to specific pages based on the course.
Once logged in, they’ll be taken to the student dashboard where they can access all the courses they have purchased from you.
Frequently Asked Questions (FAQs)
- Q: Is there a limit to the number of courses I can create with ThriveCart Learn?
- A: No, you have the ability to create an unlimited number of courses with the Learn online course platform.
- A: No, you have the ability to create an unlimited number of courses with the Learn online course platform.
- Q: Can I migrate courses from another platform?
- A: While you can copy/paste content from elsewhere, formatting will need to be done within Learn directly and it is not currently possible to import course content.
- With Learn+, however, you can import students via CSV or through your autoresponder.
- Q: How do students get access to my courses?
- A: You can see details in this guide, but students can get access in a few ways:
- Through the fulfillment setting on your product (automate checkout > course access)
- By manually importing students with Learn+
- By sharing a unique, single-use Quick Link with individual students
- Via API (developer documentation here)
- A: You can see details in this guide, but students can get access in a few ways: