ThriveCart Learn tags are a way to restrict specific content within a course to different students.
For example, you could have Course A that Student John and Jane are members of. But for Jane, you want to give them access to some additional content within that course.
Instead of having to create a separate course and giving Jane access to one or more courses, you can restrict lessons or modules with tags and then apply those tags to Jane’s student profile in several different ways.
You do not need to set up tags in scenarios where all students of a course get access to all the same content.
If a tag is removed from a student, they will also lose access to that specific content.
Setting restricted content with tags
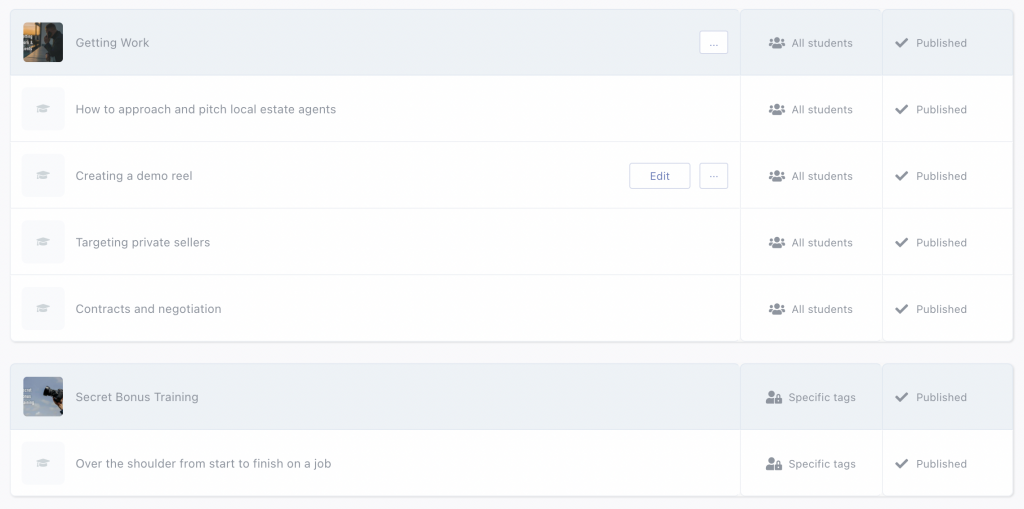
Learn+ content restriction works by essentially locking content to only students with the set tags. Below, we have an example of a couple of modules and some lessons in your course settings.
Where it says “All students“, this means that all students with access to the course will be able to view that content. It does not mean all students in your account or students who have access to different courses can see it. Only the students with access to the course.
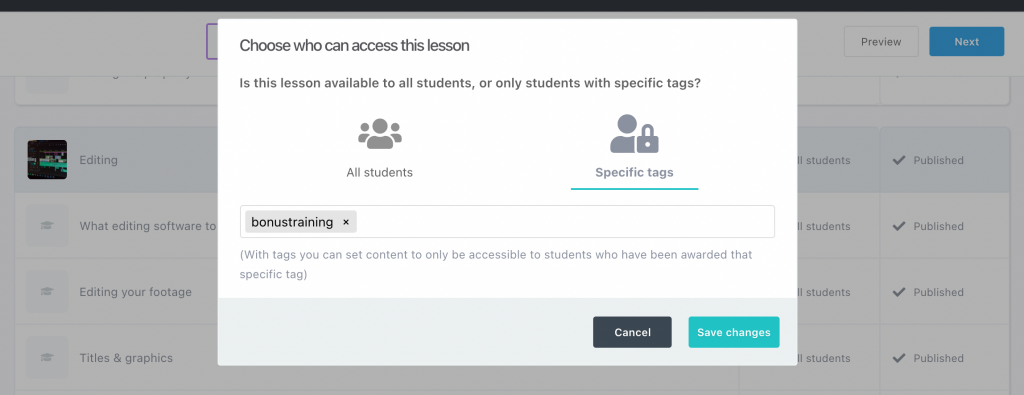
You can click on a lesson or module and change this to “Specific tags“. By doing so, this means that in order to see that module or the lesson(s), the student will need to have those tags applied to their profile to see that content.
Applying/removing tags from students
There are a number of ways you can apply tags to students:
- As part of the product & bump fulfillment (add only)
- If a customer purchases an upsell/downsell (add only)
- Using the advanced sequences
- Directly in the student’s profile
As part of the product fulfillment
When setting your product’s fulfillment, you can select which course you want to add the customer to. As part of these options, you can also have tags added to the student’s profile.
This allows you to have different products add customers to the same course, but tag them differently based on what product they’ve purchased.
Or, as in the scenario in the image below, you could have multiple pricing options on your checkout page, and have the different pricing options apply different tags (granting access to further content) if they purchase specific access.
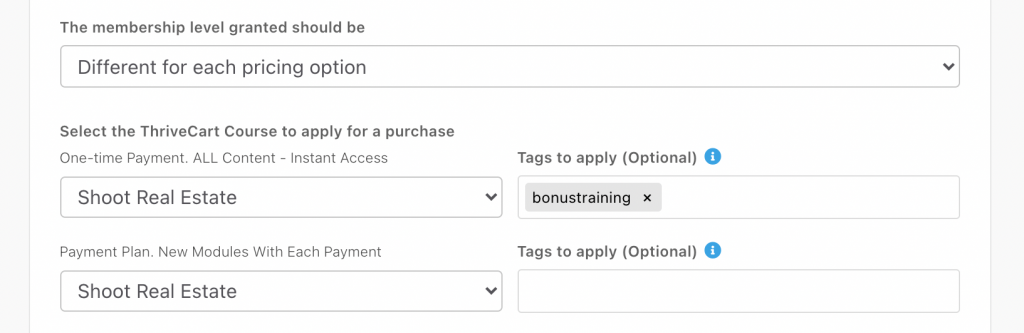
If you have a bump offer, you would be able to tag customers based on that bump purchase here as well.
Based on an Upsell/Downsell purchase
Within your funnel builder directly, you would be choosing the course that your students gain access to if they have purchased the upsell or downsell.
Within the Enhanced editor, you would access the upsell fulfillment settings from the dropdown in the middle of your editor, and enter the tags in the modal below:

Within the classic funnel builder, you would tag customers in the box right beside the course dropdown like so:

For more information on setting fulfillment in your funnel items, see: Creating a funnel and upsell pages.
Using the advanced sequences
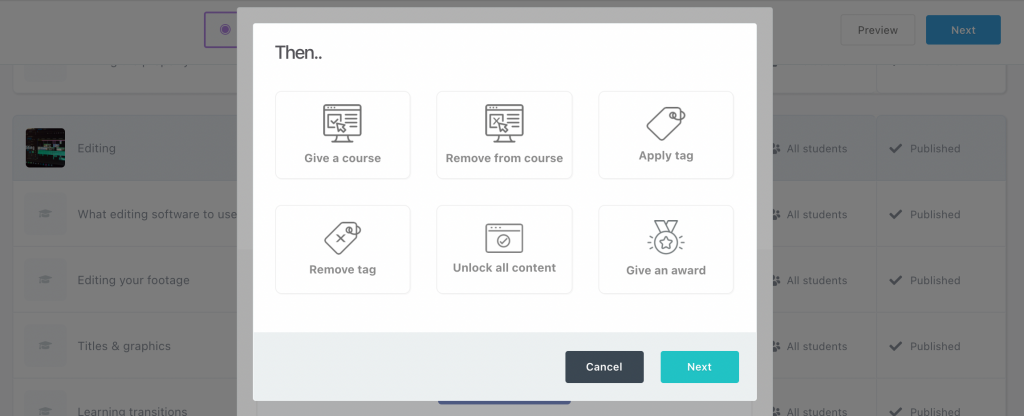
A super powerful way of applying or removing tags to a student is through the functionality of the advanced sequences. There are a number of triggers you can use to use to determine when and how a tag is applied (or something else occurs)
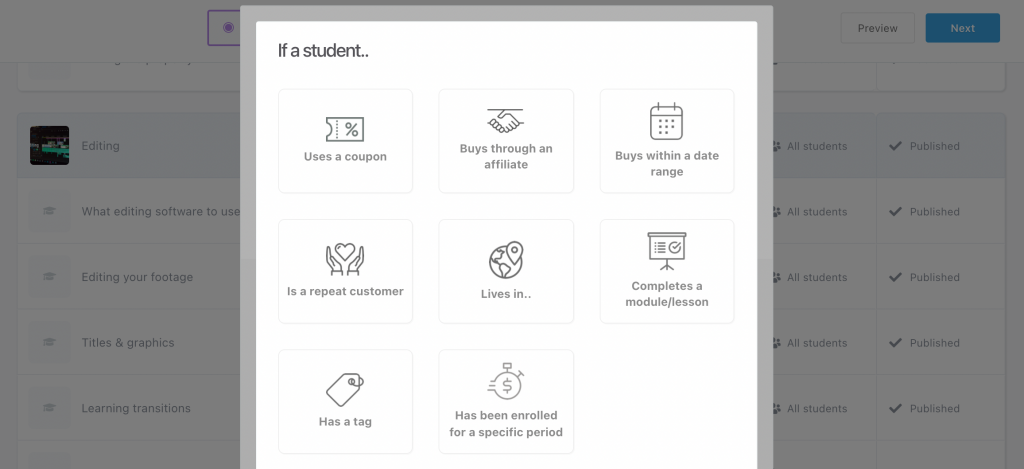
After selecting the trigger, you can then choose the action – such as applying or removing a tag.
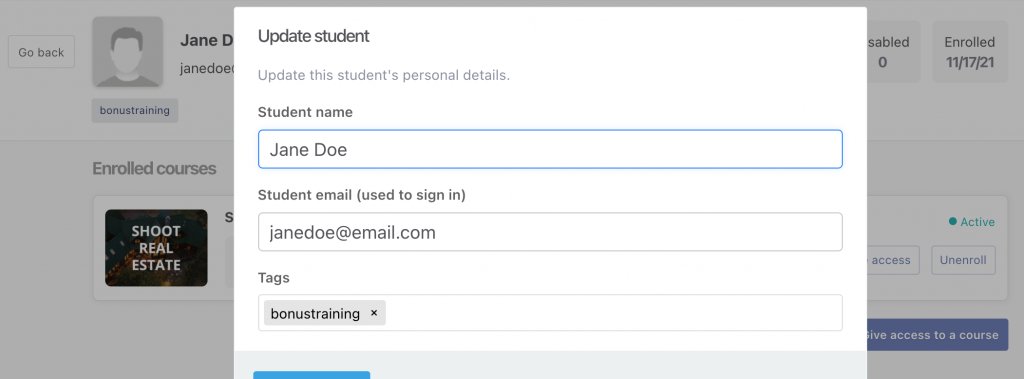
Directly in the student’s profile
On top of the automated methods of adding and removing tags from a student’s profile, you can also apply tags to students manually on a student-by-student level.
Simply head over to the student’s profile and click the Edit button next to their name. From within there, you can delete or add tags directly for that student.
Frequently Asked Questions (FAQs)
- Q: Are ThriveCart Learn tags connected to tags in my autoresponder?
- A: No, tags within Learn are unique and specific to the Learn platform. Tags in your autoresponder are completely independent.
- Q: Can I bulk tag students?
- A: It’s not currently possible to add tags to students in bulk. Student imports with a tag column will ignore this column, and it’s only possible to update tags on existing students individually, manually.
Related Articles
- How do students access my course(s)
- How can Learn students manage their subscriptions and update billing information?
- Managing subscription access to courses
- Add student comments on lessons (3rd-party solutions)
- Course contents not live – warning accessing a course
- Content Dripping with Learn
- Importing students into Learn