Streamline your delivery process and ensure customers instantly receive what they’ve purchased with ThriveCart’s product fulfillment setup. Whether you’re selling digital downloads, memberships, or online courses, ThriveCart gives you complete control over how your products are delivered.
Easily configure success URL and membership access, fulfill orders manually, or automate delivery using behavior rules and webhook integrations. With fulfillment options built to suit your business, ThriveCart makes it effortless to deliver value, delight customers, and keep your operations running smoothly.
ThriveCart Product Fulfillment Setup Methods
The methods available for digital fulfillment include:
- Manual fulfillment
- Via a success URL
- Via an integrated membership system
- Via the product’s automation rules
- Via Webhooks (advanced)
The first three methods are set via the Fulfillment tab in your product settings.

Here you will choose if you want to use a success URL or an integration with a membership platform (and automatically have your customer enrolled and added to your site).
You can select one or the other.
Note: For Autoresponder based membership platforms (like ActiveMember360 and Memberium) you will be using the automation rules which will be covered later in this article.
Method 1 – Manual fulfillment via “Display their total/invoice”

The default option in your fulfillment tab will be the option to “Display their total/invoice”. When this is selected the customer will be shown a simple thank you page and a receipt of their order and payments. There will not be any URLs or Membership platforms fulfilled via this method.
This method is great for people who don’t need to provide access to anything and simply want to take a payment, or are using methods such as webhooks or automation rules to deliver your content.
Method 2 – Success URL via “Send them to a URL”

When choosing “Send them to a URL” as your fulfillment method, you will be able to enter a URL to your own success page. If you’re offering a simple download such as a PDF or Zip file, you can enter the URL here too.
By default, this will display a success/thank you page similar to the “Display their total/invoice” success page but with the added link to access their purchase.
- If you have multiple pricing options set for your product, you will also have the option to set individual URLs for each pricing option or use a single URL for all options.
- The URL Expiration drop down will set how long this URL will be active for. A customer who clicks the link in their receipt outside of this timeframe will be shown an error saying the link has expired (you can reset this by resending their receipt to them).
- If you have bump offers enabled on your checkout (such as in the example image above), you’ll be able to set the success URL for those bump products here as well.
- You can also automatically redirect people to this URL (instead of showing the ThriveCart-Hosted success page) by selecting the option within the checkout editor dropdown for “Success Page” > Edit > Automatically redirect to Success URL. See more on redirecting to a custom success page.
Method 3 – Membership platform via “Add them to my membership site”

This method of fulfillment will automatically add your customer to your membership platform at the time of purchase for online course delivery automation. It will automatically create their account, if they do not already have one and then apply the level (or equivalent course access for your platform) to their account.
When a user checks out through ThriveCart, their details are sent to your membership site, their account created, and if it’s a new account your membership platform will send them an email with their access details.
If you have multiple payment options on your checkout, you can also set these so different payment options can fulfill different membership levels. For example, if you are offering a Premium and Standard package on your checkout page, the package that the customer selects will determine which course they get added to.
Some membership platforms will also offer the ability to revoke access automatically when the customer cancels or refunds. If your connected membership platform supports this, it will be an option you can choose.
Lastly, you can also set a URL, much like the success URL in the previous step. This URL will be used on your thank you page, or will be the URL the customer is redirected to after purchasing if you enable this option.
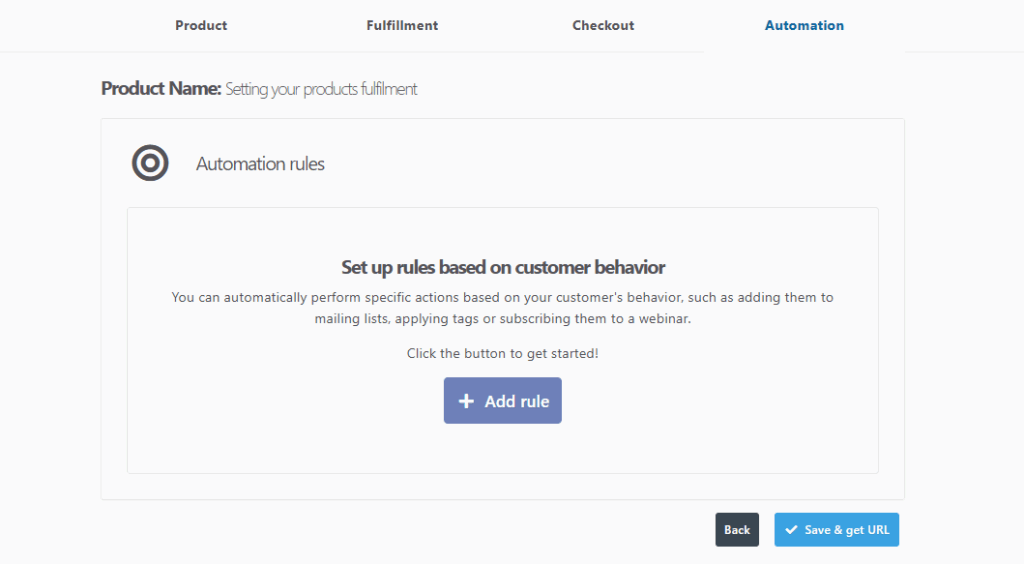
Method 4 – Automation rules
To set rules for your autoresponder, Sheets, or autoresponder-based membership platform, you would set this within the Automation tab of your product settings. Here we can create different actions based on different triggers.
The automation rules area would be where you can fulfill product access via platforms like Demio, ActiveMember360, Memberium, or even email.
The rules are very simple to set up. You simply choose the service (Demio or Autoresponder), then select when you want the rule to trigger. If you’re looking at providing fulfillment when the customer ‘purchases the main product’ you would select this from the drop-down.
You can then look at adding the customer to a list, tag, automation, sequence, webinar, etc all based on what the service you’ve selected supports.
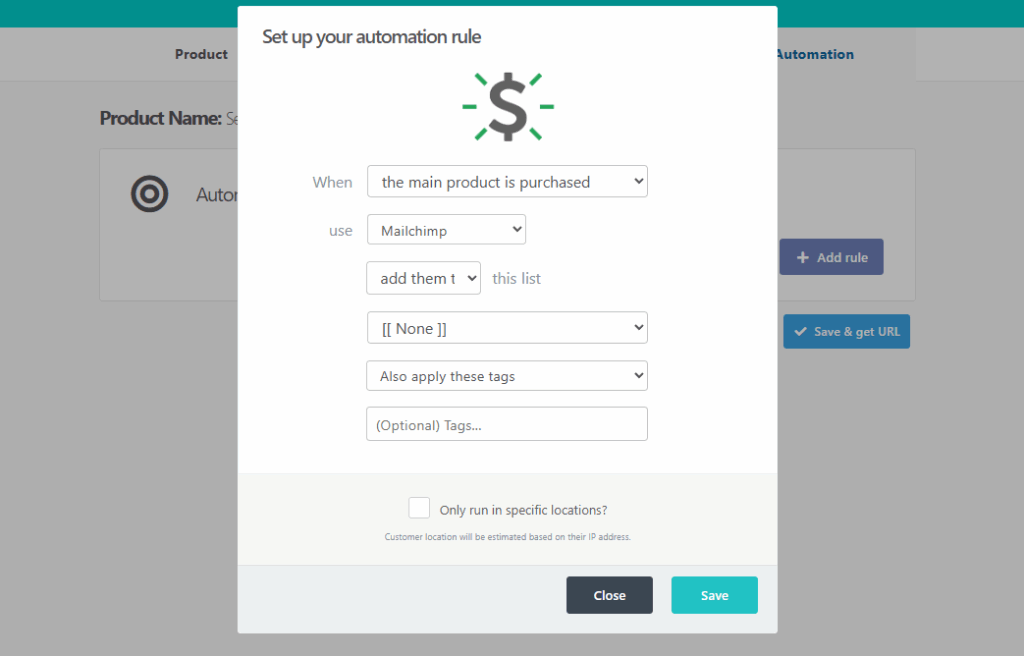
In the case of platforms like ActiveMember360 and Memberium, access is supplied by tagging your contacts in your autoresponder. For specifics, it’s best to refer to their documentation. But using ThriveCart’s automation rules, you can provide and revoke access all based on the tags you can apply and remove with your autoresponder.
You can see our full guide on Adding customers to your autoresponder here.
Note: The Custom HTML option here supports <form> code only. All other unsupported HTML will prevent the rule from being saved. See more details in our guide on setting the Custom HTML form options here.
Method 5 – Webhook (advanced)
The Webhook method of integration is for advanced users/developers and would be used when wanting to create your own custom integration with your own or 3rd party platforms.
You can access the Webhook area by heading to Settings > API & Webhooks > Webhooks & Notifications.
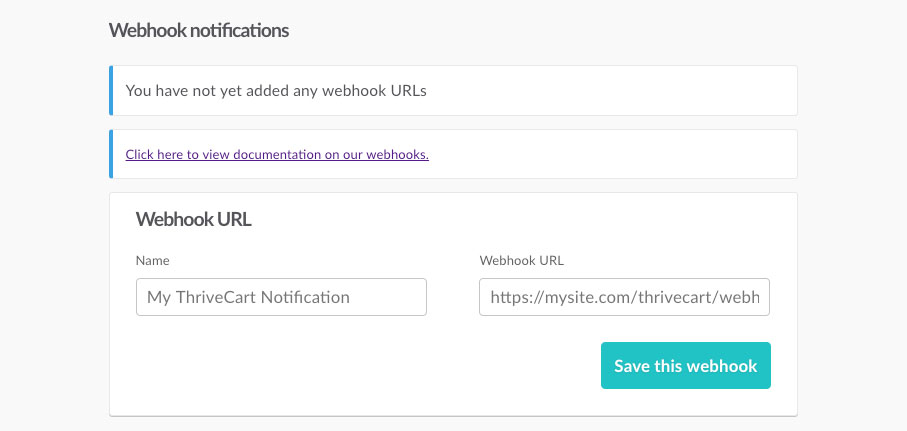
You can then add multiple Webhook URLs to your ThriveCart account which will be notified of events in your account. We send full webhook notifications for every action on an order (such as purchase, refund, subscription cancellation for example), and it would be up to your receiving server to then action accordingly based on the event type.
You can find documentation on Webhooks here.
Frequently Asked Questions (FAQs)
- Q: I want to set my main product as a success URL, but my upsell as a course, how can I do this?
- A: Currently, the fulfillment method set on your main product would be the method used for every item in your funnel. So if your main product is set to “Send them to a URL”, then all bumps, upsells, and downsells attached to this product would follow this method as well.
There are creative ways around this, however. For example, by utilizing webhooks or autoresponders to deliver content as additional items in your funnel are purchased.
- A: Currently, the fulfillment method set on your main product would be the method used for every item in your funnel. So if your main product is set to “Send them to a URL”, then all bumps, upsells, and downsells attached to this product would follow this method as well.
- Q: Can I deliver a physical product as well as a digital file?
- A: Yes! When setting your product to physical, you will have the option to set the same fulfillment methods mentioned above in addition to shipping options. See more in our physical product guide here.
- A: Yes! When setting your product to physical, you will have the option to set the same fulfillment methods mentioned above in addition to shipping options. See more in our physical product guide here.
- Q: Where can I host my digital files?
- A: We recommend hosting your files with Google Drive, Amazon S3, or ProductDyno to name a few – but any hosting site that will give you a URL for your file will work!