Supercharge your email marketing workflow with the ThriveCart Sendy integration, designed to effortlessly sync new customers and subscribers into your Sendy lists.
With seamless email list management, you can organize buyers, segment your audience, and trigger targeted campaigns the moment a purchase is made. Plus, powerful custom field mapping ensures every detail—like names, tags, and product data—flows directly into Sendy, giving you clean, actionable insights for smarter marketing.
How to connect the ThriveCart Sendy integration
To Connect with Sendy you will need:
- Your Sendy dashboard URL
- Sendy API Key
You’ll want to gather this API Key within Sendy directly by following the below steps:
- Within Sendy, click your user profile in the top right corner
- Within the “Your API key” section, copy this full key
- Within ThriveCart, head to Settings > Integrations > Autoresponders > Sendy
- Enter your Sendy dashboard URL
- Paste the Sendy API key you previously copied
- Click “Authorize with Sendy”
When creating automation rules within ThriveCart, you will need to enter your Sendy List ID. To access this List ID in Sendy, navigate to:
- All Campaigns
- All Lists
- However over the ID column for your desired list > right-click > Copy
Click here to see how to add your customers to Sendy after it’s been connected.
What does this integration support?
Using ThriveCart’s integration with Sendy you can easily manage contacts for a wide number of triggers by
- Add to List
- Remove from List
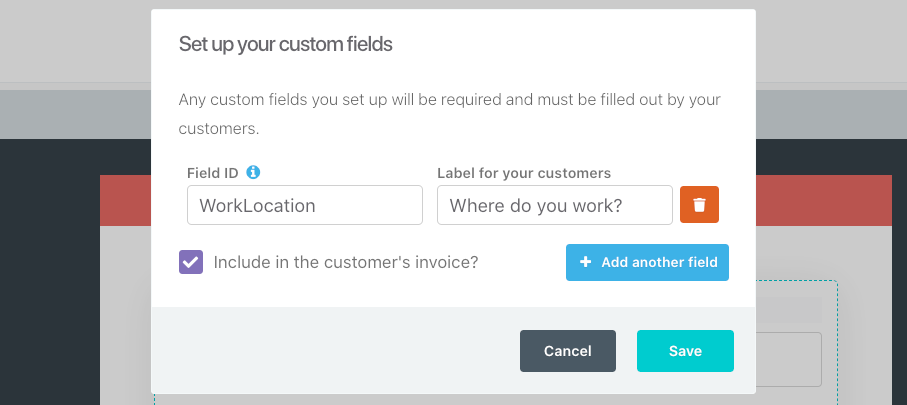
Our integration with Sendy also supports passing more than your customer’s email, providing you have the custom fields set up in your Sendy list.
Your field names in Sendy need to match the field names below and cannot have spaces in them.
Standard fields:
- FirstName
- LastName
- AddressStreet
- AddressCity
- AddressState
- AddressZip
- AddressCountry
- BusinessName
- ContactNumber
- VatId
Shipping fields:
- ShippingAddressStreet
- ShippingAddressCity
- ShippingAddressState
- ShippingAddressZip
- ShippingAddressCountry
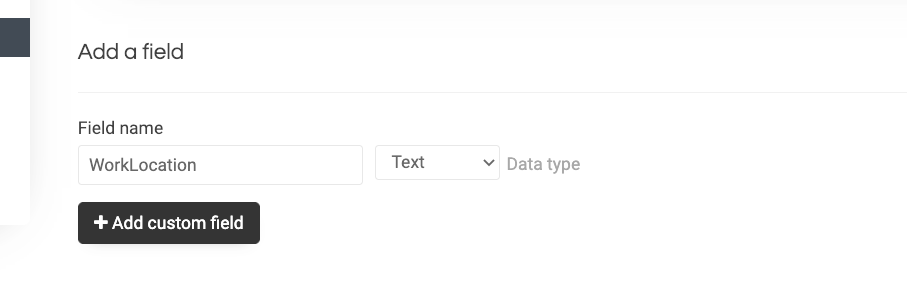
Custom fields:
Custom fields need to match the same format without spaces and using capital letters. For the following example image, the field name in ThriveCart would be set to WorkLocation, and so in Sendy, it would need to be set to
- WorkLocation