Take your online business to the next level with the ThriveCart MemberPress Integration. This powerful membership automation lets you effortlessly grant, manage, and revoke memberships based on customer purchases, ensuring a smooth and professional experience for your customers.
In the video above, we look at how you can connect your MemberPress site to ThriveCart so that you can automatically add customers to membership levels when their orders complete.
Memberpress setup on ThriveCart (under Settings > Integrations > MemberPress) required fields are:
- Site Name (internally used in ThriveCart)
- WordPress site URL
- WordPress username
- Application Password
Step-by-Step Installation:
- Within your WordPress Dashboard, click on MemberPress > Activate
- In Activate Settings head to Add-ons > Developer Tools > Install > Activate Plugin
- Head to Users > Your Profile to access your username > copy/Paste username ThriveCart
- Under your profile in WordPress, navigate to Application Passwords > Set a password name (i.e. “ThriveCart”) > Add New > copy/paste this password somewhere safe for your own notes, and also paste it into ThriveCart
- Click “Save MemberPress Site”
Remember, ThriveCart allows you to connect multiple membership platforms to your account and also multiple sites for each platform. So you could have multiple MemberPress sites connected here and you’ll be able to choose the site to grant access to during product fulfillment setup.
This allows you to have different products in your account that add customers to different membership sites and services you may use.
What does this integration support?
When using ThriveCart to power your sales and sending customer information to MemberPress, you will be able to
- Add customer to membership level(s) when their orders complete
Additionally, when customer information is passed to MemberPress we also create a transaction within MemberPress that works to grant access to your content. If you have a subscription, then for each recurring payment, a manual transaction is automatically created in your MemberPress dashboard for the customer.
Revoking access is not currently supported – originally this was handled within MemberPress itself based on your membership levels. The expiry time you set there would be when the membership expired and the new transaction passed through on rebills would reset/restore access. Now MemberPress API requires the expiry date to be passed through with each transaction – something we will look to support in the future.
How to add customers to MemberPress automatically
To automatically add customers to MemberPress when they buy your product, you will set this up under your products Fulfillment tab.

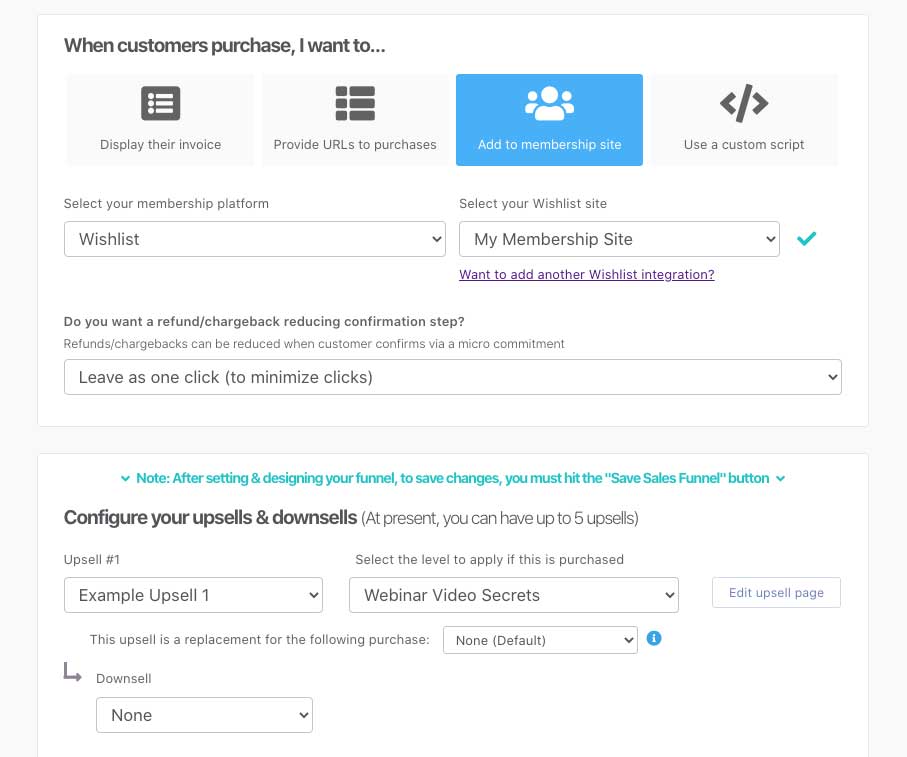
You will want to select the option to ‘Add them to my membership site’, followed by selecting what membership fulfillment you’re looking to use, followed by what specific website for that platform.
You can then select MemberPress as the “membership platform”, selecting your MemberPress site (the site name set within ThriveCart settings), and then choosing the specific membership level to add customers to.
Optionally, you can set the Login URL. This URL will be shared on the ThriveCart success page, but you can choose within the checkout editor to automatically redirect customers to this URL instead of showing the ThriveCart success page. See more on setting your success page in this guide.
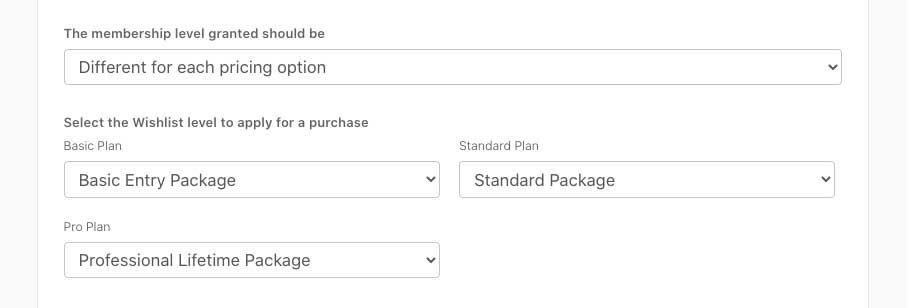
If you have multiple pricing/product options set up, then you can also choose to apply the customer to the same level for the pricing option they purchase , or set different levels for different options.
If you have one or more bump products enabled on your checkout, then you will also have the option to set what level you wish to apply to the customer should they purchase the bump offer.
Setting Course Access on Upsells
When using an Enhanced Checkout Template, you’ll be setting your upsell courses within the editor directly, via the dropdown > clicking “edit” beside your upsell (this will also show during the add upsell/downsell creation process):

When using a Classic Checkout Template, you’ll access the Classic Funnel Builder via the “Edit Funnel” button from your product’s overview, where you can then set the course levels:
How do customers get their login details?
After your customer’s order completes, ThriveCart will send your customer information to MemberPress which will automatically have their account created, if they don’t already have one associated with the email address entered at checkout.
If the customer already has an account on your site under that email address, their new membership levels will simply be added to their existing account and they can follow the normal customer login flow.
New users are sent an email with access information (which can typically be modified within your membership platform settings in their system).
WordPress looks to typically send welcome emails with login information only for new users. It’s worth noting that ThriveCart does not send the login details via email – this is sent directly from your website.
Most membership platforms look to automatically generate a password and send this to the customer via email, however MemberPress API integration doesn’t support this and the customer will need to ‘reset’ their password.
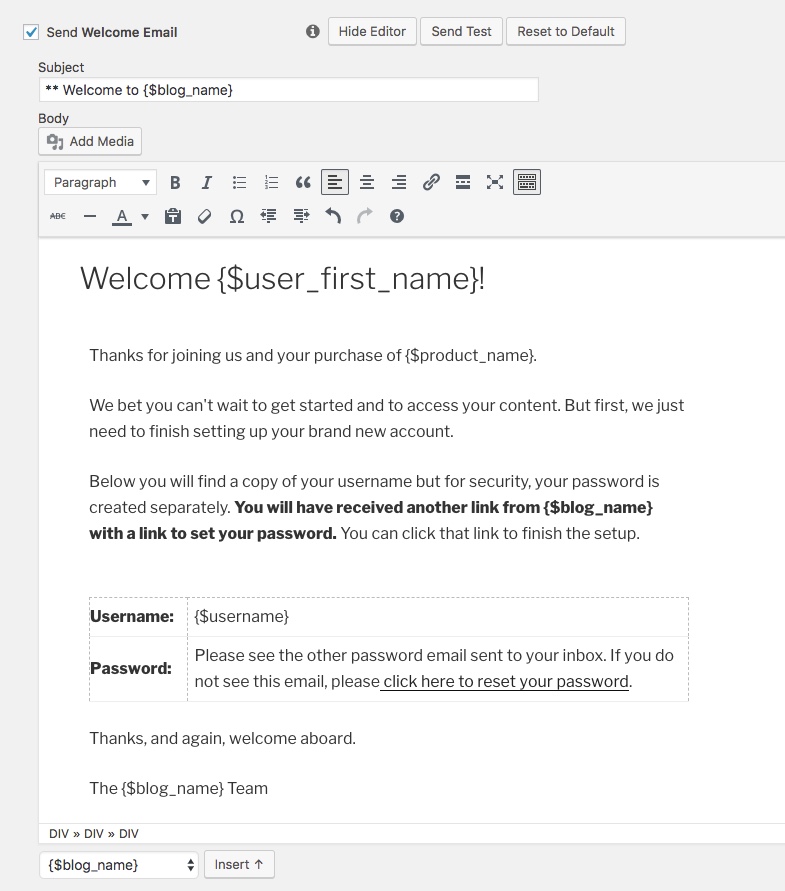
To work around this limitation, we recommend triggering the welcome email from MemberPress AND also a password reset email directly from your WordPress site. This means your customer will get their welcome email from MemberPress AND a password reset link which lets them go through and set their password.
We recommend editing your MemberPress welcome email to include reference to this. You can reinforce this as a positive security measure, letting them know you don’t send usernames and passwords together. See below for an example MemberPress welcome email.
If you’re wanting to include a link to your password reset page then it will typically look like this: www.yourwebsite.com/wp-login.php?action=lostpassword
Subscriptions and recurring payments
If you’re creating a subscription or payment plan within ThriveCart then when the user is created in your MemberPress site, you might initially be concerned that there isn’t a subscription showing in MemberPress for them. This is completely normal.
Subscription access management within MemberPress is related to their own internal subscriptions feature and not something they allow us to use via their API.
Instead, what we do is update your customers ‘transactions’ with each recurring payment. This keeps their access alive as each payment triggers access to your membership.

Managing subscriptions & billing details
The ThriveCart Customer Hub is where your customers can update their personal details and billing information. There’s a link included in the bottom of their invoice receipt and you can also link to this directly from your website.
If you allow it from your customer hub and product settings, you can also allow the customer to cancel their own subscriptions.
MemberPress – specific troubleshooting
| Problem | Solution |
|---|---|
| Receiving an “unable to authenticate” error when attempting to Integrate MemberPress | * You can test by adding or removing /wp-admin to the end of your site URL when attempting to integrate. Some sites require this for connections, others do not. * Make sure that you are using MemberPress Plus in order to authenticate, and of course verify that you’re entering the correct application password into ThriveCart! * Our previous setup instructions detailed that you may need to install the plugin “Application Passwords”, but you’ll want to make sure that you’re using the built in WordPress application password now instead. |
For more troubleshooting, such as levels not loading or customers not being added to MemberPress, see our general membership troubleshooting tips here.