Integration with Paid Membership Pro can be set up in just a few minutes using Zapier, (it’ll likely take you longer to read this article than to set it up).
Please note that this is an advisory article and uses the official Paid Memberships Pro Zapier help article as the basis and any questions are best directed to PMP support.
By following this guide, you’ll be able to have:
- ThriveCart process your customer’s order
- Automatically have their details passed through to your website with access to a Paid Membership Pro level
There are a few steps to follow but they’re really straight forward and easy to do.
Here’s what you’ll need:
- Paid Memberships Pro
- Paid Memberships Pro Zapier plugin for WordPress
- A Zapier account
Step 1 – Install PMP Zapier plugin on your WordPress site.
Step 2 – Create ThriveCart trigger in Zapier.
Step 3 – Add Webhook action to send customer data to your Paid Memberships Pro site.
Step 4 – Create a welcome/generate password email (if not sent from WordPress)
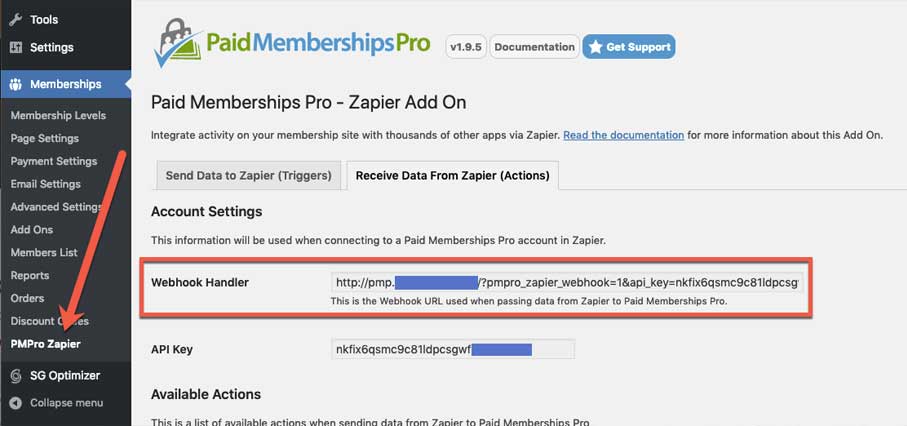
Step 1 – Install PMP Zapier plugin on your WordPress site
On the website where you have your Paid Memberships Pro installed, you’ll need to install their free add-on for Zapier.
Once installed, under your Memberships area in WordPress, you’ll have a new area called PMPro Zapier. In here under the Receive Data From Zapier (Actions) tab, is a Webhook Handler URL. We’ll need this as part of Step 3.
Step 2 – Create a ThriveCart trigger in Zapier
We’re not going to go into the exact details in this tutorial, we already have a help desk article on this here.
The take aware points are to make sure you’ve got your checkout set up the way you want (with the requested fields) and that you’re using either the Any Purchase or Product Purchase trigger.
Step 3 – Add Webhook action to send customer data to your Paid Memberships Pro site.
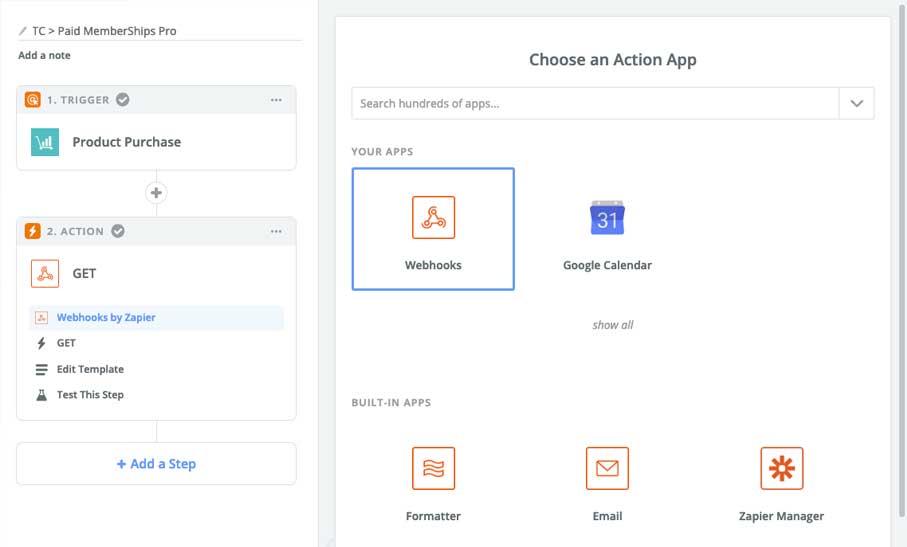
For this step, we’re going to create an action in Zapier. After creating the trigger for ThriveCart in your Zap, Zapier will prompt you to create an action.
You’ll want to select the action Webhooks by Zapier
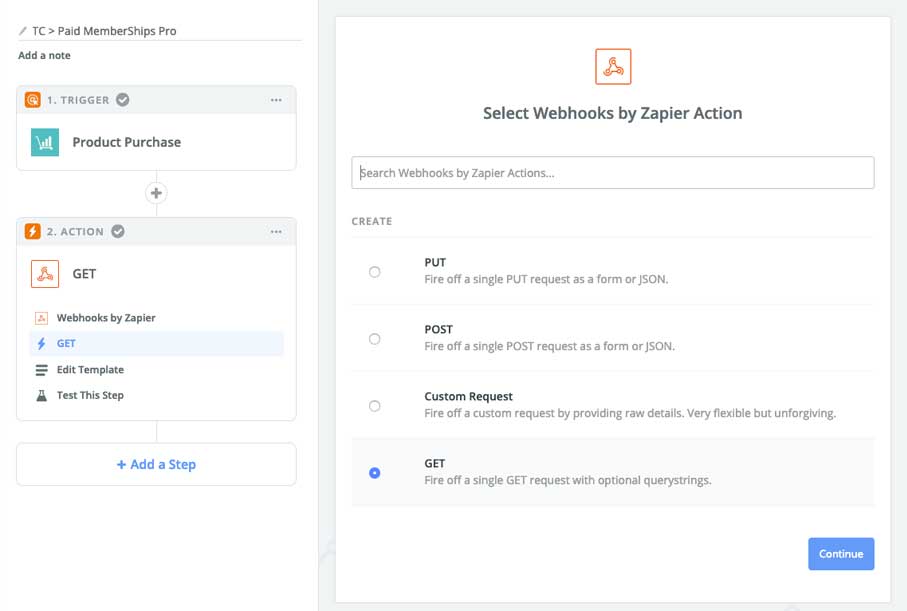
Then, the type of webhook you’re wanting to create is GET
Now, we’re going to set up things up so our customer’s information is passed through to your site and creates a new user and adds them to your level.
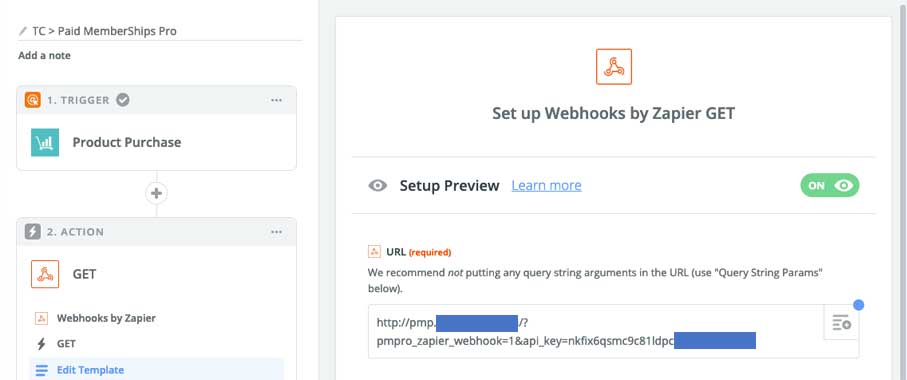
In the URL field, we’re going to enter that Webhook Handler URL you get from your website (Step 1 above). This is where this data is going to be sent.
Next, we’re going to look at adding Query String Parameters. Paid Memberships Pro have a great help article on this and it’s what we’re using for the basis of this article. You can click the plus icon to add multiple query-string parameters and we’re going to need at least 3.
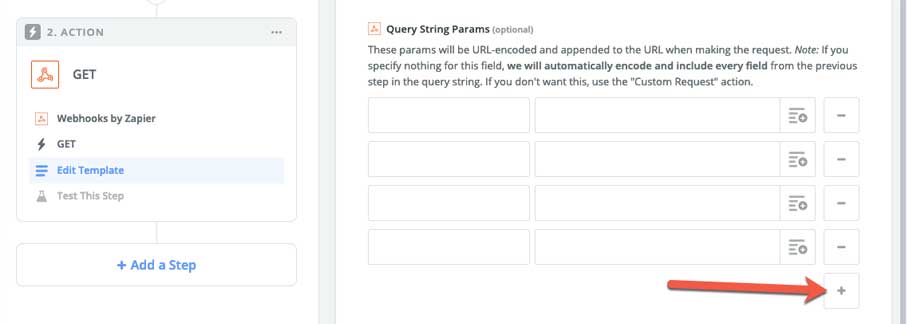
The first parameter you’re going to create is the action parameter and give it a value of add_member So now when the data is sent to your site, it knows it’s job is to add this user to your site.
Next, you’re going to want to add some further parameters to query string, Paid Memberships Pro supports the following:
- user_email (required)
- level_id (required)
- user_login (required)
- full_name
- first_name
- last_name
So typically you’re going to add the user_email,level_id, user_login, and the full_name parameters.

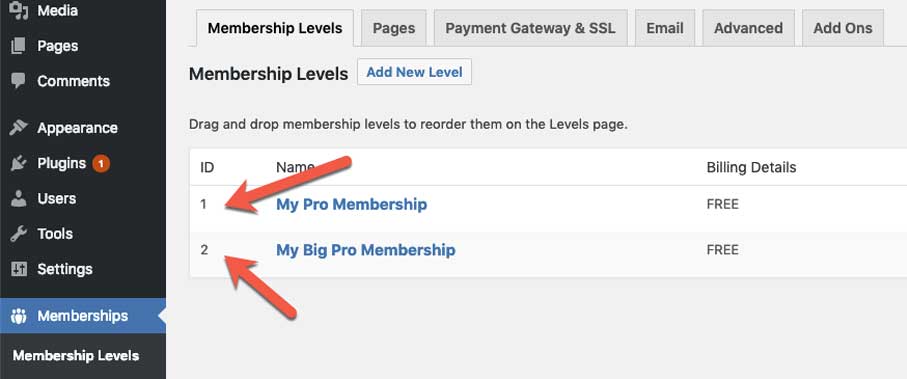
You can find out what your member level_id is by checking your Membership Levels section under your Paid Memberships Pro area in your WordPress site. The level ID is identified to the left of the level in the list.
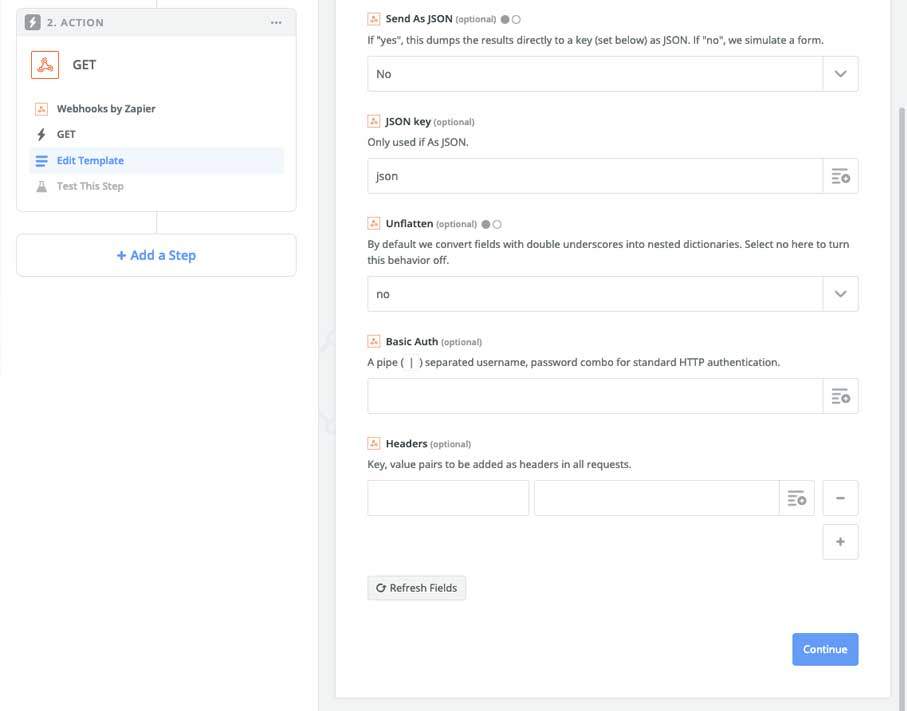
Finally for the last steps of the Webhook set up in Zapier you want the following:
- Send as JSON – No
- JSON key – json
- Unflatten – no
- Basic Auth – blank
- Headers – blank
Finally, you’ll need to test your Zap to make sure that it works ok.
Then that’s it! Give you Zap a name, save it, and make sure it’s enabled.
Now, when a customer purchases the product you’ve set in the trigger, they’ll be added to the level in Paid Memberships Pro that you’ve set.
There are a couple of things we’ve noticed, but please note that we don’t use this platform ourselves so you might want to reach out to Paid Memberships Pro to clarify these things:
- Your customers can only ever have access to a single level. Unlike other platforms that allow multiple levels to be applied to a customer, from what we can see, you can only add one level or change the level for your customers. This can be quite limiting if you sell multiple items/courses on your site.
- No Webhook action to remove access. Normally you’d want to revoke access when the customer cancels their subscription. Now there isn’t a
remove_memberaction, so it looks like you’d have to create a level on your site that doesn’t have access to anything and then move the customer to that level if they cancel their subscription. You can create a different Zap the subscription cancelled ThriveCart trigger then use the change_membership_level action from Paid Memberships Pro, see their help article here for more. - WordPress Welcome email isn’t sent. In our testing we noticed the WordPress welcome email letting the user know about their new account isn’t sent out. Which means the customer doesn’t get any login information. We did check the box under ‘Email Settings’, but nothing was sent. Which leads up to the optional Step 4 below, if you too have this issue.
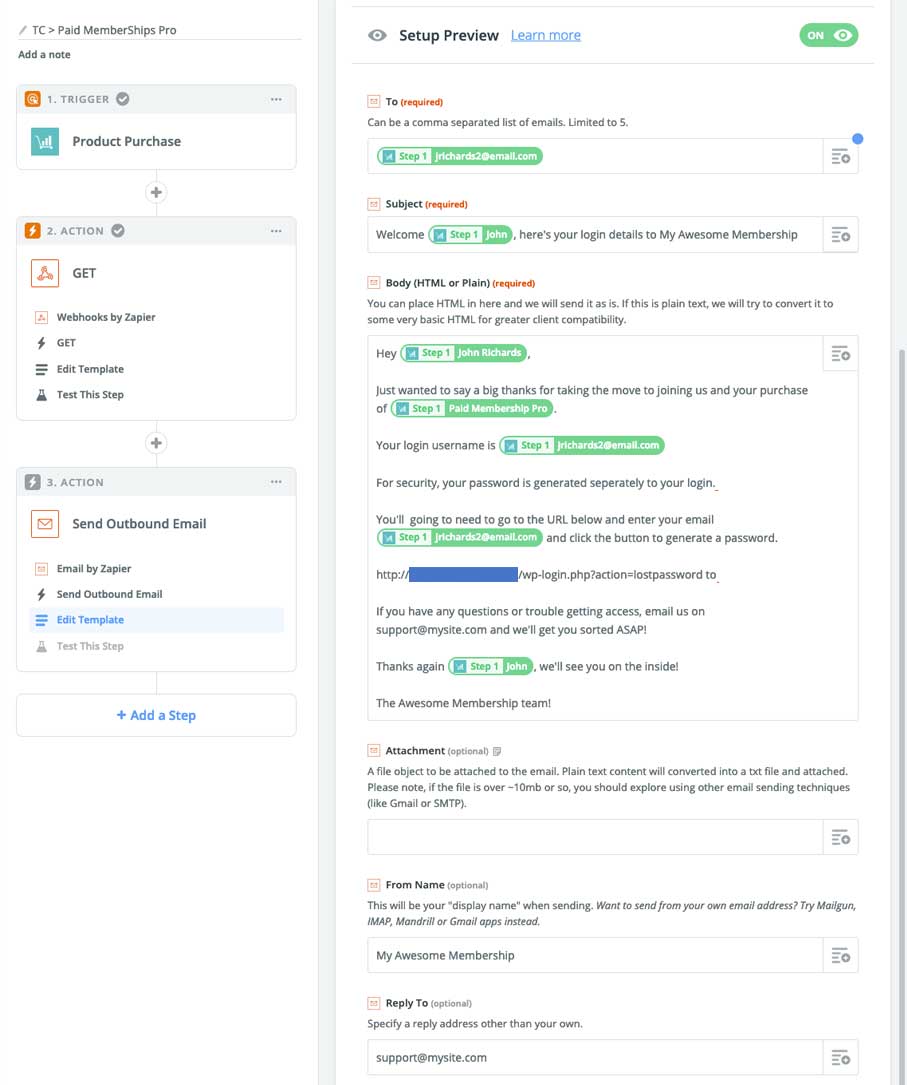
Step 4 – Create a welcome/password email for your site
If WordPress doesn’t email out a welcome email, then you can handle this within Zapier to trigger at the same time the user is added to your Paid Memberships Pro site.
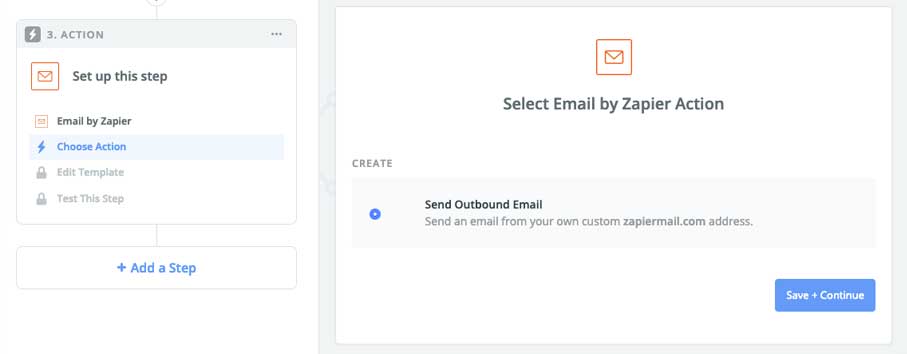
You’ll need to add a 3rd step to your Zap and choose the Email by Zapier action.
You can then go ahead and create the email you want to send the customer. You can reference the customer’s name, the product they’ve purchased, their email, and more all in the email that’s sent out to them.
The URL for the password creation would be your site’s password reset URL.