We have many users who like to use Kajabi to host and manage their courses and for ThriveCart to handle their funnel, checkouts, and affiliate management side of their business.
With ThriveCart and Zapier, you can easily have your customers added and removed from offers in Kajabi based on triggers from ThriveCart.
The most commonly set up triggers are:
- Product Purchase [ThriveCart] > Grant Access to an Offer [Kajabi]
- Refund [ThriveCart] > Revoke access to an Offer [Kajabi] – normally for single payment products with no rebills.
- Recurring Payments Cancelled [ThriveCart] > Revoke access to an Offer [Kajabi] – normally for courses where access is based on subscription payments.
Some vendors may look to set up granting access and revoking access based on successful and failed recurring payments, these will use up more Zap slots and Zap tasks so it’s not for everyone and remember your subscriptions will typically be canceled by your payment processor after multiple failed recurring payments which will trigger the revoking of access Zap.
Step 1
The first step would be to create your trigger for ThriveCart in Zapier, either you’re going to be triggering when a product is a purchase, the subscription is cancelled, or on a refund. So review our helpdesk article here on creating a trigger in Zapier if you’re not familiar with this process.
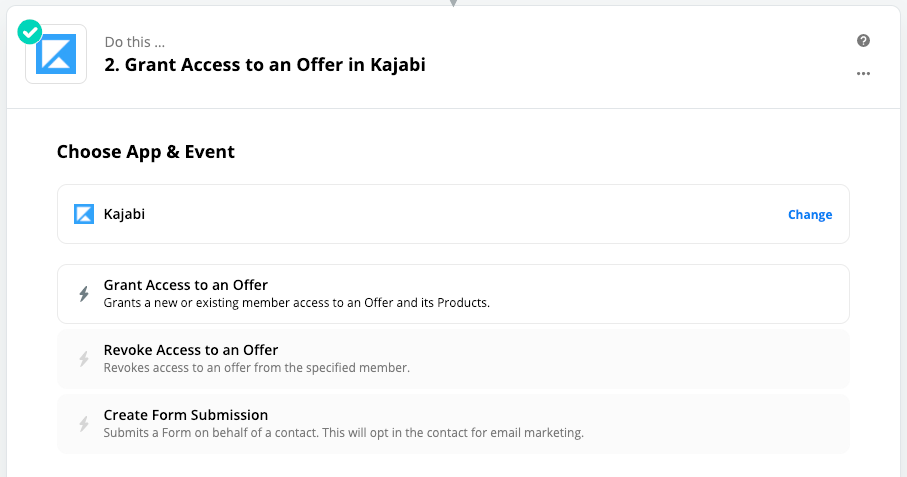
Step 2
You’ll want to choose Kajabi as your action in Zapier and then select the event you’re wanting to trigger such as “Grant access to an Offer”
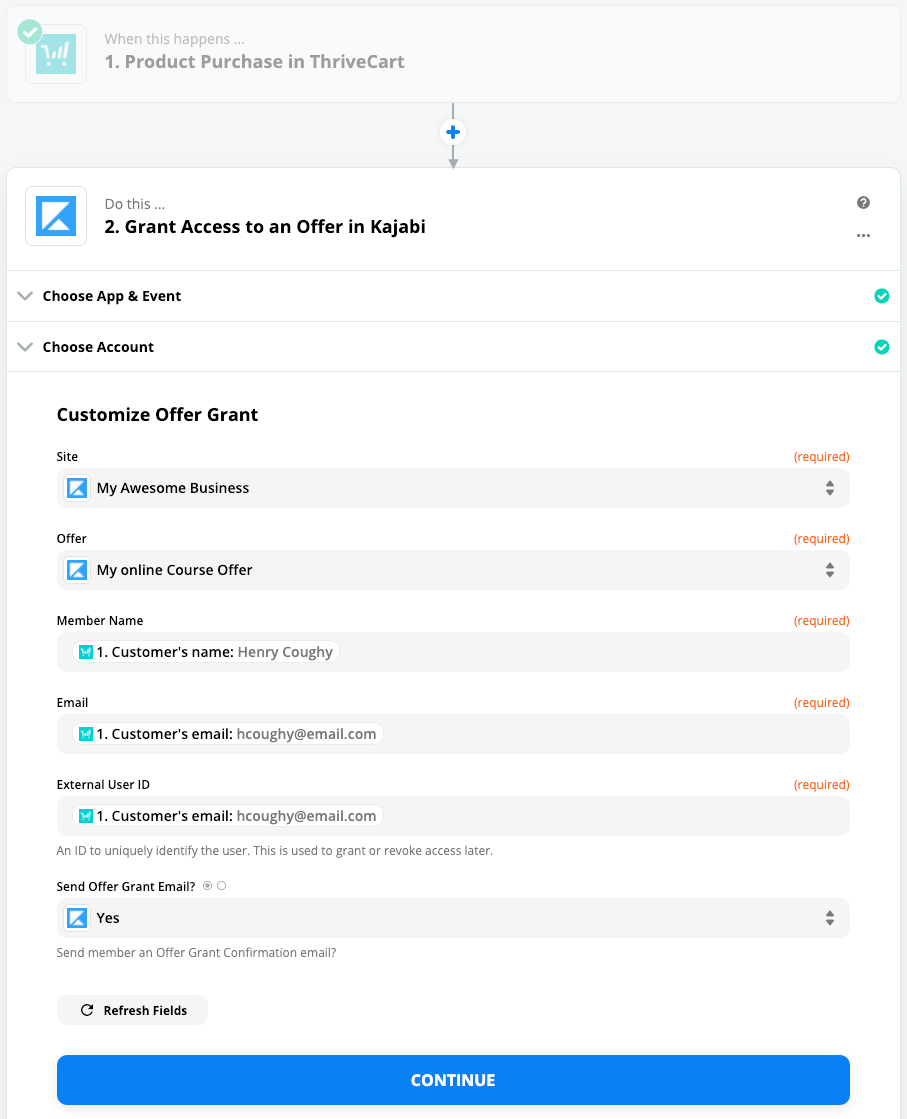
Step 3
Next, you’ll want to select your site and the specific course this is triggering for.
You can refer to the ThriveCart order information to populate the customer name (remember you’ll need to request this information from your customer on the checkout).
For the email field, you’ll want to select the customer’s email data point from your ThriveCart trigger.
For the External User ID, you’ll also want to select the customer’s email data point from your ThriveCart trigger (more on this at the bottom of this article).
Typically, you’ll also want to make sure that Kajabi is sending that offer email – this is how your customer gets their access details via email sent to them after purchase.
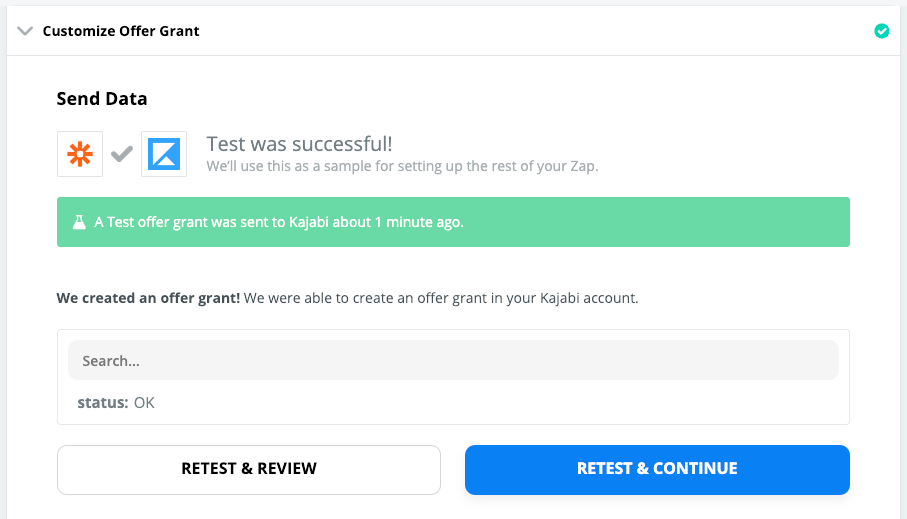
Step 4
After saving the above step, you can test the integration with Kajabi and if it’s the first time that user data has been passed through you should get a success page.
Note. You will see an error if the user is already created in Kajabi as you can’t add a customer to an offer they’re already registered for – this is fine, you can skip and save your zap and then see future ‘new’ users get added.
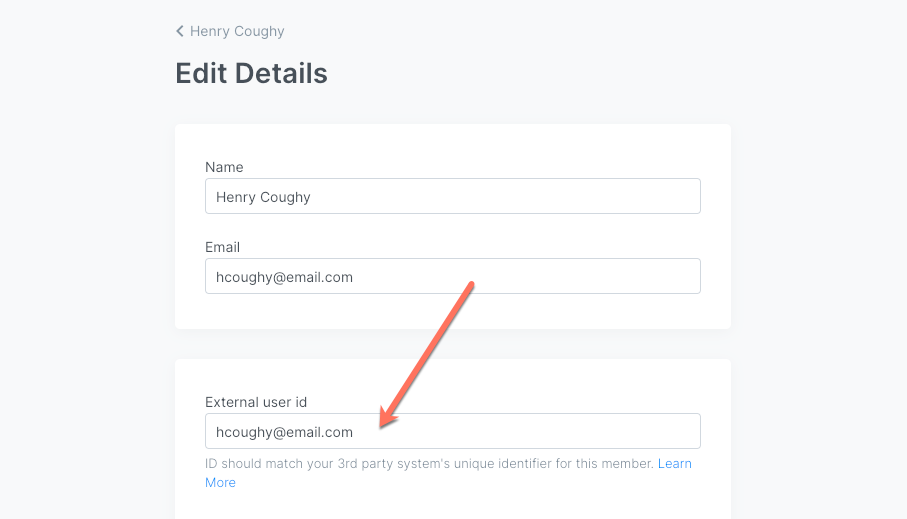
Note: External User ID
The external user ID in Kajabi is something platforms use to reference your customer and we recommend using the email address as this is something that’s unique to your customer.
This allows multiple courses/offers to be applied to a single customer should they buy multiple products in a funnel or additional products in the future.
If you have existing customers in Kajabi you may find Kajabi has automatically populated this field with something else. You may wish to check with Kajabi about updating these to the customer’s email so that your existing customers won’t have any upgrading problems when purchasing additional courses through ThriveCart.
You can find Kajabi’s own documentation on their Zapier app here.
If you need help setting things up between ThriveCart and Kajabi, we’re also more than happy to – simply reach out to support and let us know where you need help.