Create a seamless and professional learning experience with ThriveCart’s Learn course customization, designed to help you maintain consistent branding across every student touchpoint. With this feature, you can easily edit registration and login pages to match your unique brand style – from colors and logos to custom messaging. Effortlessly add branding to student login pages to build trust, enhance recognition, and deliver a cohesive experience that reflects your business identity from start to finish.
Your course registration page would be the first thing students see after they are added to your course and click the link to access course content. Students would see this registration page in a few scenarios:
- After your customer has completed their order and follow the link in their receipt or from the success page to complete their account set up
- When you provide a student with a ‘quick link’ to skip purchasing
- When you’ve imported a student to your account (using Learn+) and the link emailed to them instructing them to complete their account set up is visited.
Login pages would be shown by default whenever anyone visits your course’s login page URL.
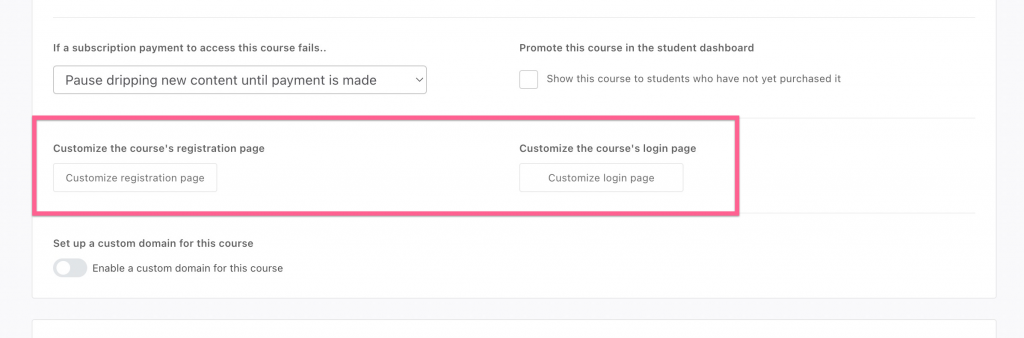
To customize your pages, you’ll need to edit your course settings, then go to the Course options tab. Here you will find the ability to launch the editor for both the registration and login pages.
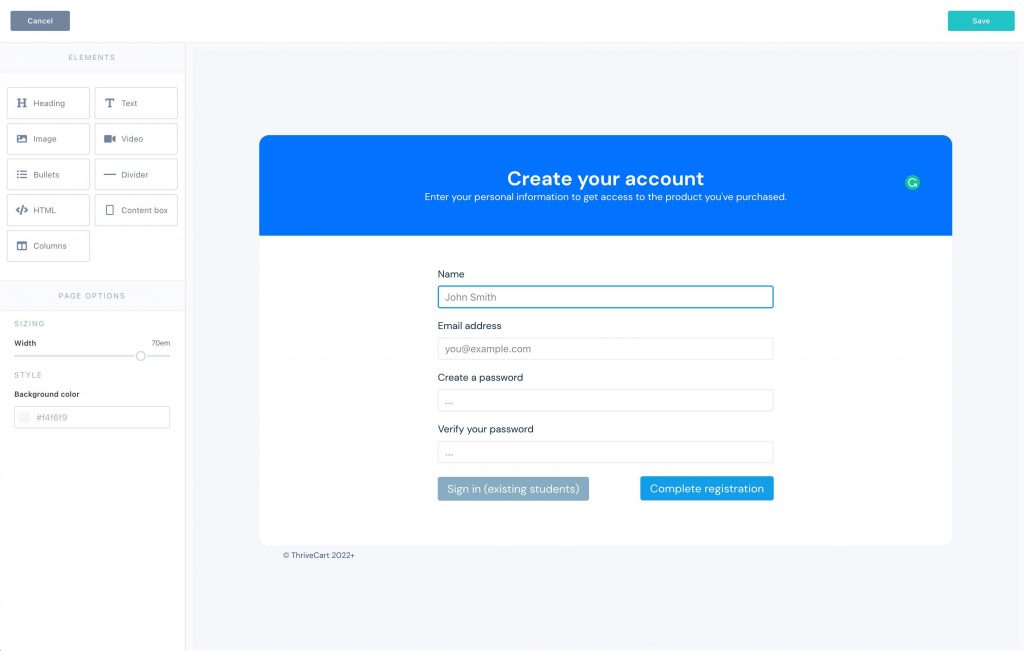
The default registration page can be seen below. Customers coming from a “complete your account setup” link will see their name & email fields pre-fill based on the customer information at checkout, with 2 password fields.
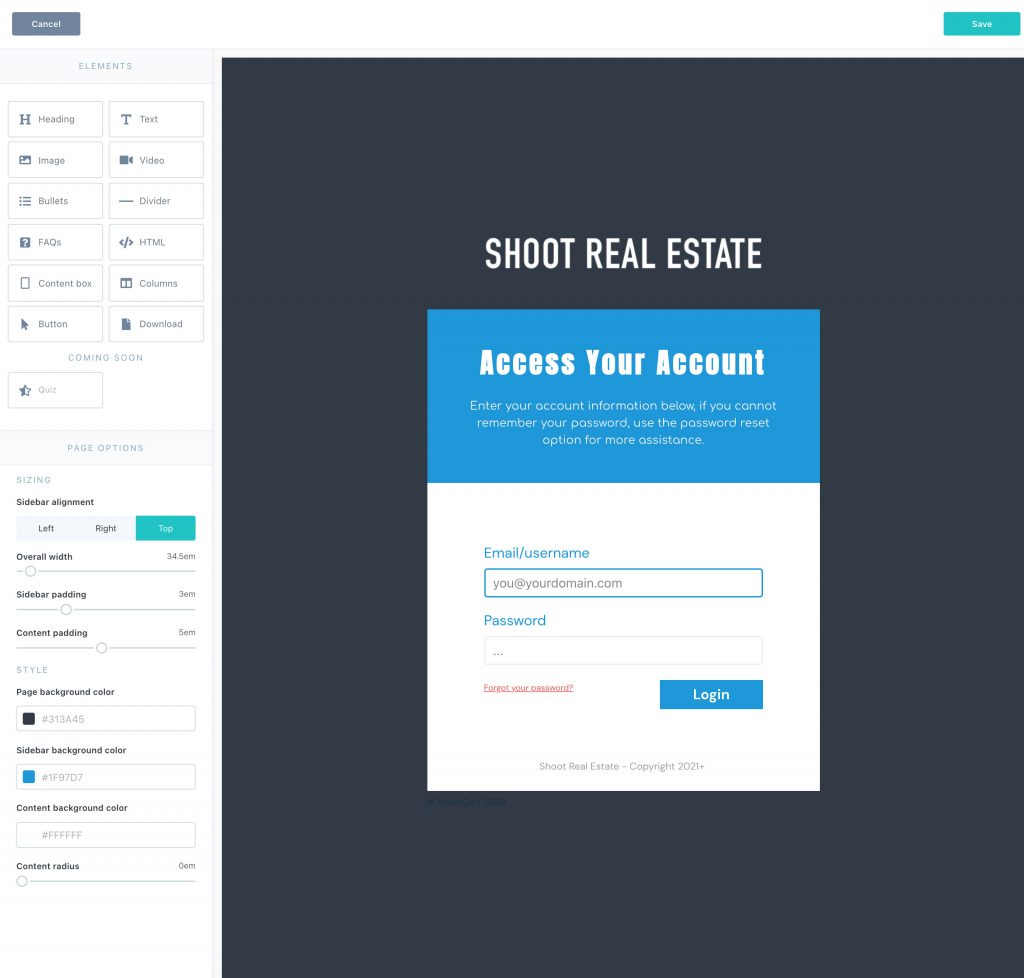
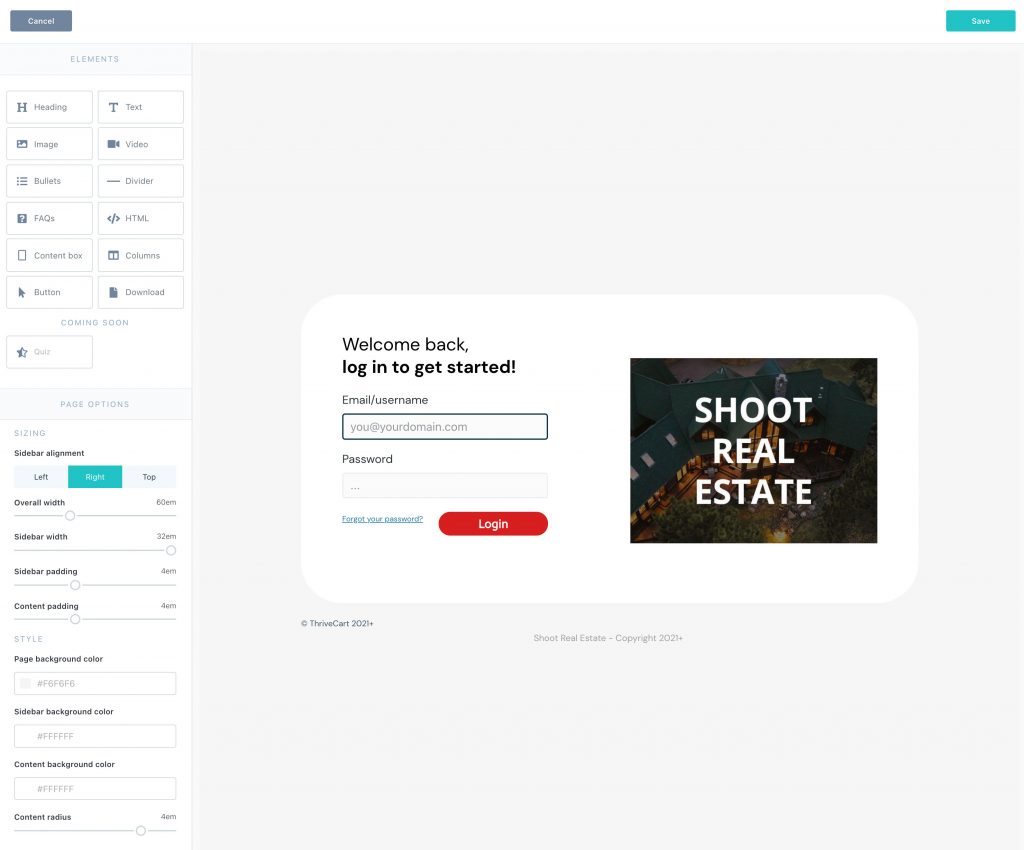
Using the editor, you can easily create completely different-looking login and registration pages for your courses.
See below for a couple of login page examples, but using the drag and drop page builder in ThriveCart Learn, you can build out pretty much anything you like or need for your login/registration page.
Frequently Asked Questions (FAQs)
- Q: Can I set a default login page for all courses?
- A: Yes, you can! The above instructions walk you through setting pages specific to your course, but you can edit the default login page from your overall “My Courses” overview like so:

Then, if you do not edit the login page within a specific course, they will see this overall default login page.
- Q: How can I share a URL for the registration page?
- A: There is no direct URL for the registration page. Students would gain course access either through a product purchase, through a single-use quick link, or get uploaded via CSV/autoreponder. You can see more on how students get access to your courses here. When a student gains access to your course, they are emailed a “complete your account setup” email with their unique registration URL to set up their student account.
- A: There is no direct URL for the registration page. Students would gain course access either through a product purchase, through a single-use quick link, or get uploaded via CSV/autoreponder. You can see more on how students get access to your courses here. When a student gains access to your course, they are emailed a “complete your account setup” email with their unique registration URL to set up their student account.
- Q: My students aren’t seeing the registration page, how can I set this?
- A: Students will access the registration page only if they are not an existing student, and when following their unique registration URL – provided in the “complete account setup” email, and from the success page. They can access the success page again from the “access your products” button on their receipt, as that registration URL will be available on the success page.
If the student had been previously registered for a course of yours, they would not need to register again and can simply login using their previously setup password or go through the password reset process.
- A: Students will access the registration page only if they are not an existing student, and when following their unique registration URL – provided in the “complete account setup” email, and from the success page. They can access the success page again from the “access your products” button on their receipt, as that registration URL will be available on the success page.