ThriveCart coupons are a proven way to drive more conversions, reward loyal customers, and create urgency that inspires quick action. Whether you’re running a limited-time sale, offering exclusive rewards to repeat buyers, or testing new price points, you can easily create discounts in ThriveCart to match your marketing goals.
With support for ThriveCart fixed and percentage discounts, automatic promotions using auto apply coupons, and even funnel-wide coupon application, ThriveCart gives you the flexibility to run powerful, conversion-focused campaigns that turn browsers into buyers and keep customers coming back for more.
How to Create Discounts in ThriveCart: A Coupon Setup Guide
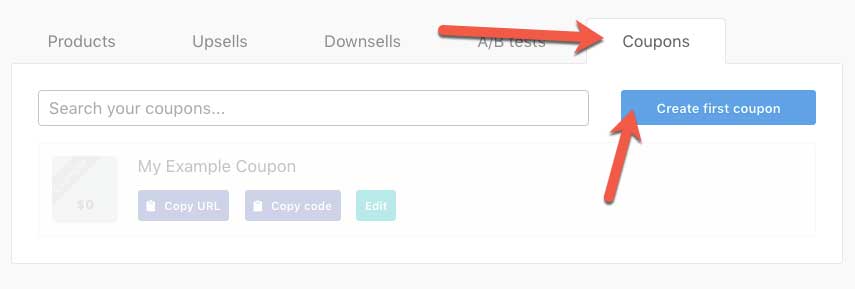
We first want to head over to the Coupons area in your dashboard, which is found under your Products > Coupons tab.

In this coupon overview area, we can search through any existing coupons, create a new coupon, and grab our coupon codes/URLS, or edit existing coupons. You can also see how many times each coupon has been used.
The Copy URL option for your coupon will let you auto apply coupons to a customer when they visit the coupon URL. You will be able to select the product URL that you’re wanting to share, and the URL provided will include the coupon info to ensure that it’s automatically applied. (See more on automatically applying coupons in our guide here).
This is a great way to help increase conversions as when your customer arrives on the checkout page the coupon is automatically applied and the discount is shown in the order summary. There’s no need for the customer to manually input the coupon and they instantly see the great deal they’re getting.
The Copy Code button simply copies the code you’ve set for your coupon. So if you want to quickly grab this code to share with someone. Click this button to copy it to your clipboard and then paste it to them in your email or chat application.
They will then be able to enter that code in checkout for the discount to be applied.
If you have not created ThriveCart coupons before, you can click the Create first coupon button to get started.
Setting Coupon Info
Creating coupons is broken down into several clear sections and makes the process really easy to follow. Let’s take a look at the first panel, Coupon Info.

Coupon Name – This is an internal name used to identify your coupon to yourself. So if you’re having a 20% off Christmas sale, you might want to call it “20% off Christmas sale for product X”. Just make sure you name it relevantly so should you want to find it in the future, you know what the coupons are about
Coupon Code – This is the actual code used for the coupon. This is what’s required to be entered on the checkout page in order for the discount to be applied, but it must be at least 3 characters long and alpha-numberic. Special characters will not save.
Coupon Status – A simple case of enabling or disabling your coupon. You might have a coupon for your product run for a while and then decide you want to turn it off, but not delete it. Set your coupon status here to either enabled or disabled.
Discount Type – What kind of discount do you want to offer? Fixed amount or a percentage? Here you can choose the type of discount applied to the checkout at purchase.
Discount – This is where you enter the amount of discount you wish to give. Either a fixed amount, if that’s the chosen discount type, or the percentage. As a note, you can go into the decimals with your percentage discounts so you can really drill down to specific amounts of discount.
Applies To – If you’re using percentage as your discount type, you can also choose to apply the discount to the entire funnel, the main product, bumps only, or the main product and the bump. Fixed Price coupons will only be applied to the main product, and will automatically deduct that amount a single time from the main product’s price. If a coupon is set to “bumps only”, but the product doesn’t have any bumps, customers will see the message: “This coupon does not apply to this order.”
You also have the option to apply the discount to recurring/future payments (if your coupon is a percentage-based coupon).

The next screen is our usage settings. Here we can set how our coupon is used.
The Coupon Is Redeemable – When do you want your coupon to start? As soon as you’ve saved it, or from a date in the future. Note that if you’re choosing a date in the future, coupons will be active from 00:01 of the morning of the date set in your account or device’s timezone, depending on your account settings. (See more on setting an account-wide timezone here)
The Coupon Is Redeemable Until – Like above, where you can set a start date, you can also set an automatic end date for your coupon. Combining the two options here let you quickly and easily create coupons available over holiday periods throughout the year for limited-time offers. Coupons will expire at the end of the day you set here (based on your account’s set timezone). So if you set the date to be 21st July, the coupon would stop working after 11:59:59 pm on 21st July.
This Coupon Will Auto-apply An Affiliate – Affiliate coupon tracking removes the need for affiliate links using ThriveCart’s affiliate coupon URL functionality. In this section you can choose one specific affiliate to be linked to this coupon.
Provide your affiliate with their own unique coupon code, then for every customer who uses this coupon code, your affiliate will automatically be rewarded with their commission. Affiliate coupon tracking works even if the customer never clicked on an affiliate link.
Disable After A Fixed Number Of Uses – Want to limit your discount to the first 10 customers as an alternative to traditional limited-time offers? Enable this option, set it to ten, and then only the first 10 users who attempt to use this coupon will get the discount. The 11th customer onwards will be politely informed that the coupon has reached its maximum number of uses. A great way to drive sales with that sense of urgency!
Do note that this fixed number of uses settings is overall uses and is not tied to a specific customer.
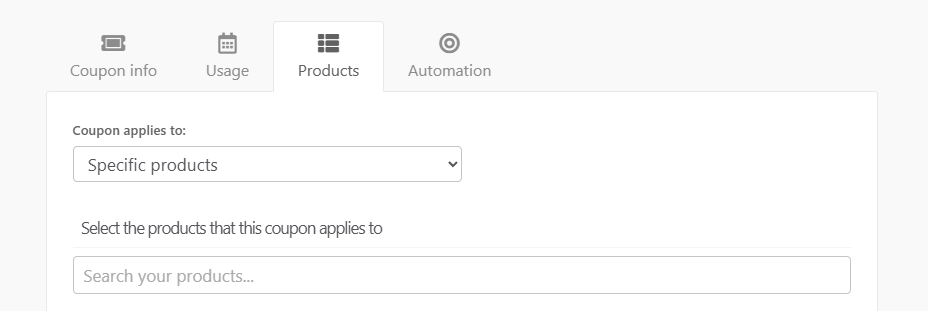
Apply Coupon to your products
Where do you want your coupons to be used? Unlike other platforms, which automatically apply your coupon to ALL products in your account with no options to set it to specific products, ThriveCart gives you the choice.
If you’ve got a generic coupon, you can set this for all products in your account.
But if you’ve got product-specific coupons, you can quickly choose which products your coupon is applied to, and if it’s attempted on a non-compatible product, the users will be politely informed that the coupon isn’t valid.
But if you’ve got product specific coupons you can quickly choose which products your coupon is applied to and if it’s attempted on a non-compatible product the users will be politely informed that the coupon isn’t valid.
Both pricing options and bumps will show slightly indented beneath the product, making it clear they are sub-options.
Applying coupons to bumps
When using a percentage-based coupon, Pro+ and with Connect+ enabled on your product, you will be able to select specific bump offers that your coupon will apply to.
Ensure that the setting within the “Coupon info” tab is set to apply to “bumps only” “main product + bumps” or “entire funnel” and you’ll have the option to choose whether to also apply to coupon to specific bump offer(s) as well.

Notes on applying coupons to specific products & bumps
- When selecting a product, all current pricing options and bumps are automatically selected by default.
- If you add new bumps after creating the coupon, those new bumps are not automatically selected – you’ll need to edit the coupon to include them.
- If you select bumps in the product list but the coupon type is restricted (e.g., “main product only”), those bumps won’t be discounted.
Trigger Integrations when your coupon is used
Looking to add actions based on your customer’s behavior when they use this coupon? You can quickly set this up here and it works just like Automation rules for your products.
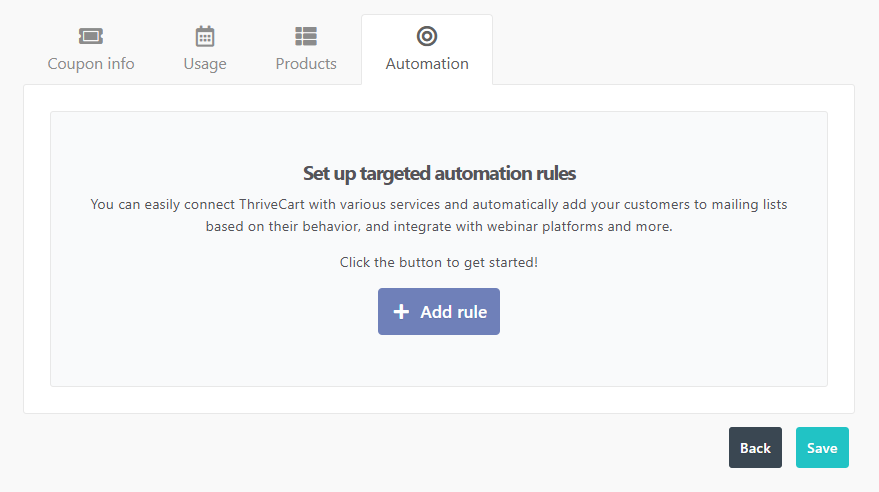
Now all you need to do is save your coupon, and you’ll be taken back to your coupons overview.
Editing the look of the coupon code box in checkout
When a coupon code is assigned to a product, the box to enter that discount code will be automatically added to your product’s checkout. Within the editor, you’ll have the option to adjust the look and feel of that box.
The available styles are:
- Collapsible – Where customers would need to click the checkbox in order to see the coupon code field
- Expanded – Where the entire box is shown by default
- Hidden – prevents the coupon code fields from showing on your checkout at all, and coupons can then only be auto-applied using a URL
The default stye of the coupon code box depends on the theme that you’ve chosen. There are a number of customizable options within the Enhanced Editor:

While Classic Templates give you fewer settings for your bump offer:

Notes & Limitations
- Upsells & downsells: Coupons cannot apply to upsells or downsells individually (since coupon fields don’t appear on upsell pages). These remain covered under the Applies to > Entire funnel setting.
- Receipts: Discounts are shown as a total summary with the coupon code, not itemized by product.
- Minimum charge rules: Standard payment processor rules still apply. If a coupon reduces an item below the minimum but not free (e.g., Stripe’s 50¢ rule), there would be processing errors preventing the order from being placed. Either set the coupon to discount 100% of the product, or ensure the discount amount still falls within minimum charge rules.
- Fixed discount coupons do not have the Applies to dropdown—they can only be applied to the front-end main product.
- Fixed Price coupons can only be applied to the “today” price. Percentage-based coupons will have an additional checkbox to apply the coupon to recurring payments.
Frequently Asked Questions (FAQs)
- Q: Can I set a coupon to apply to bump offers only?
- A: Yes, you can! You can create percentage-based coupons that apply only to bump offers on your checkout pages. See how in our guide: How to Apply Coupons to Bump Offers Only.
- Q: Can I assign coupons to specific bump offers?
- A: When choosing your product from the list, if the product has one or more bumps enabled, all of your bump offers will be listed so that you can select or deselect the different bump offers on a product to determine if a coupon is applicable for that specific bump offer. See more in our guide: How to apply coupons to specific bump products.
- Q: Can I limit the number of times a customer uses a coupon?
- A: Currently you can only set overall usage limits, (e.g. a total of 10 uses across the board) as the system will not cross-check whether the customer is a returning customer that has already used a coupon.
- Q: Can I set a fixed price coupon to apply to recurring payments?
- A: At this time only percentage-based coupons can be used towards subscription rebills. Fixed rate coupons for subscriptions will only discount the initial (today) payment.
- Q: I’m not seeing the coupon code box on my checkout, what’s going on?
- A: A coupon code box will be automatically added to your product and checkout when a coupon is assigned to your product. Make sure that a coupon has been enabled for the product checkout you’re looking at, and that the option to hide the coupon code box has not been set in the checkout editor.
- Q: My coupon setup is showing a dollar ($) sign, but my currency is not dollars, why?
- A: Coupons will always charge in the currency of your main product, so the currency symbol shown in coupon setup defaults to “$”. However, if your product is in another currency, the coupon (once used on that product’s checkout) will discount in the product’s currency. See more in our guide on Setting the currency of upsell or coupon.