Supercharge your affiliate program by instantly nurturing every new affiliate from the moment they join. With ThriveCart’s built-in automation rules, you can seamlessly connect your email marketing tool to establish an affiliate autoresponder integration where affiliates are automatically added to your email platform the moment they sign up or are approved. This creates a hands-free, fully streamlined workflow that keeps your partners informed, engaged, and ready to promote.
By pairing email marketing automation with ThriveCart’s powerful affiliate management system, you can send onboarding sequences, training resources, promotional materials, and updates—without ever lifting a finger. It’s the easiest way to deliver a polished, professional affiliate experience while saving time and scaling your program effortlessly.
How to enable your affiliate autoresponder integration
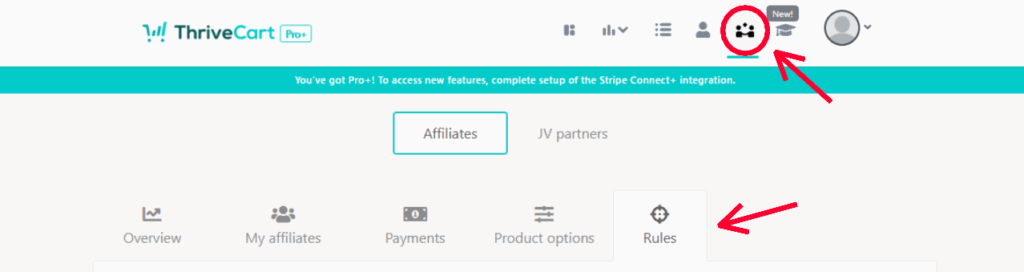
The first step is to navigate to the affiliate rules area by clicking the affiliates menu icon in your dashboard, then click the rules tab.
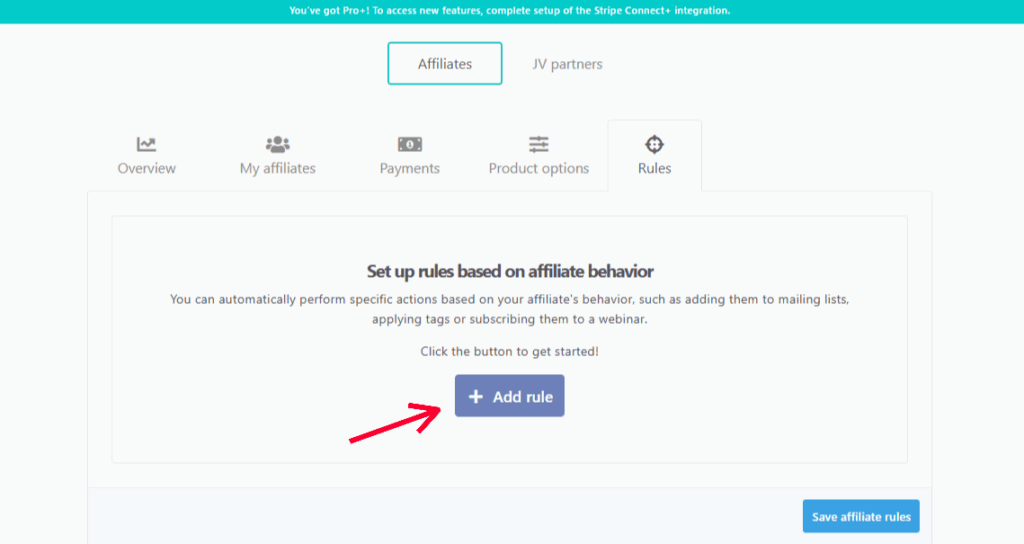
Here you will be shown any existing rules you’ve created for your affiliates. If you’ve not already created any rules you’ll need to click the Add rule button to get started.
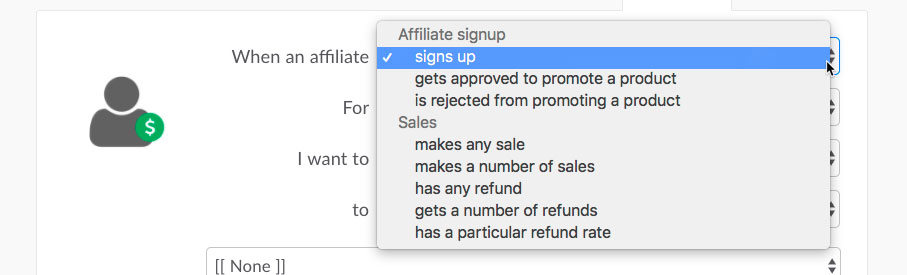
The first decision you’ll want to make is what triggers the rule. You’ll have various rules around the affiliate signing up or being rejected/revoked and we also have various rules about their performance.
In this case, you’ll want to create a rule for when someone signs up to be an affiliate.
Next, we can look at creating rules specifically to trigger on certain products or to trigger when they sign up for any product. The decision here is yours.
In this example, we’re going to select the option “any of my products”. This way when an affiliate signs up for any product in your account this behaviour rule will action.

Next, we want to choose what action we want to take. When selecting the first drop down you’ll have many different options such as using an integrated service, sending an email, triggering Webhook notifications, adding/removing to other products and changing when they are paid commissions.
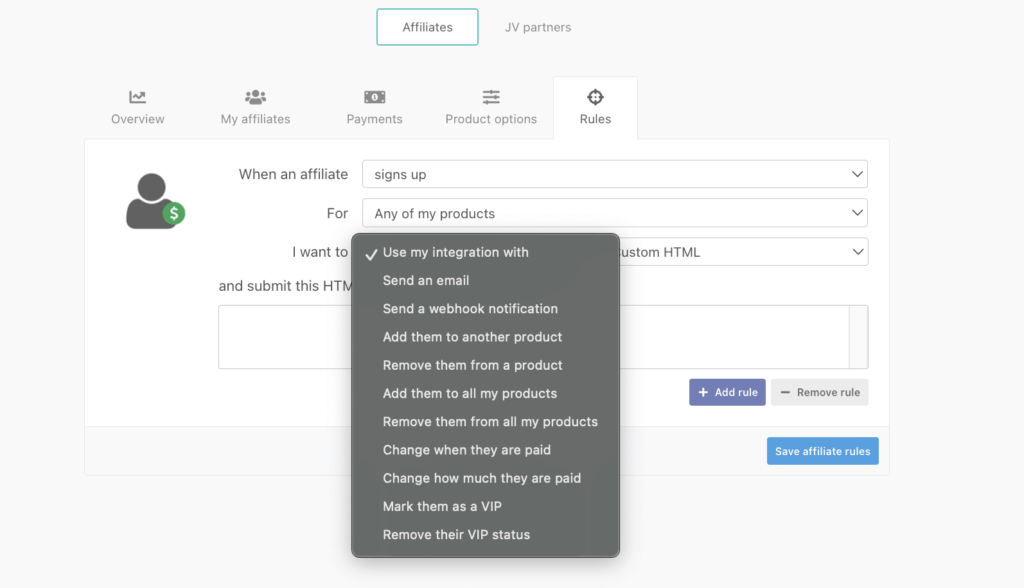
In our example we’re adding our affiliate to our autoresponder, so we’ll choose “Use my integration with” and then from the next drop down select our autoresponder.

Now that’s done, we can leave the option ‘add them to” selected and choose what we want to add them to. With ActiveCampaign you have the option of a list, automation, existing tag, or a new tag. These options will update depending on the autoresponder you use and their supported features. In this example, we’re going to use a list.

Then finally we need to select that list, or, depending on what’s available with your autoresponder, the tag, automation, sequence, etc.
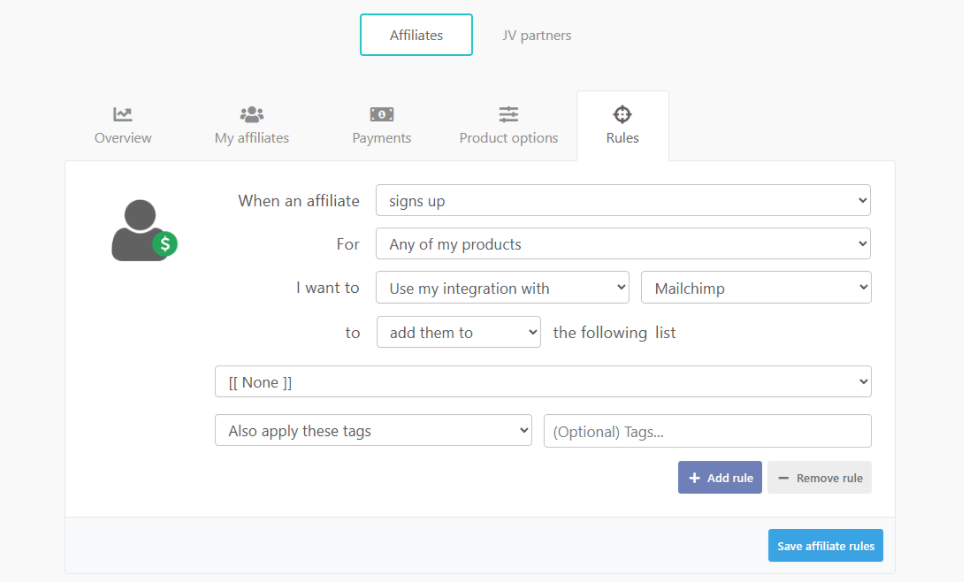
The last thing we need to do is click that Save affiliate rules button.
Now, whenever someone signs up to promote a product you have for sale, their contact details will be added to the list or tag with your chosen autoresponder.
Frequently Asked Questions (FAQs)
- Q: Why am I not seeing any integrations in the dropdown?
- A: The only available integrations that you’ll see are those that you have already connected. In the examples above, the account has ActiveCampaign, MailChimp, and Ontraport already connected. If you do not have an email marketing service connected yet, see our guide on connecting an autoresponder to get started.
- Q: Affiliates aren’t being added to my autoresponder when an action occurs, how can I troubleshoot this?
- A: You’ll want to review your rules for the requirements to make sure they are set to your desired action. Fo example, if you have a rule set for a specific product, it will not trigger if an affiliate signs up for another product (unless you have another rule set for that additional product).
Rules will also not trigger for existing affiliates, only new signups after the rule was created. If using the sales rules, however, those will trigger once affiliates hit those milestones set.
- A: You’ll want to review your rules for the requirements to make sure they are set to your desired action. Fo example, if you have a rule set for a specific product, it will not trigger if an affiliate signs up for another product (unless you have another rule set for that additional product).