Want to make every sale feel seamless and on-brand? ThriveCart Payment Notifications give you full control over the customer receipts your buyers receive after purchase. Choose between Detailed or Basic notifications to match your business needs — from invoice-style receipts with full breakdowns and customer hub links, to minimalist confirmations perfect for external invoicing setups.
Easily customize colors, text, and logos for receipt branding, or even disable order notifications at the product level if you’re managing communications through another platform. ThriveCart puts you in charge of how your customers experience their payment confirmation emails — clear, professional, and designed your way.
When your customer goes through your funnel and completes a successful order, ThriveCart Payment Notifications are sent automatically to confirm their order.
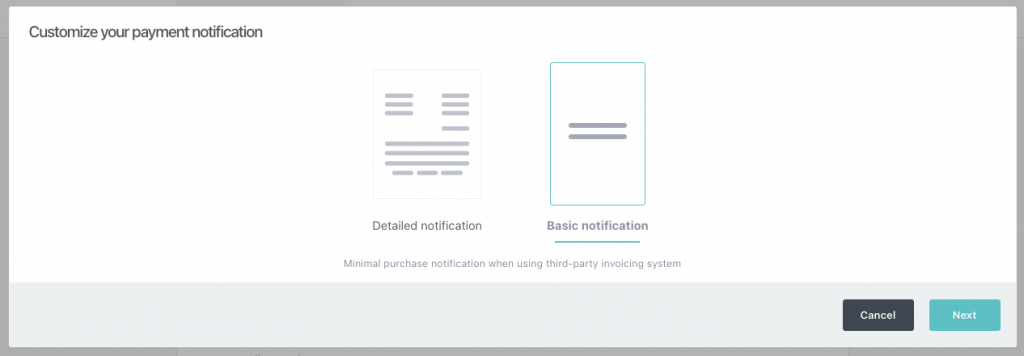
You can choose between two types of notifications on a product by product basis.
- A detailed notification.
- A basic notification.
Detailed notification
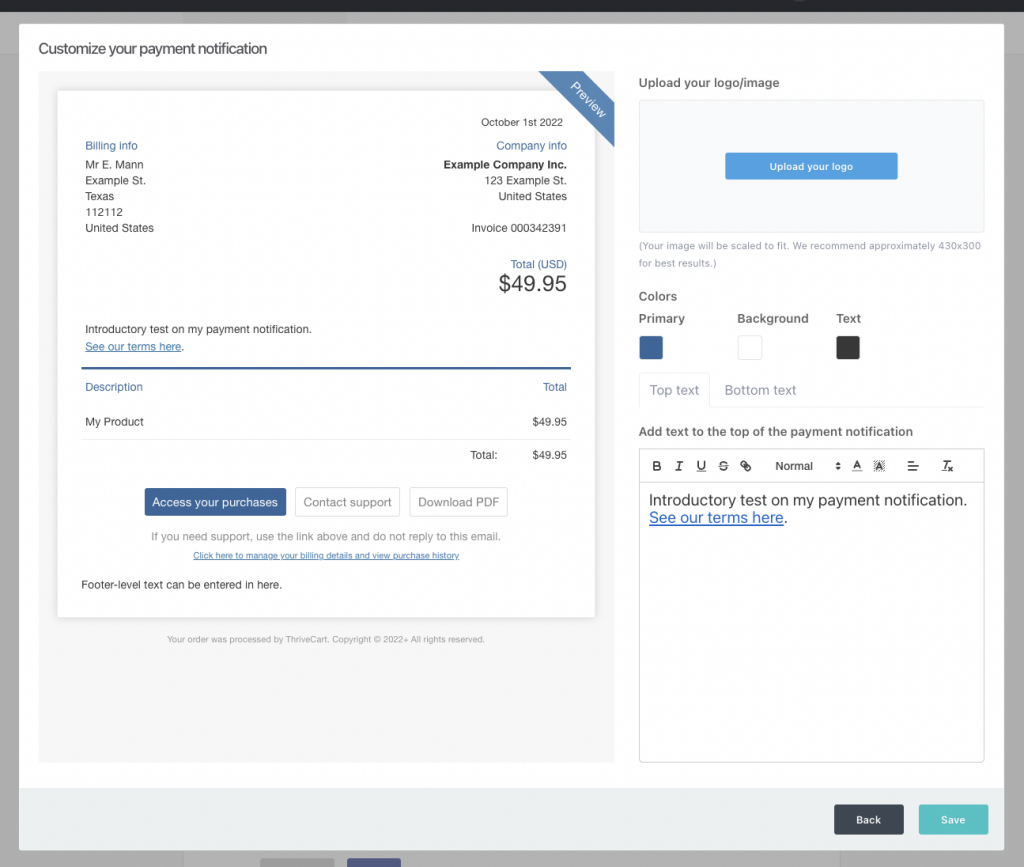
By default, the “detailed notification” is enabled and the system will send invoice-style customer receipts to your customers after purchase as this contains the details that most vendors will want to provide.
This notification is suitable for business records and accounting and is the preferred choice for the high majority of vendors. It includes all required information such as:
- the company logo,
- both the customer and vendor details,
- when they purchased,
- their invoice number,
- how much they paid, including breakdowns of each item, taxes, and future payments (when applicable),
- an access button for their purchase (when applicable),
- your support link,
- the ability to download the receipt as a PDF,
- a link to your customer hub (where they can update their billing information if needed)
- custom text above and below the order breakdown
- color styling options
See an example detailed notification here.
The email subject line for a detailed notification will include your business name and the customer’s invoice number, similar to the below:
Your Business Name: Invoice 000002210
Basic notification
The basic notification is a really basic and clean notification and is more suited for those advanced vendors looking to use 3rd-party platforms to issue invoices or provide access and support to their customers. It can also be used when you are offering a free product that does not require a pricing breakdown.
It will simply have:
- your logo (when set),
- your company name,
- any introductory text you’ve set and
- a quick list of the products they’ve purchased in your funnel.
- access link (optional)
- support link (optional)
- custom text above and below the order breakdown
- color styling options
It does not include any links to your customer hub, order/invoice numbers, or your business information.
See an example basic notification here.
The email subject line for a Basic notification will include your business name, without an invoice number, similar to the below:
Your Business Name: Payment Notification
Setting your payment notification
Set your preferred ThriveCart payment notifications type in the product’s Pricing tab by selecting the checkbox to customize the invoice and clicking “Edit”.

After selecting the type of notification that you want to send, the invoice email setup lets you preview and customize notifications, including logos, colors, and text placement.
For example, below you can see the detailed invoice-style payment notification and the options such as the ability to add your logo, set several colours, and add text above and below the order breakdown area:
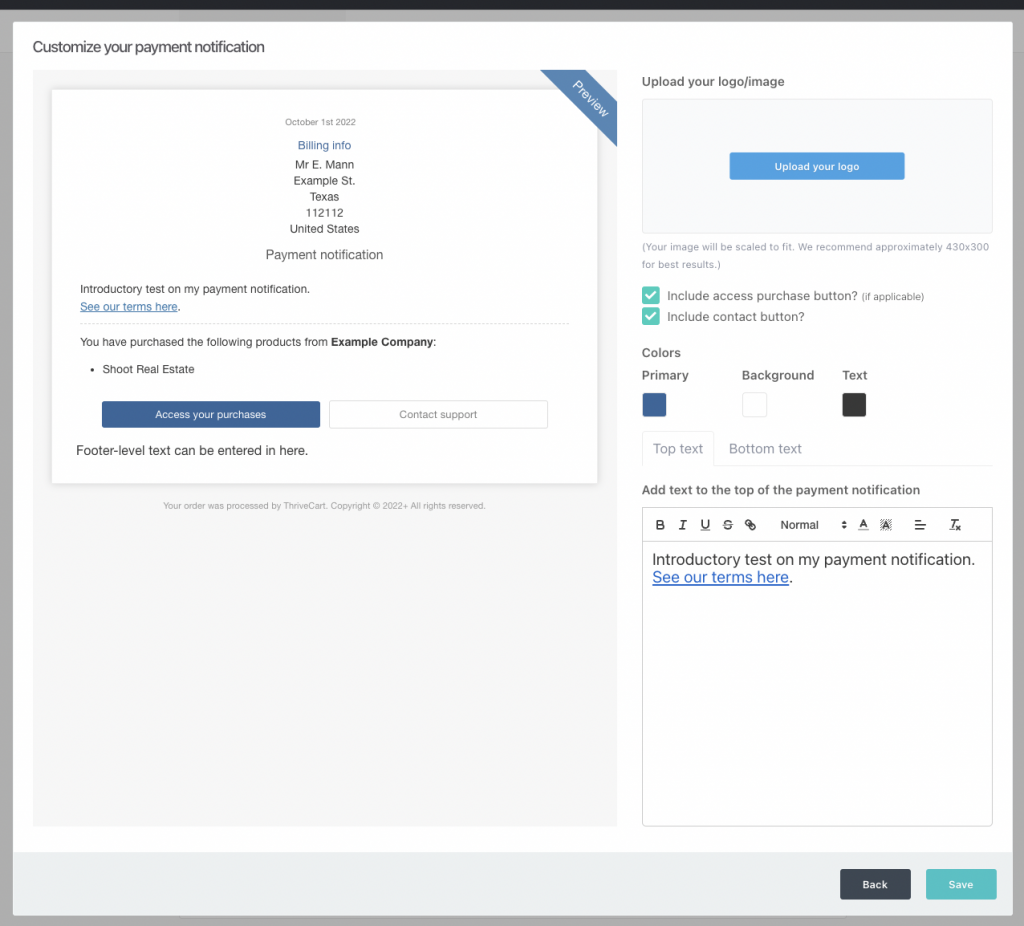
When using the basic notification, you’ll have the ability to add your logo and any content above/below the order breakdown.
The basic invoice email setup also allows enabling an optional access button (which will show when you have URL fulfillment or membership fulfillment for your product) and a contact support button.
Note: If you have set a logo under your account profile and you leave the option blank here, the system will pull through the logo from your profile. The option here allows you to use a different logo for this product specifically.
The business information that is included in your customer receipts can be found under your profile, by clicking your profile icon in the top-right > My Profile.
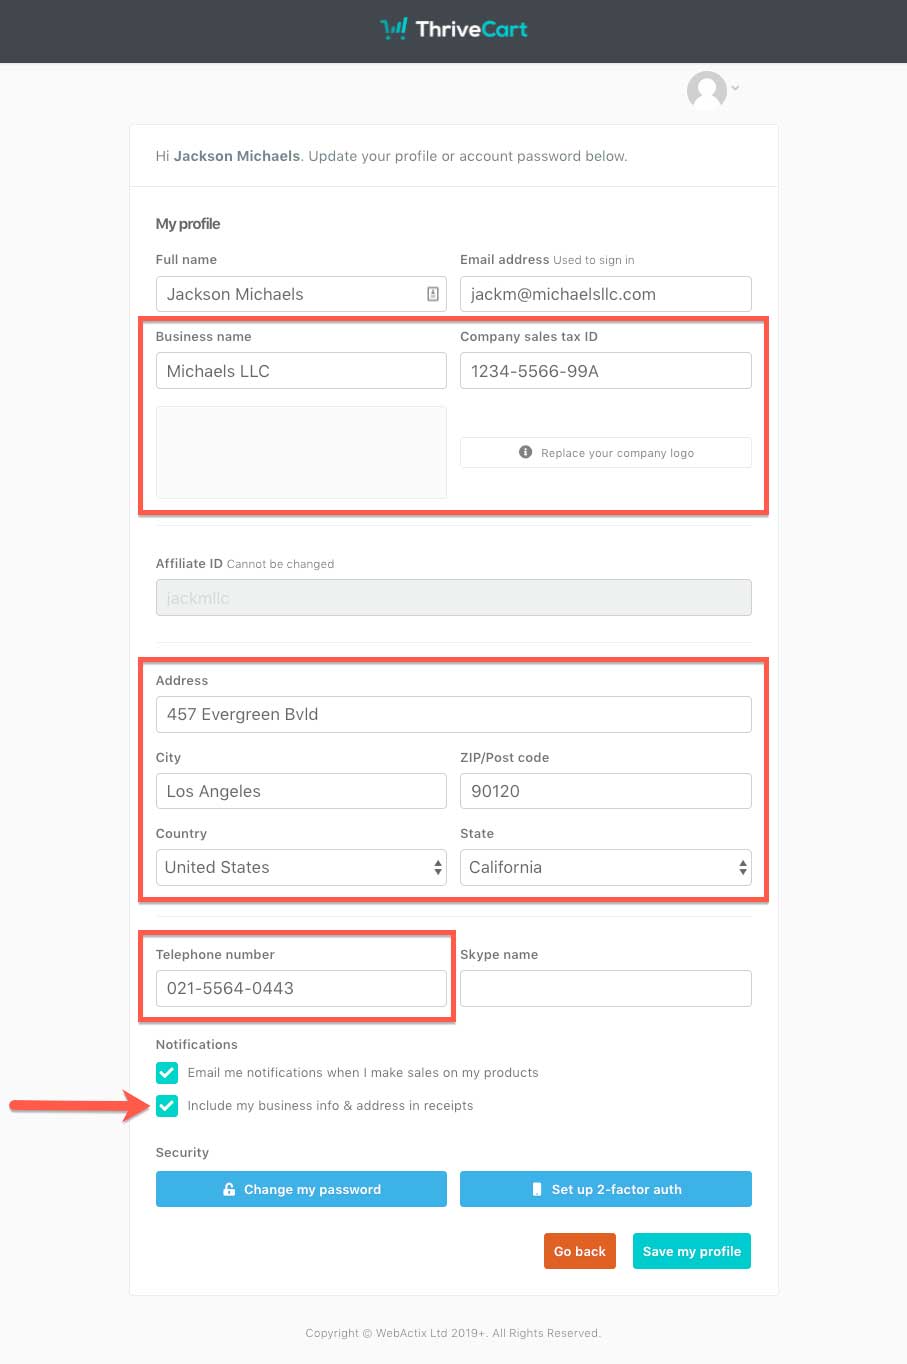
As long as you have ticked that box at the bottom, “Include my business info and address in receipts”, the areas highlighted in red will be included as part of the payment confirmation emails.
If the business name field is blank, the system will default to the full name field.
If any other information is left blank – it will not be included.
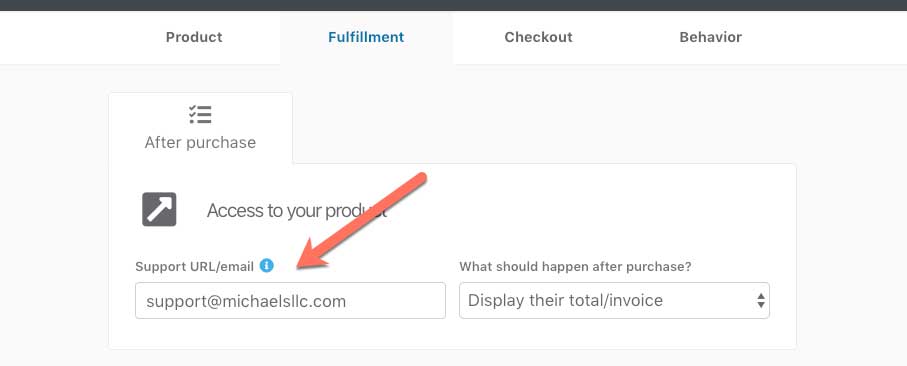
The “reply to” email in your receipt and payment confirmation emails will be taken from either your product settings (see image below) or if you’ve used a website address there instead of an email, it will be the email listed in your profile.
Can I disable notifications?
There are 2 ways you can disable order notifications to your customer:
- Globally (across the entire account)
- Product/pricing option level
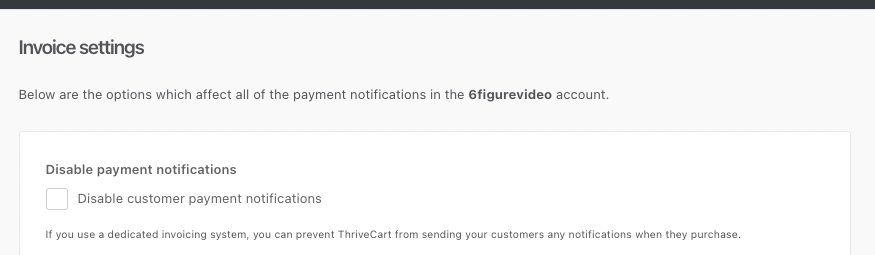
Under your Settings > Invoices area, you can check the box to completely disable all order notifications to customers and they will no longer be sent (note that Dunning emails will be sent if enabled in the Dunning area).
Alternatively, you can use product-level notification settings to enable or disable notifications per pricing option. When creating or editing a pricing option of a product, you’ll see the options to enable/disable notifications for the initial order (and recurring payments if applicable). Within product-level notification settings, notifications for initial orders are sent by default, with optional control over rebills.

Frequently Asked Questions (FAQs)
- Q: How do I disable notifications for certain products?
- A: Use product-level notification settings in the pricing option setup to enable or disable notifications per product.
- Q: Can I customize the look of my payment notifications?
- A: Yes, you can add logos, custom text, and color styling for both detailed and basic notifications.
- Q: Can I add an access button or support link in notifications?
- A: Yes, these options are available in both detailed and basic notifications when using URL or membership fulfillment.
- Q: Can I edit the email’s subject line or customize these invoices further?
- A: It’s not currently possible to customize design-wise beyond what is available in the editor, and the business info on your receipts is pulled from the product owner’s profile. We recommend that any additional fields or information should be added via the “Top text” or “Bottom text” fields within the editor.
However, the email’s subject line and additional fields can be adjusted within the Custom Text & Translations section of your dashboard. Just make sure if you’re adding a language, to apply that language to your product and changes will then be used in invoice emails moving forward.
- A: It’s not currently possible to customize design-wise beyond what is available in the editor, and the business info on your receipts is pulled from the product owner’s profile. We recommend that any additional fields or information should be added via the “Top text” or “Bottom text” fields within the editor.
