Thrive Academy introduces a new way for your students to learn, interact, and socialize with a larger community of learners. Unlike traditional course platforms, Communities puts your community first — students land in a branded social learning hub where courses, discussions, achievements, and commerce all live in one place.
Whether you’re migrating from Thrive Learn or starting fresh, ThriveAcademy and Communities replace the standalone course experience with a fully integrated social learning community. Every ThriveCart purchase automatically enrolls students into your community, with no manual setup required after the initial connection.
What is Communities?
Communities is ThriveCart’s native LMS and community platform. It’s a social learning environment built natively into ThriveAcademy, and it’s unlike anything we’ve shipped before.
This isn’t an update to what you already have, it’s a completely new way for your students to experience learning with you.
What’s new?
The core difference from traditional course tools is that the community is the main experience, not a feature added to it. Students never land in a standalone course. Instead, they arrive at your creator-branded community feed, where courses are consumed within the community context, discussions happen in context alongside lessons, and achievements are tracked and celebrated publicly.
- Gamification – leaderboards, points, streaks
- Discussion board(s) – tied to lessons, courses, or general conversation
- Single Communities login – students access to every community they belong to — across all creators in the ThriveCart ecosystem — without creating separate accounts.
- A student directory and capabilities for direct messaging. Not only so that you can easily contact your students, but so that they can expand their network and connect with other students as well.
The ThriveAcademy dashboard:
Logging in:
ThriveCart users may notice a ThriveAcademy option in their navigation bar, which will direct them from directly to their creator Academy login:
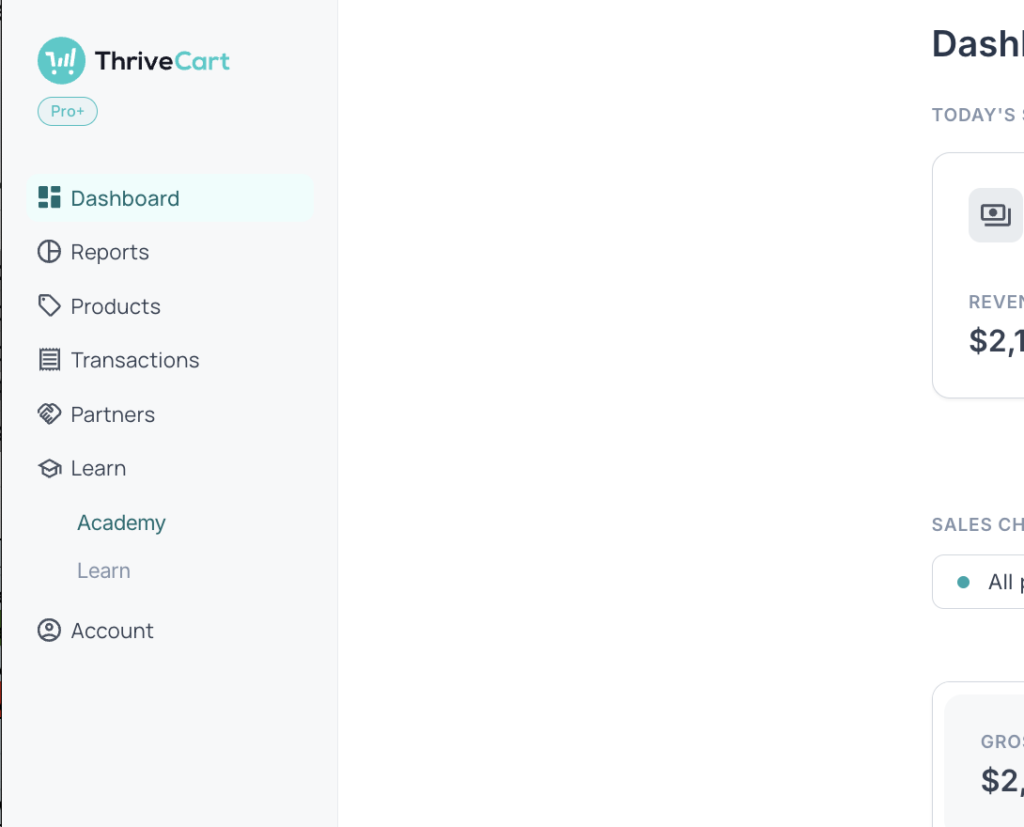
All users can access ThriveAcademy by heading to the creators login at https://lms.thrivecart.com/auth/creator/signin
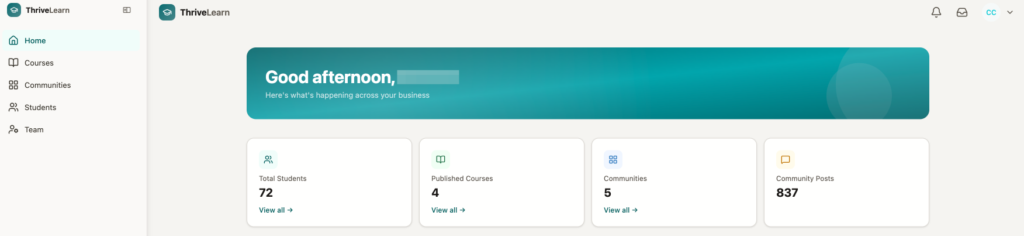
The first thing you’ll see when logging into ThriveAcademy is your dashboard: a high-level summary of everything happening in ThriveAcademy with four stat cards showing your Total Students, Published Courses, Communities, and Community Posts.
Home
Below the stats, the Recent Activity feed keeps you up to date on what your students are doing – lesson completions, new enrolments, and recent discussion posts all appear here in real time, along with any actions that need your attention such as unpublished drafts, moderating flagged content, or approving pending members.
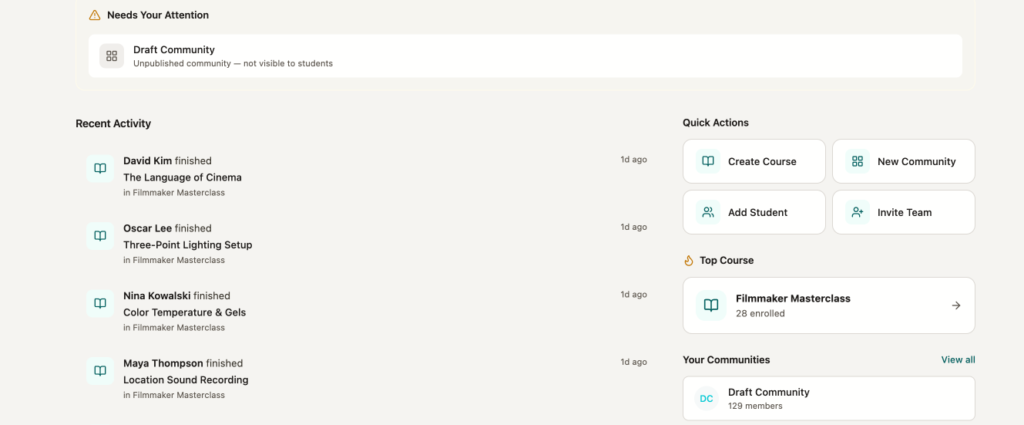
On the right-hand side, Quick Actions let you jump straight to the most common tasks: Create Course, New Community, Add Student, and Invite Team. The Top Course widget highlights your best-performing course by total enrolment, and your full list of Communities is accessible from here as well for quick one-click access to each Community Dashboard.
Courses
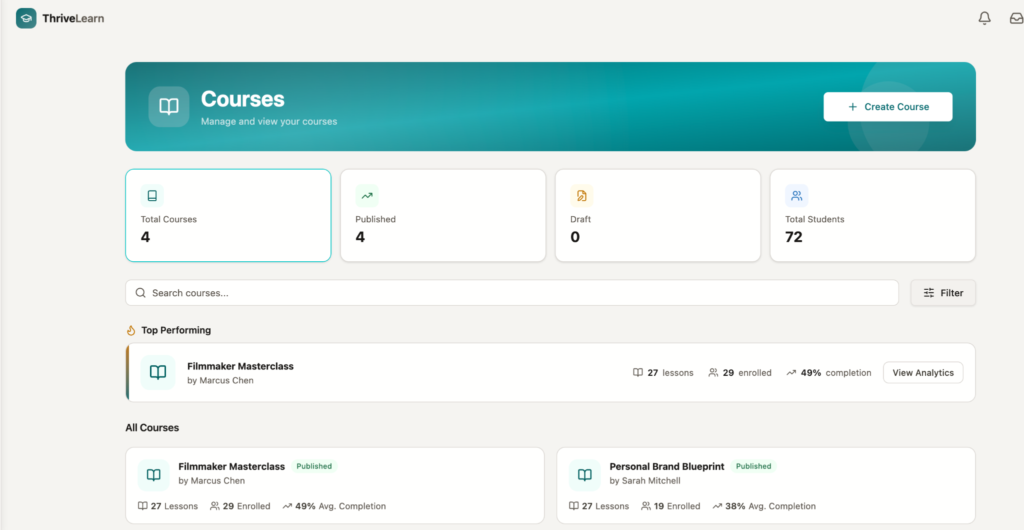
Within the Courses tab is where you’ll create your courses and content. The Courses list displays all of your courses with key stats at a glance — including author, number of lessons, enrolment count, and publish status. Use the search and filter tools to find a specific course quickly.
Hover over any course card to reveal three actions: Duplicate Course to create a copy, View Analytics for a lesson-by-lesson completion breakdown across your enrolled students, or Edit Course to open the full course builder. Inside the course editor, the top toolbar gives you access to Tags, Assessment, Sequences, Settings, Student Preview, and publishing controls.
Communities
Communities are the product you’re selling. Whether they include discussion Spaces, course content, gamification leaderboards, or all three, your Community is your brand’s social ecosystem where everything lives for your students.
Create a Community to get started, then set up Spaces to define the kind of experience you’re going to offer. Spaces are the dedicated sections inside your Community, and they’re what make it feel like a real destination rather than a course player. Every Community comes with six built-in Spaces ready to choose from:
- Announcements for broadcasting updates to your entire student base
- Q&A for general discussion, questions, and structured peer support with pinnable best answers
- Course Space where students can access your course content and discuss
- Resource Hub for a permanently searchable library of everything you share outside of lessons
- Quiz Hub to include all quizzes from within your courses in one easy-to-access place
- Lounge for general discussion, or VIP access for a smaller discussion group
Courses live as a Space directly inside your Community — not as a separate destination. Lesson discussions, progress milestones, and peer interaction all happen in the same place your students are already spending their time.
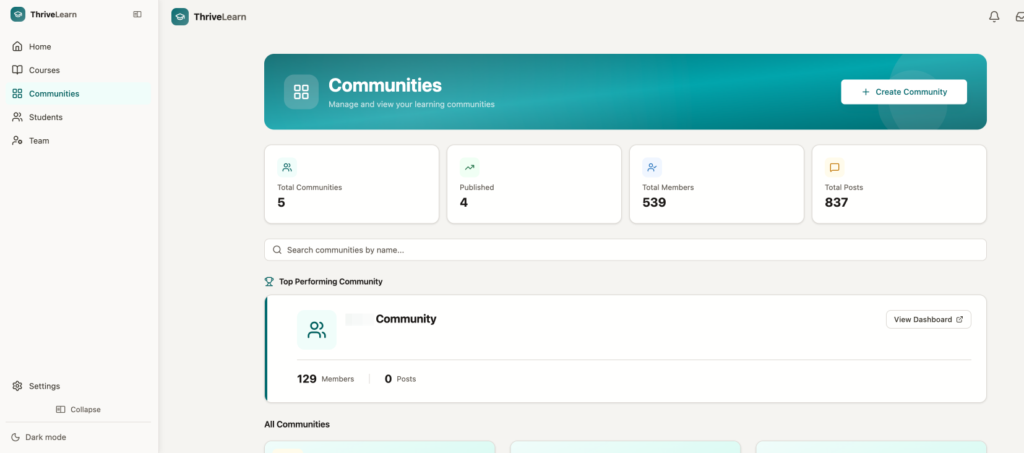
From the Communities section of your dashboard you’ll see an overview of all your Communities, including your top performer by member count and engagement.
Click Manage Dashboard on any Community to access Community-specific data, spaces, and courses.
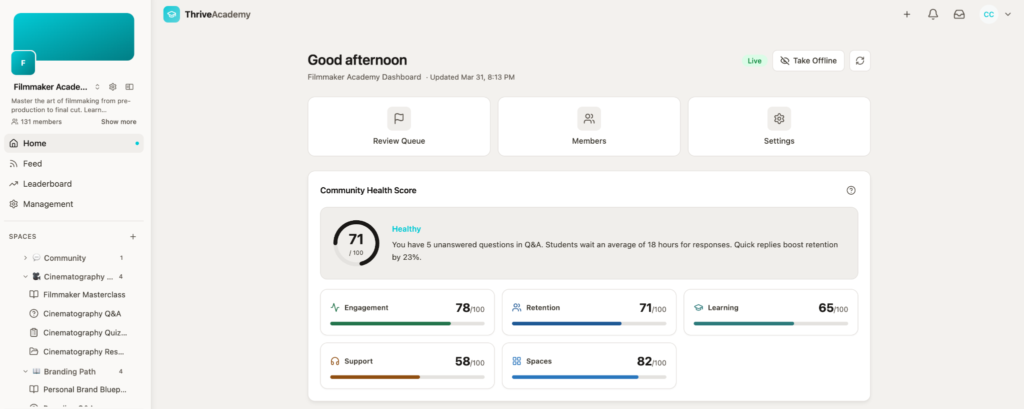
Once inside a Community, the Home page will include its health metrics — including a Community Health Score broken down across Engagement, Retention, Learning, Support, and Spaces — along with quick access to your Review Queue, Members, and Settings.
For a full walkthrough of creating and managing your Communities and Spaces, please see our Building Communities guide here.
Students
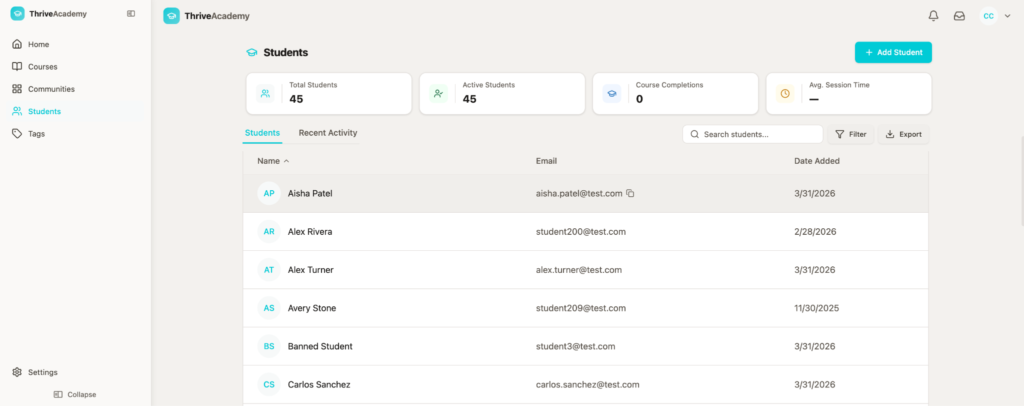
A full account-level view of every student across all of your courses and Communities. From here you can search, filter, export your student list, and add new students manually. This view shows all students in one place regardless of which Community or course they belong to.
Click into a student to review more details about them, add/remove tags, view enrolled courses and communities, and see their full list of achievements and badges.
Migrating from Learn
If you’re an existing Thrive Learn or Learn+ creator, course content and students from your account will be migrated to ThriveAcademy automatically, but you retain control over when students access content in ThriveAcademy. They continue to access via Learn until they are notified of the new URLs.
Step 1 — Your Content is Migrated in the Background
You don’t need to do anything in Stage 1. The ThriveCart engineering team handles the full migration of your account behind the scenes as part of the onboarding process, and once you’ve opted into ThriveAcademy, you will see your courses and students synced over in the background..
What gets moved across automatically:
- All courses, modules, and lessons (structure and order preserved)
- Video content — all YouTube, Vimeo, and Wistia embed codes are copied across exactly as-is.
- PDFs, audio files, images, and downloadable resources
- Drip schedules, student tags, and access rules
- Student accounts and passwords — students won’t need to reset anything
Your students see and receive nothing during This step. Legacy Learn remains fully live and is where they will continue to consume your original content.
Step 2 — Review Your Content
Once opting into ThriveAcademy, you’ll land inside your new community to review your migrated content.
Take as much time as you need to:
- Review your migrated courses, lessons, media, and students
- Make any edits or updates before students are pointed to their new dashboards
- Set up a custom domain for your community if desired
There are some limitations in migration from Legacy Learn to ThriveAcademy that will require manual intervention. Some things to consider that may not get moved across automatically includes:
- Unsupported embed types are preserved as raw HTML
- Unsupported behaviour or drip rule types will need to be re-created within your community and/or course environment.
- Custom Integrations (i.e. Zapier, API, Autoresponder links) are not currently supported for actions within ThriveAcademy directly and so you will not see your integrations within your Academy.
Legacy Learn stays fully live until you direct students to your new community. Your students continue accessing their courses without any interruption.
Global Account Settings:
In the bottom left of your left-hand sidebar, when viewing your home page, you’ll be able to access your overall account settings such as your global business name, timezone, and support email.
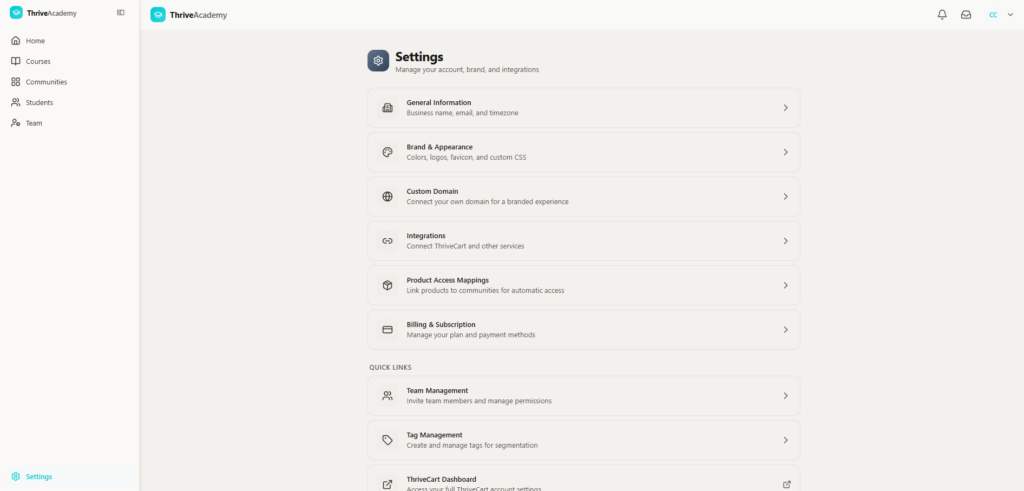
This is also where you can set your brand kit – where colors, themes, logos, and header images can be set to apply to your account from the global level.
These settings can also be overridden on a Community level (colors, logo, header image), but adding your brand colors here will ensure that every community created will automatically match your brand colors.
ThriveAcademy Pricing
ThriveAcademy is available on three plans to fit your community and course business at any stage. All plans include course hosting, gamification, and assessments. Choose the plan that matches your member count and feature needs.
| Starter | Growth | Scale | |
|---|---|---|---|
| Monthly Price | $47/mo | $87/mo | $127/mo |
| Annual Price Note: Save 20% by choosing annual billing. | $37/mo when paying $444/yr | $67/mo when paying $804/yr | $97/mo when paying $1,164/yr |
| Members | Up to 2,000 | Up to 10,000 | Unlimited |
| Communities | Up to 10 | Unlimited | Unlimited (multi-brand) |
| Video Storage | 100 GB | 500 GB | Unlimited |
| Max Video File Size | 2 GB | 4 GB | 10 GB |
| Streaming Quality | HD (1080p) | HD | 4K |
| Custom Domain | No | Yes | Yes |
| White-Label Branding | No | No | Yes |
| AI Features | No | AI moderation + AI quiz generation | AI analytics + Conversational AI tutor |
| Support | Standard Support | Priority | Dedicated account manager |
Existing User Trial Period
Existing ThriveCart Learn and Learn+ users are being given trial periods of ThriveAcademy access starting on May 18. All users on signup will get access to the Scale level plan, but can always opt to purchase a lower tier level at the end of their subscriptions.
Existing Learn users will get 2 free months, while Learn+ users will get 4 free months. Anyone can earn an extra month by submitting favorable social media post content.
Recommended Image sizes:
| Image Type | Recommended Size | Notes |
|---|---|---|
| Course Thumbnail / Banner | 1280 × 960 px | Main course image; shown as an explicit UI recommendation in the uploader. 4:3 aspect ratio. |
| Course Logo (course card) | 400 × 300 px | Displayed on course cards in the student-facing browse/dashboard view. 4:3 aspect ratio. |
| Author Logo / Avatar | 640 × 640 px | Square avatar; rendered/cropped to 160×160 px in the UI. Upload at 640×640 for best quality. |
| In-lesson image | 1280 × 960 px | In-lesson images embedded as content blocks within lessons render responsively (fluid width, max-width 100%). A safe general recommendation is 1280 × 720 px (16:9) or 1200 × 800 px for wide inline images, as these cover most modern screen resolutions without being oversized. |
Glossary of Terms:
| Term | Definition |
| Creator | The account owner who builds courses, manages communities, and configures product-to-access mappings. |
| Community Member | A student who has been granted membership in a community, either by purchasing access, joining a free community, or being manually added by a creator. |
| Community | The top-level container students purchase access to. Contains spaces, courses, discussions, and content. A creator can have multiple communities. |
| Space | A section within a community. Can contain courses, discussions, and/or resources. Spaces can be public, locked (visible but gated), or hidden (invisible until unlocked). |
| Space Unlock Rule | A condition that must be met before a student can access a locked or hidden space. Rules support AND/OR logic and include triggers like payment, course completion, quiz score, XP level, tags, engagement, and time-after-join. |
| Space Collections/Space Categories | Multiple spaces grouped together. These can be organized to contain specific topics, specific courses, and/or be set up for VIP groupings of content/social spaces. |
| Product-to-Access Mapping | A creator-configured link between a ThriveCart/ThrivePay product ID and the community membership + space unlocks it grants. |
| Access Model | A community-level setting such as free (anyone can join) or paid (requires a purchase). |
Frequently Asked Questions (FAQs):
- Q: What happens to my existing Thrive Learn courses and students?
- A: All existing Thrive Learn and Thrive Learn+ creators and students are migrated to Communities with full continuity — courses, student progress, drip schedules, certificates, and billing are all preserved. Only review will be required from you.
- Q: Why isn’t The Go Live option appearing in my checklist?
- A: Go Live requires your community to have at least a published name and confirmed access model. If your community is Paid, you also need a linked ThriveCart product before the Go Live task becomes available.
- Q: Do I need a community to offer courses?
- A: No, while the focus of ThriveAcademy is communities first, you can always grant students access to a course only. You can always create a community that simply offers a Course Space and disable public posting on that Spaces discussion board. Functionality is coming to ensure product purchases can be mapped to courses only.
- Q: Do I need to create a new ThriveCart product to use Communities?
- A: No. You can link an existing ThriveCart product to your community during the Link ThriveCart Product checklist task. If you don’t have an existing product, you can create one from within the checklist.
- Q: How do students find lessons?
- A: Via the left sidebar or activity feed. Lessons load inside the community – students never leave.
- Q: How does gamification work?
- A: XP is earned for a number of actions such as course completion, discussions, and contributions. XP will place community members in leaderboards, but can also be used to unlock additional access or products for your most engaged members. XP amounts earned can be set in your Community settings.
- Q: Can students manage billing in-community?
- A: Not during initial phases, but in future releases all subscriptions, payment methods, and billing history will all be manageable within the community.
- Q: Are there mobile apps on the roadmap?
- A: No, native apps are not in the short term plan. Fully responsive web only for now.