Thrive Academy’s course builder gives you everything you need to create a professional learning experience without needing technical skills. Build courses with a straightforward module and lesson structure, add mixed content to every lesson (video, audio, text, PDF, and quizzes all in one place), control exactly when and how students access your content, and publish directly into your Community so students learn within a social context from day one.
Whether you’re launching your first course in a weekend, or managing a catalogue of advanced programs with gated tiers and cohort scheduling, the course builder is designed to scale with you — and every course you publish lives inside your Community so students never learn in isolation.
- Quick Setup
- Building Your Course: Structure
- The Course Editor
- Building Your Course: Adding Lesson Content
- Adding Quizzes and Assessments
- Enable and deliver Certificates
- Setting Up Drip Content
- Tag-Based Access Control and Course Gating
- Sequences
- Connecting Courses to ThriveCart Products and Community Spaces
- Student Experience
- Frequently Asked Questions (FAQs)
Quick Setup
Step 1 — Create Your Course
From the ThriveAcademy Dashboard, click Create Course in the Quick Actions panel, or navigate to Courses in the sidebar and click Create New to launch the Course Create Wizard. Enter your course name, author, and an optional description before setting your course layout and colors.
The builder is divided into three panels: a left sidebar with your module and lesson tree, a centre panel with the lesson editor, and a right sidebar for course settings. Everything auto-saves every 30 seconds — there is no Save button to click.
Step 2 — Add Modules and Lessons
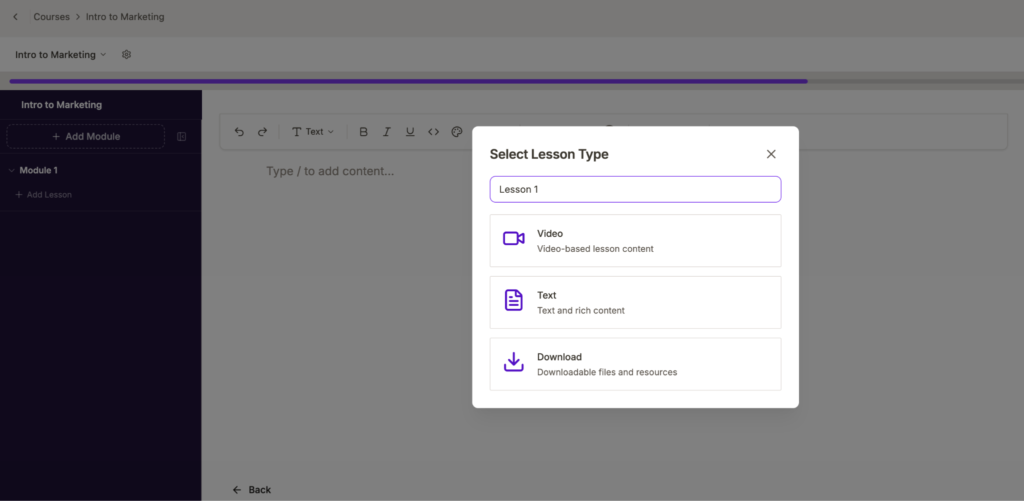
Click + Add Module in the left sidebar to create your first module, then click + Add Lesson within it to start adding content. Select a lesson type (Video, Audio, Text, File, or Quiz), add your content in the centre editor, and repeat across your course structure. Green dots in the sidebar indicate published lessons; grey dots are unpublished drafts.
Step 3 — Publish Your Course
When your course is ready, click Publish in the top toolbar. A validation checklist runs automatically — your course needs at least one module, and a landing page before it can go live. Once all items are clear, your course is published and available to manually enrol students into, or set the ThriveCart product that will grant them access to your course.
Building Your Course: Structure
Course → Modules → Lessons
Similar to ThriveCart Learn, every course in ThriveAcademy follows a three-level hierarchy: Course → Modules → Lessons.
Modules are the chapters or sections of your course and lessons are the individual pieces of content within each module. Both can be reordered via drag-and-drop at any time.
Limits to know:
- Maximum 20 modules per course
- Maximum 50 lessons per module
- Course, module, and lesson titles are all required fields
Unlike Learn, ThriveAcademy does not have projects that your courses would be organized into, but you can group courses into categories within your community spaces.
To organise multiple courses into named categories within a single Community (for example, “Beginner Courses” and “Advanced Courses”), you can create Course Collections as an optional grouping layer inside Community Settings. Courses without a Collection assigned still appear under a default section. See more on Space organization here.
To duplicate an existing course, hover over any course card in the Courses list and click Duplicate Course.
Course Setup
To start building a course, click “Create Course” from your dashboard – either from quick links in the right-hand sidebar, or when clicking through to “Courses” in the top left navigation.
The course creation wizard will walk you through adding basic course information such as your course name, description, uploading an image, and choosing the community it will belong to, or setting it as a standalone course.
Similar to the Community creation wizard, you’ll have a preview on the left where you can preview your course widget (as students will see it in your community), upload a logo image, and preview in light or dark mode.
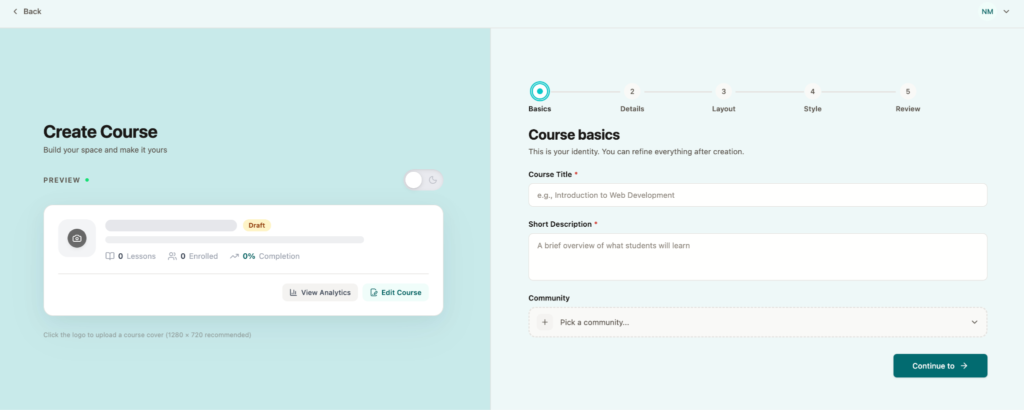
First set your course basics such as your title, a short description, and the community you’ll be adding it to. As you add details, the preview of your course on the left will update, which can also be viewed in light and dark mode.
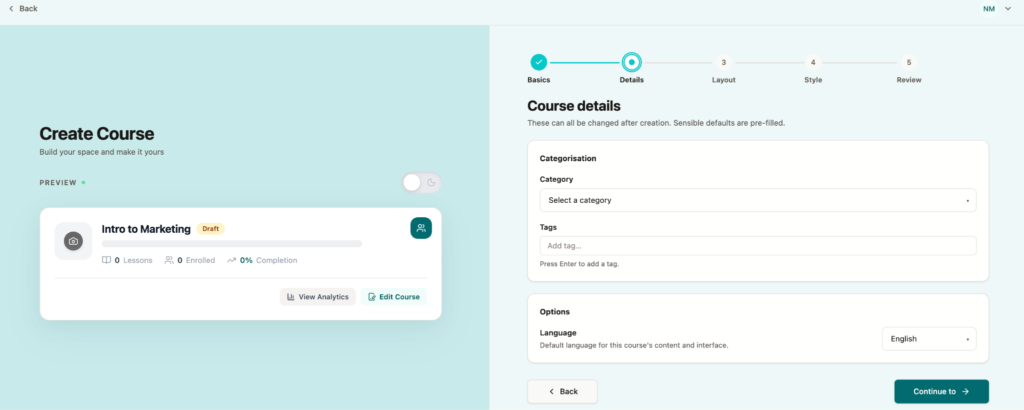
On the Details tab, you can then set the category and tags for your course, as well as set your default language.
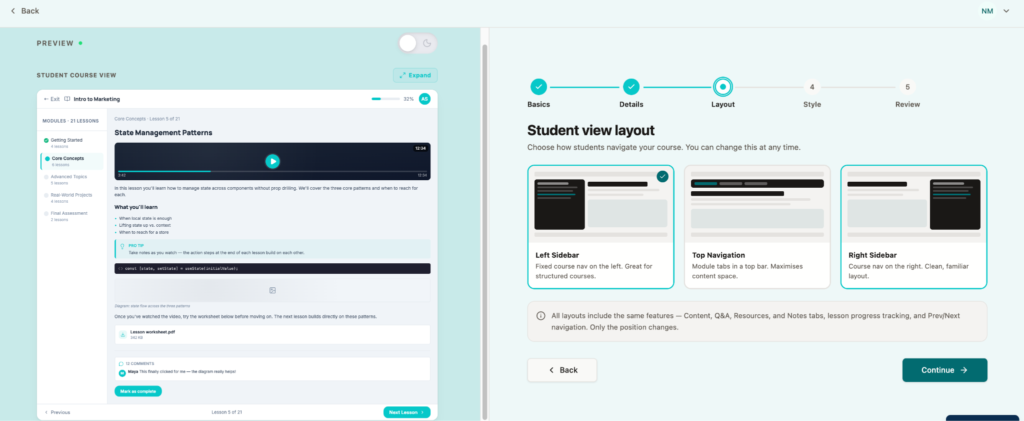
Next, you’ll want to choose a layout for your navigation – how students will be able to switch between lessons within your course. The options are Left Sidebar, Top Navigation, and Right Sidebar.
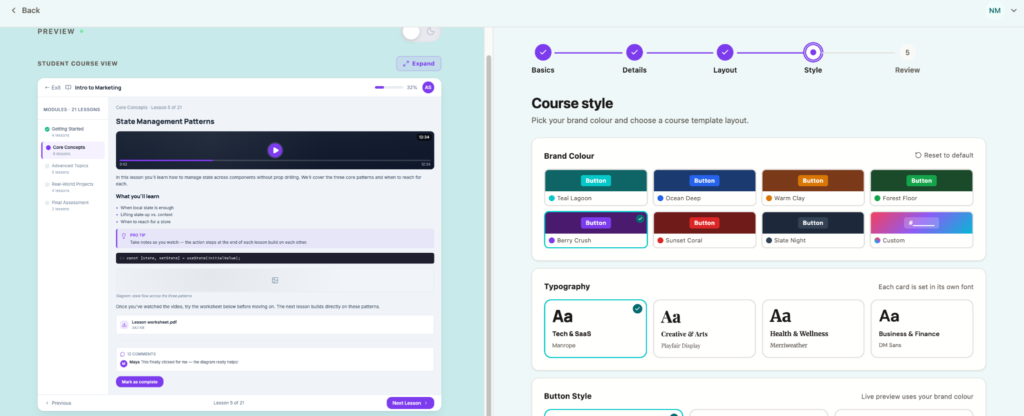
The Style tab is where you can adjust default colors and styles, fonts, and button shapes.
Finally, you’ll have a chance to review and adjust all of your course settings before
You’ll then be taken to the course editor, where you can start by clicking “Create Content” or “Add Module” to start building out your course.
The Course Editor
Clicking “Add Module” within the left-hand sidebar will open a modal where you can name your first module.
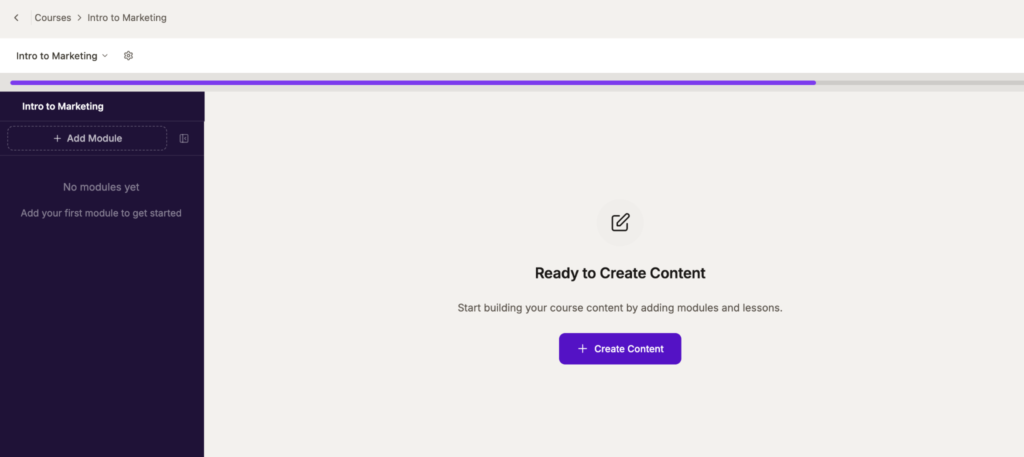
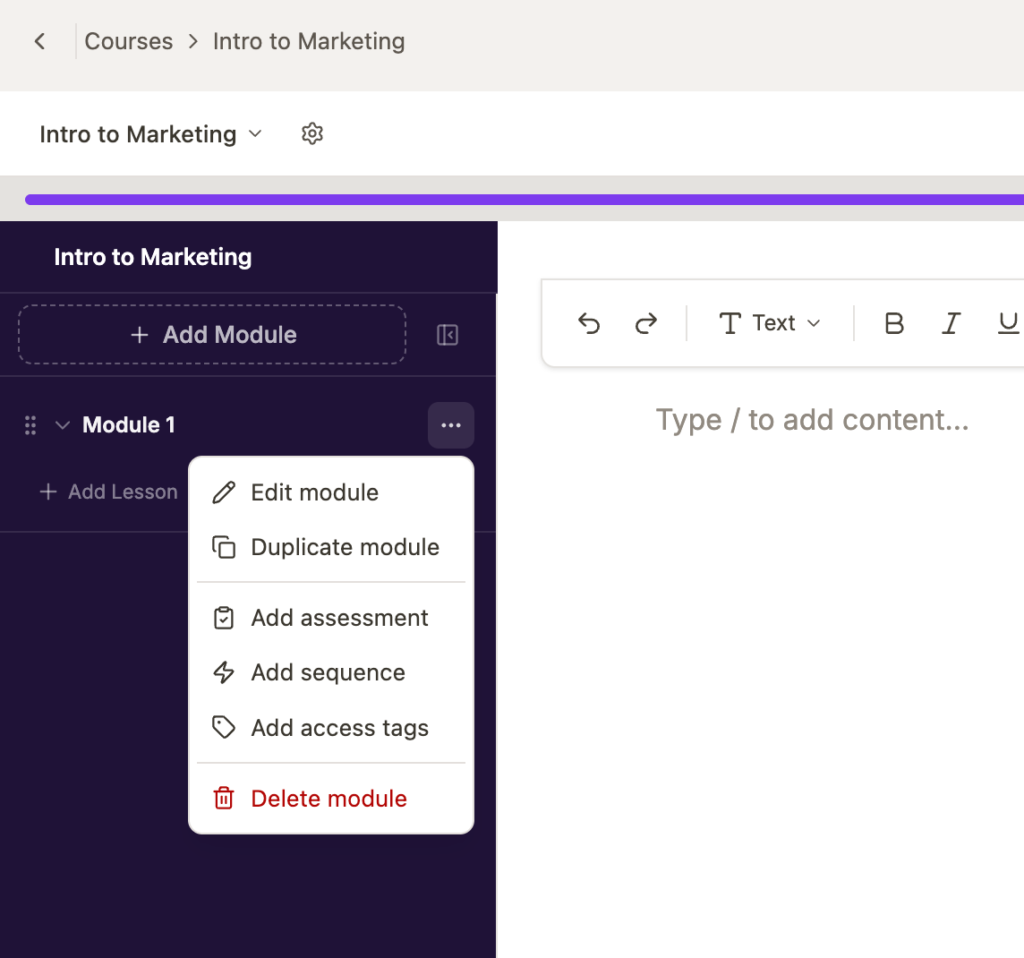
Clicking “Create Content” in the middle of your screen will automatically add a module to your course with the default name “Module 1”. This can always be changed by hovering over the module in the left-hand navigation to edit your module, as well as set any required tags or assessments.
The final step in setup is to add a lesson to your new module. Clicking the “Add Lesson” button beneath the module will open a setup modal where you can enter your lesson name, as well as choose the lesson type.
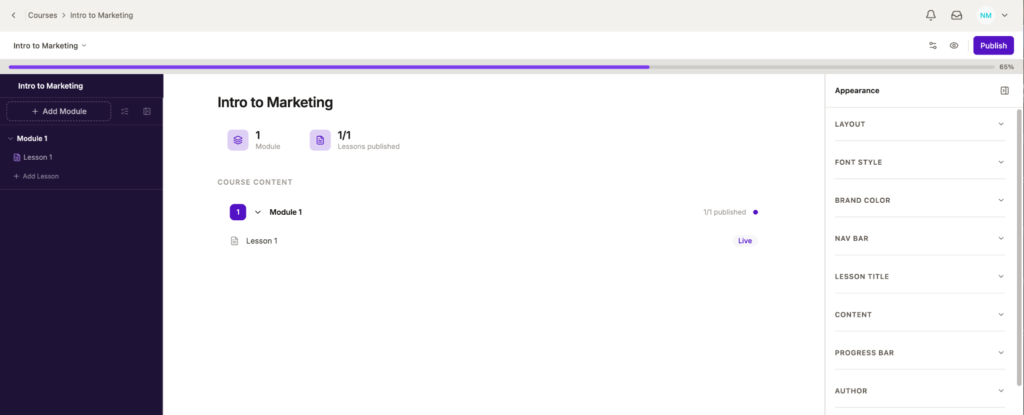
Once you’ve added a Module and a Lesson, the course editor will show a preview of those sections for editing. On the right-hand side of your screen, a panel will appear where you can adjust a number of display settings such as your Lesson Layout, Fonts, Colors, Navigation Settings, Lesson Title, Content Colors, Progress Bar Display Settings, and Author details (name, bio, and profile picture).
Building Your Course: Adding Lesson Content
The Lesson Type that you choose does not impact the layout itself, as every lesson in ThriveAcademy supports mixed content, so you can combine video, text, a PDF download, and a quiz all in a single lesson.
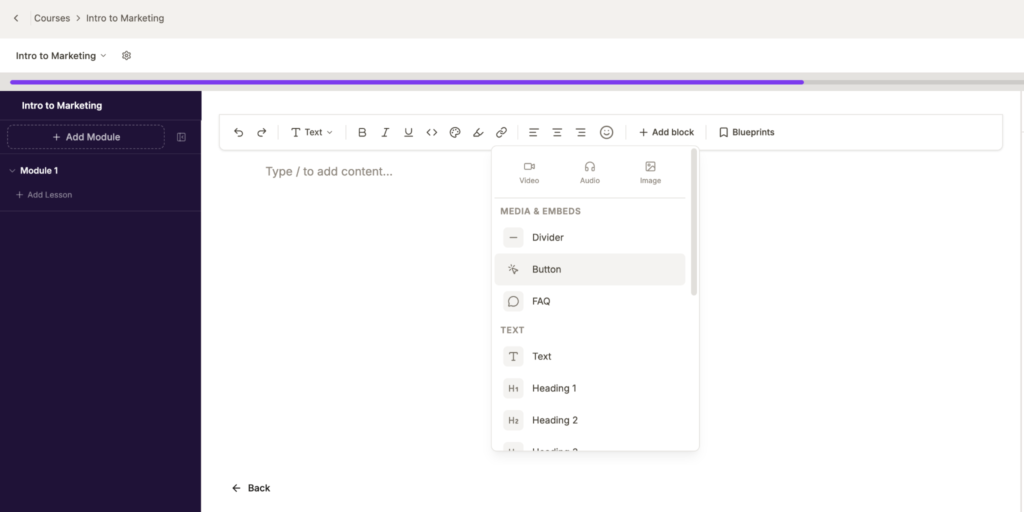
Click “+ Add Block” inside any lesson to add additional blocks, and drag them into the order you want using the handle on the left of each block.
You can add multiple content blocks to your lesson, allowing for easy content separation, re-ordering of information, and formatting control.
To adjust your content blocks, you can click the 6 dot block seen at the top left of your content block. From there you can delete the block, duplicate it, or re-arrange it.
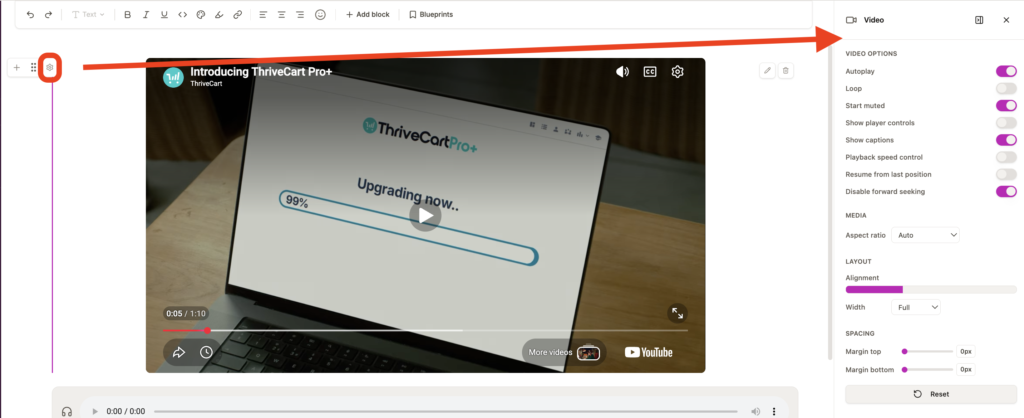
The settings gear beside each element opens settings specific to that element – such as video or audio playback settings. You can then adjust those settings in the right-hand sidebar to customize any of your elements.
Video Block
When adding a video block to your lesson, you’ll have the ability to choose how to embed that content:
- Upload a video file
- From your library of already uploaded video files
- YouTube, Vimeo, or Wistia — paste your video URL and the player renders inline
Your video element will show that video name, as well as an uploading progress bar in the bottom right corner to detail that videos upload progress. Once uploaded, your video will show a preview right within the editor and uploaded video will also be available via your Video Library for future use.

Audio Block
Select an Audio block to attach the URL for your recording. You can optionally add a text transcript that displays alongside the player. The audio player includes playback speed controls and supports background playback on mobile — students can lock their phone or switch apps and the audio continues playing.
Image Block
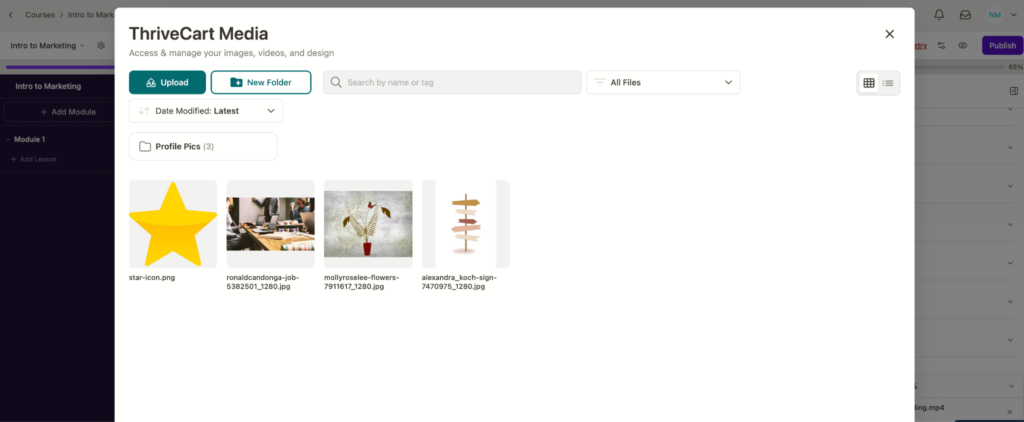
Access images via your Media Library, or paste an image URL to upload that image directly into ThriveAcademy.
Your Media Library is where you can upload your images, search to locate an image based on its file name, and even organize your images into folders for easy storage.
Full width images will be added to your lessons, but can be sized down if you like, just make sure to upload high-resolution images.
Text Block
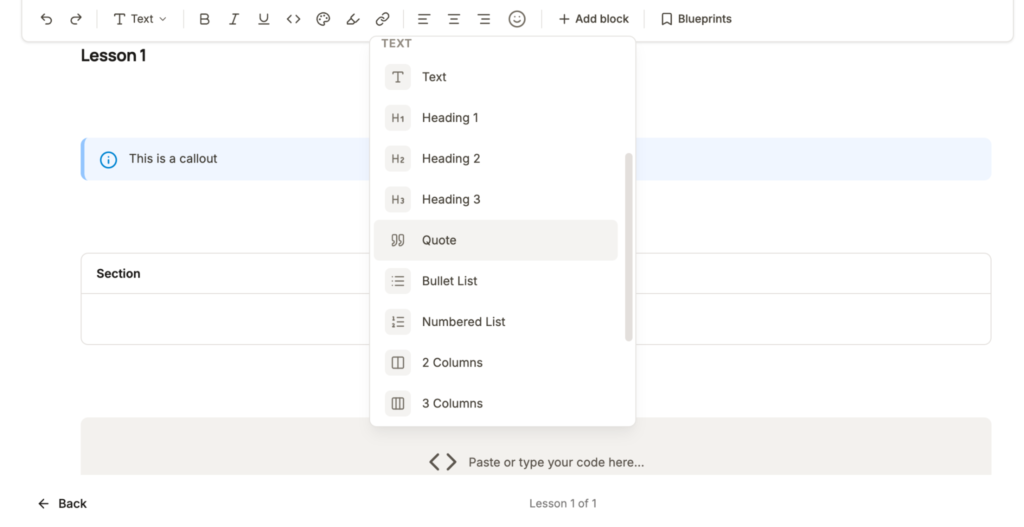
Add a Text block to use the rich text editor, which supports headings, formatting, links, images, and code blocks. Lesson completion fires when a student has scrolled to the bottom and spent at least 30 seconds on the page — so skimming doesn’t count as complete.
There are a number of different text block styles to help you format your lesson, including your normal text blocks, heading blocks, bulleted lists, numbered lists, columns, callouts, sections, as well as code blocks to display code in your lesson.
File Downloads
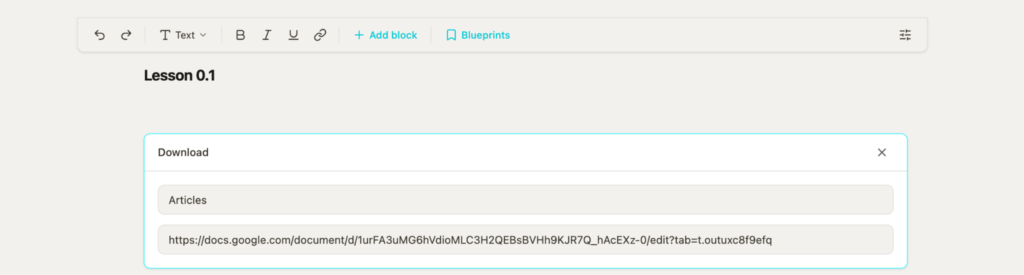
Add a “Download” block to attach the download URL for PDFs, documents, or any downloadable resource.
Alternatively, you can always embed the content (for example scrollable PDF content) using embed code from your file host and placing that custom script into your lesson using the Custom HTML element within the course builder.
FAQ Block
Add an FAQ Block to set Questions and Answers to Frequently asked questions.
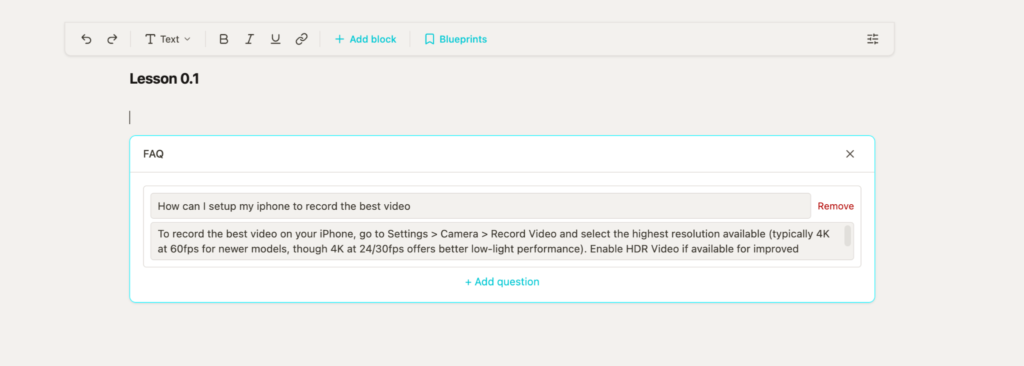
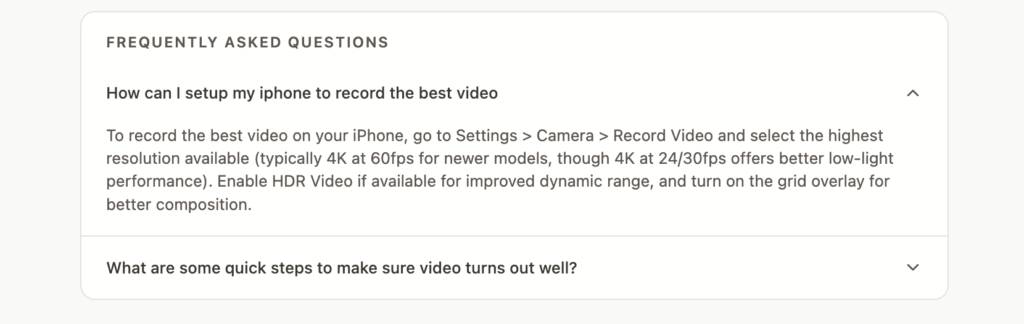
On the front-end, students will see all of your questions with dropdowns to open the answers one at a time.
HTML Element Block
The HTML Element Block supports custom script via CSS or HTML code to insert something into your lesson page. Make sure that any custom code you’re entering here has been thoroughly tested and
Blueprints
Not sure which block to add, but have a lesson format in mind? Blueprints will help guide you and automatically add the best block for your needs as a jumping off point to get you started designing your lesson content.
Adding Quizzes and Assessments
Per-Lesson Quizzes
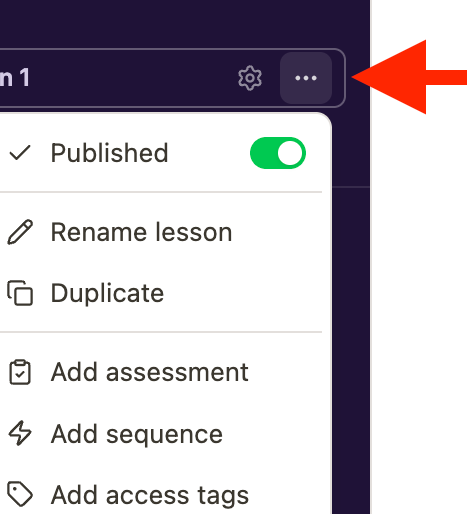
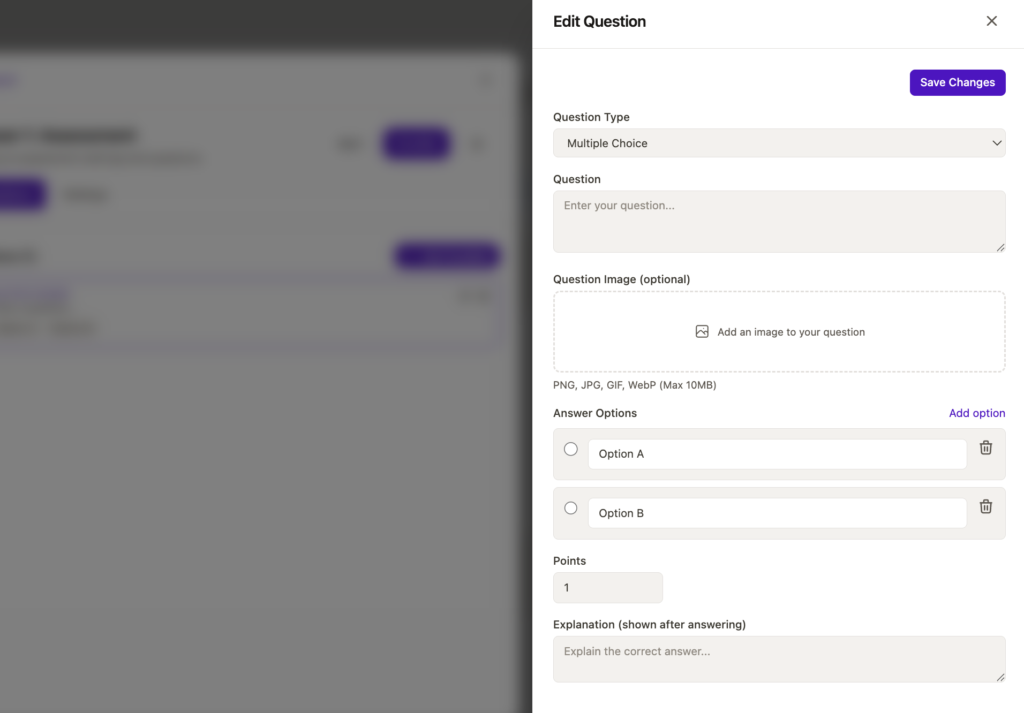
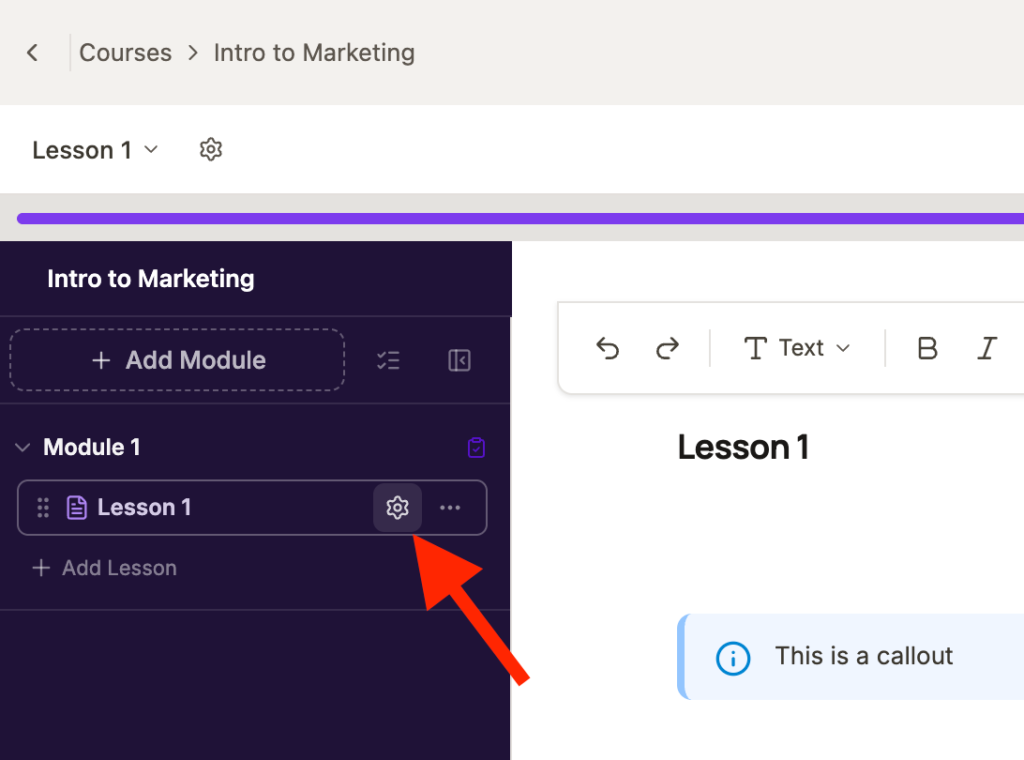
Add a Quiz block to any lesson, or enable it via the lesson dropdown on the left-hand side and choose “Add Assessment”. A modal will appear where you can customize quiz questions and settings.
Four question types are available:
- Multiple Choice — one correct answer
- Multi-Select — multiple correct answers
- True/False
- Short Answer — keyword matching
Set your questions and answers, upload images if desired, set points earned for getting the specific question right, and whether an explanation will show once the question has been answered.
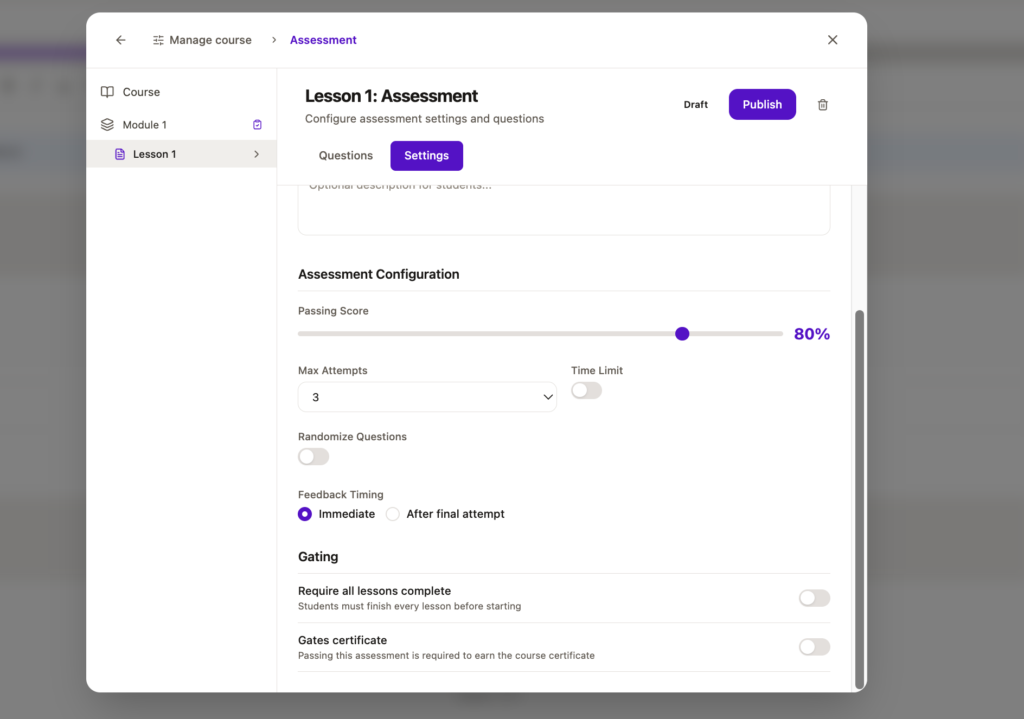
Under the “Settings” tab, you’ll be able to set the overall quiz settings, such as what the pass mark is, whether there is a time limit to complete the course, and any gating rules.
| Setting | Options |
| Pass Mark | Percentage (default 80%) |
| Attempts Allowed | 1, 3, or Unlimited |
| Time Limit | Optional, set in minutes |
| Feedback Timing (when explanations are shown) | Immediate / After Final Attempt |
| Randomize (shuffle) Questions | Yes/No |
| Require all lessons complete (Assessment can only be taken once course has been completed in full) | Yes/No |
| Gates Certificate (Pass is required to earn course certificate) | Yes/No |
| Require pass to continue (pass is required to move onto the next lesson) | Yes/No |
When a student submits a quiz, it is graded instantly and their score, pass/fail status, and per-question feedback are shown inline — no page reload. If they attempt multiple times, their best score is stored across all attempts, not the most recent. If the quiz is marked as Required for Lesson Completion, the lesson stays locked until the student passes.
Lessons with a quiz attached show a ✓ indicator on the lesson card in your course outline.
Course Settings: Certificates, Drip Content, and more
To access your course settings, head to the filter option in your top navigation menu:

Click into “Course Settings” to access a full list of course-specific settings such as:
- Content – Set your course category, difficulty level, and language
- Visibility – Set your course to draft, published, or disabled
- Quiz Defaults – The default course pass percentage, attempts, and time limit can be set here – but any settings added within the course directly will override these settings
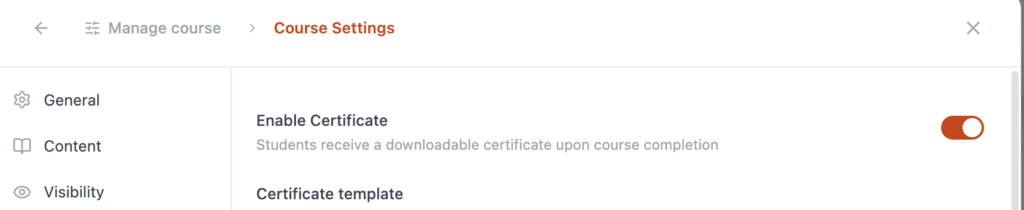
- Certificates – Choose a template to enable certificates that will be automatically sent to students on course completion
- Community – Enable or disable whether student progress is added to the activity feed
- Downloads – Rules for lesson-specific file downloads
- Drip Scheduling – Choose rules for dripping content
- Manual Overrides – Grant or revoke lesson access for specific students
Enable and deliver Certificates
Under Course Settings > Certificates, you can choose from a number of pre-designed certificates that will be delivered to a student on course completion.
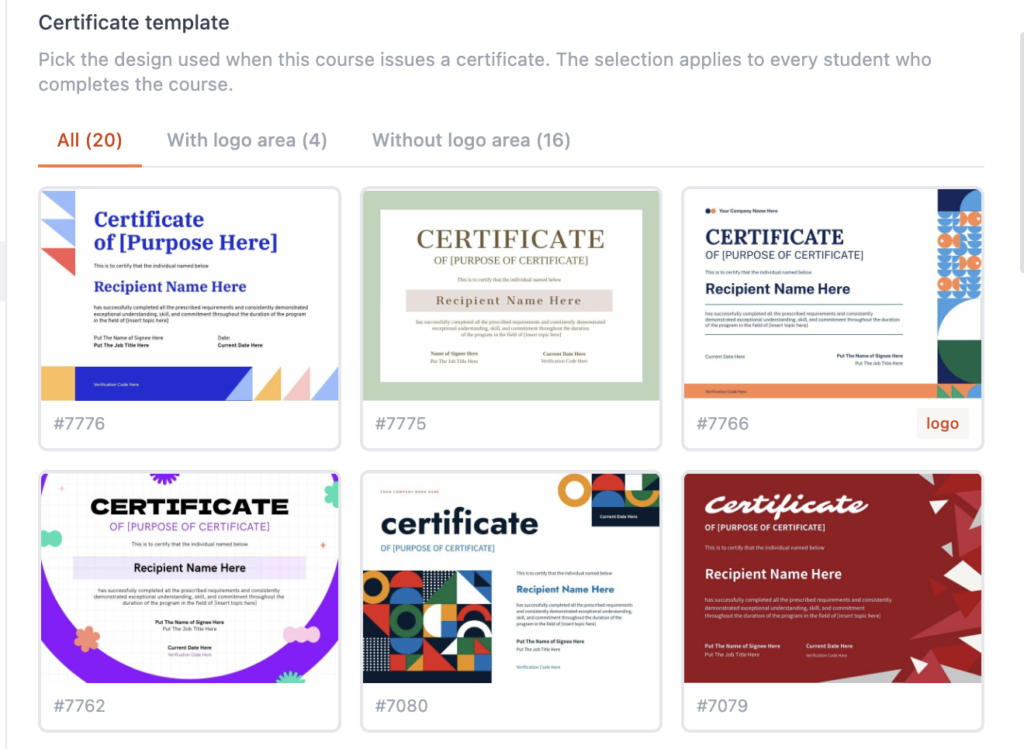
Once you’ve chosen a template, make sure to enable the certificate:
Certificate delivery happens automatically once enabled, and students can download the certificate from their profile.
Finally, set the completion threshold (when the certificate is sent) to either 100% or 80% of course completion, or if they pass the final assessment.
You can also set your company and signee name, as well as your color pallet for borders, titles, and underline of the signee name.
Setting Up Drip Content
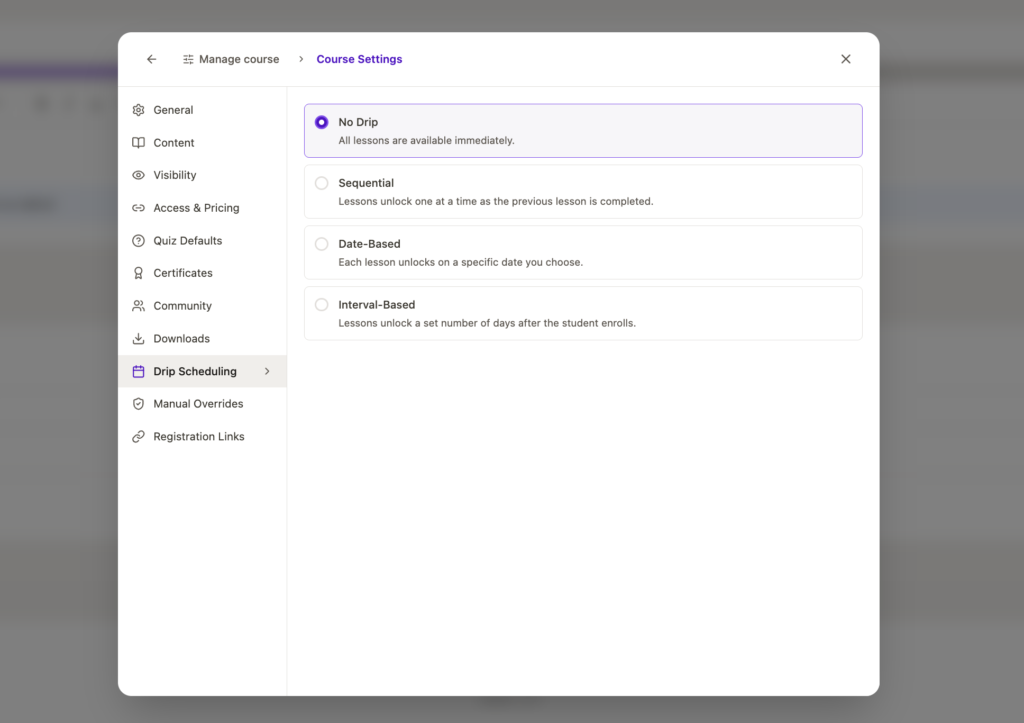
Drip scheduling controls when your modules and lessons become available to students after enrolment. Navigate to Settings > Course Settings > Drip Scheduling to configure.
Within Drip Scheduling settings, there are four drip types available:
| Drip Type | How It Works |
| No Drip | Immediate Access. All content unlocks on enrolment (default) |
| Sequential | Each lesson unlocks only after the previous lesson is completed (no configuration required) |
| Date-Based | Content unlocks on a specific calendar date (you can choose a specific date from the calendar picker) |
| Interval-Based | Content unlocks X days after a student enrols (set the number of days for each lesson/module) |
Students who attempt to access locked content via a direct URL are shown the locked state and unlock condition.
You can also manually override the drip schedule for individual students — useful for cohort members who need early access. Manual overrides can be set in Settings > Course Settings > Manual Override > Grant Access, where you can search for a student and grant manual access to specific content.
Drip Techniques in action:
- Use Interval-Based drip (e.g. one module per week) to keep students on pace and reduce overwhelm — it also spreads out the support load for you
- Use Sequential drip if you’re wanting to make sure that students are completing each lesson before skipping forward in your course content
- Use Date-Based for cohort-based programmes where everyone needs to progress at the same pace
Tag-Based Access Control and Course Gating
Tag-based access lets you gate specific modules or lessons so only students who hold the right tags can access them. This is the most powerful way to manage tiered memberships, product bundles, and upgrade paths — all from within a single course.
To set tag requirements, open a module or lesson’s settings in the course builder and navigate to Student Access in the right-hand settings panel that opens.
When setting Student Access to “Specific Students”, an additional settings panel will open for Access Requirements, where you can add tag(s) that students must have in order to access that specific lesson/module.
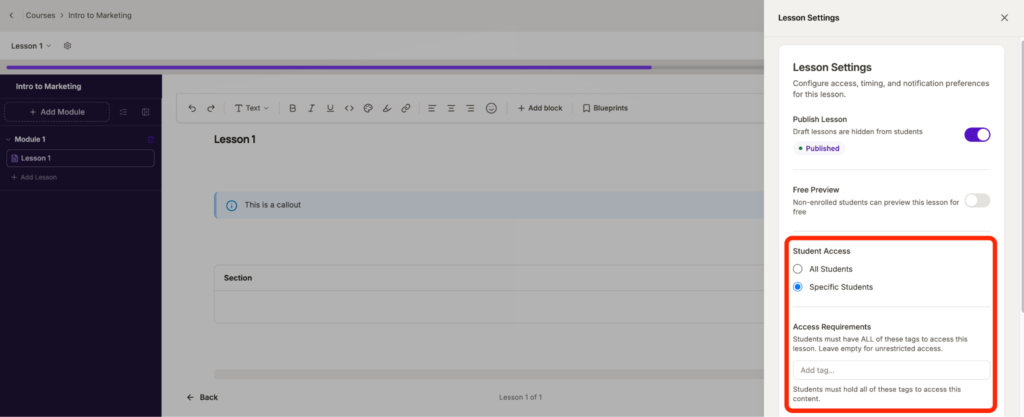
If setting multiple tags, students must hold all specified tags to access the content (AND logic). A maximum of 10 tags can be applied per community.
Tags are applied automatically to students when setting your product linking access. Students will see newly unlocked content immediately without needing to log out and back in. You can also create sequences to grant tags to student profiles based on community or course actions, and tags can also be granted from the students profile as well.
When tags are removed from a student’s profile, any associated gated content is revoked automatically.
Sequences
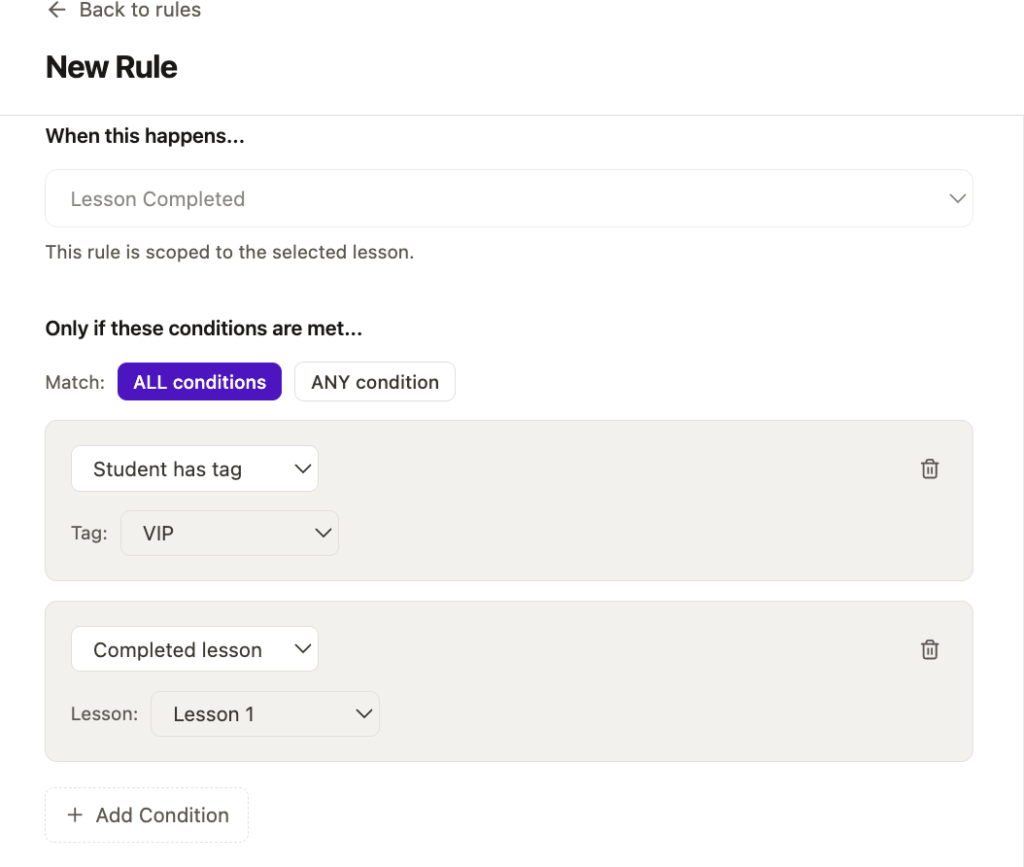
Sequences unlock actions that can be triggered based on students’ completion within your course. Triggers are scoped to the specific lesson or module that you’ve selected as part of the sequence editor window, and Triggers include:
- Lesson completed
- Module completed
- Course completed
- Assessment completed
- Tag applied
- Tag removed
- Content unlocked
You can then set conditions for when the sequence triggers, such as whether the student:
- Has a tag
- Completed a lesson
- Completed a module
- Enrolled after a specific date

You can also set multiple conditions, such as if a student as a specific tag AND/OR has completed a specific lesson.
Actions include:
- Grant Access (lesson/module content within the same course)
- Revoke Access
- Award XP
- Create Feed Post (content to be customized when creating the sequence)
- Apply Tag
You can set a single trigger, but multiple conditions and actions. For example, when a student completes a lesson they could be awarded XP, given additional lesson/module access within the same course, and your pre-written message could be posted in your communities activity feed for the course.
Connecting Courses to ThriveCart Products and Community Spaces
There are three ways that students can access your course content:
- Once they purchase a product specifically required to access a Course Space or overall community.
- Once they are granted access to the overall community your course is in, and meet the unlock rules to your course space.
- If they are manually given access to your specific course when created as a student (see more on manually adding students here).
Integrating your ThriveCart Account
In your overall account settings, you can integrate your ThriveCart account to ThriveAcademy and set Product Access Mapping rules.
To link ThriveCart, head to Settings > Integrations:
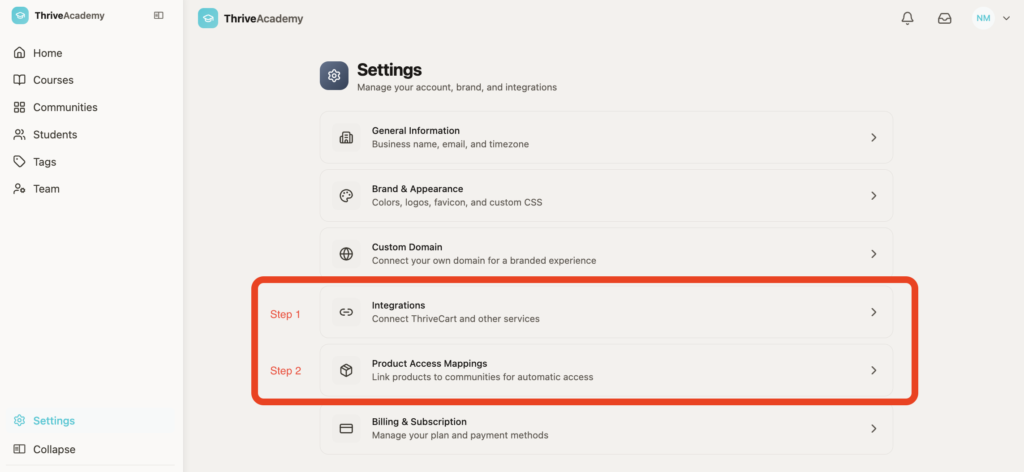
In Step 1, you’ll be directed to link your ThriveCart account to ThriveAcademy by logging into your ThriveCart account (if not already logged in) to authorize the connection.
To link a community, space, or space category:
In Step 2 you can choose a specific product and then select “+ Create Mapping”
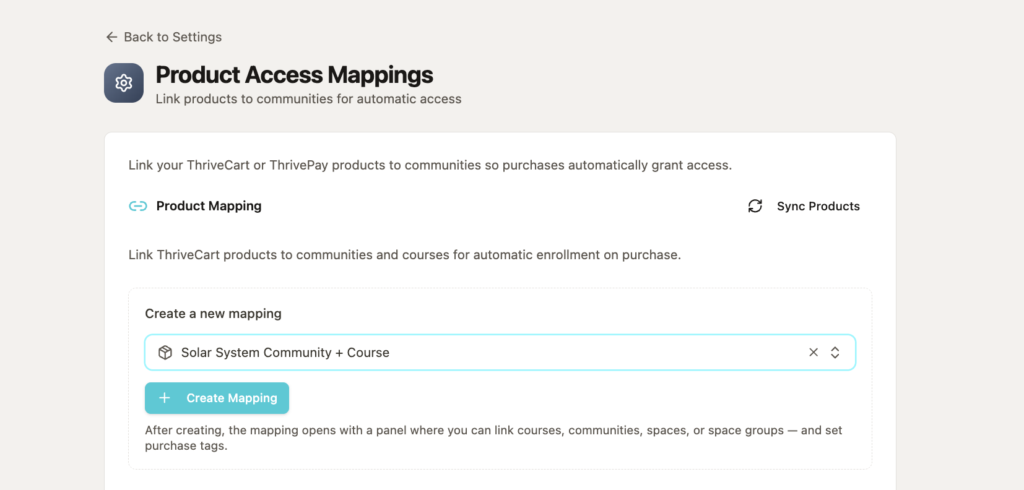
From the modal that opens, select “+ Add target”, where you can then choose whether that product unlocks specific communities, spaces, or space categories.
Once you’ve selected your community, or space(s) that your product grants access to, you’ll see them listed below your product name.
Under the “Tags” tab, you can also then choose whether anyone purchasing this product receives a specific tag that can be used in additional access settings throughout your course and/or community setup.
For course only access:
If you’re not looking to utilize the community environment for your courses, you can still set a product purchase to grant access to courses by heading to Course Settings > Access & Pricing, where you can then link a product to grant access to your course.
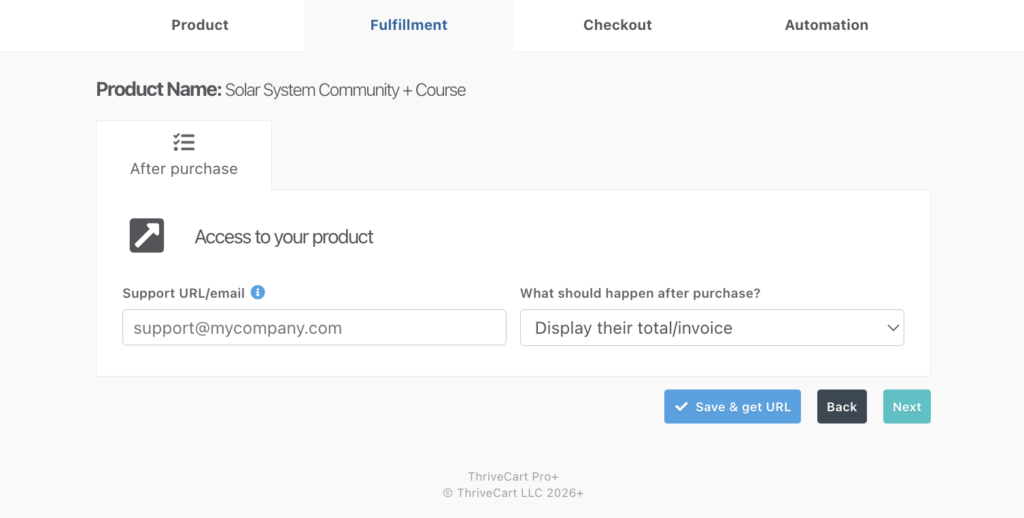
Setting your ThriveCart Product Fulfillment
There are not currently any additional requirements to set fulfillment within your product settings, as the integration linking and product mapping is handled entirely on the ThriveAcademy side.
From your ThriveCart product, you can set the fulfillment method to “Display Invoice” seen here:
Granting Course access via a locked Community Space
You can have multiple courses available within a community, but set specific courses to be locked unless they purchase an additional product. To make a course available inside your Community, navigate to your desired Community’s Dashboard > Spaces > + > New Space.
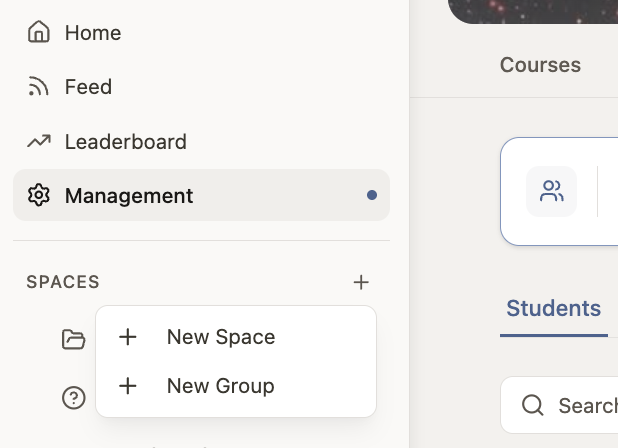
Choose a Course Community Space, and select the course you want to link.
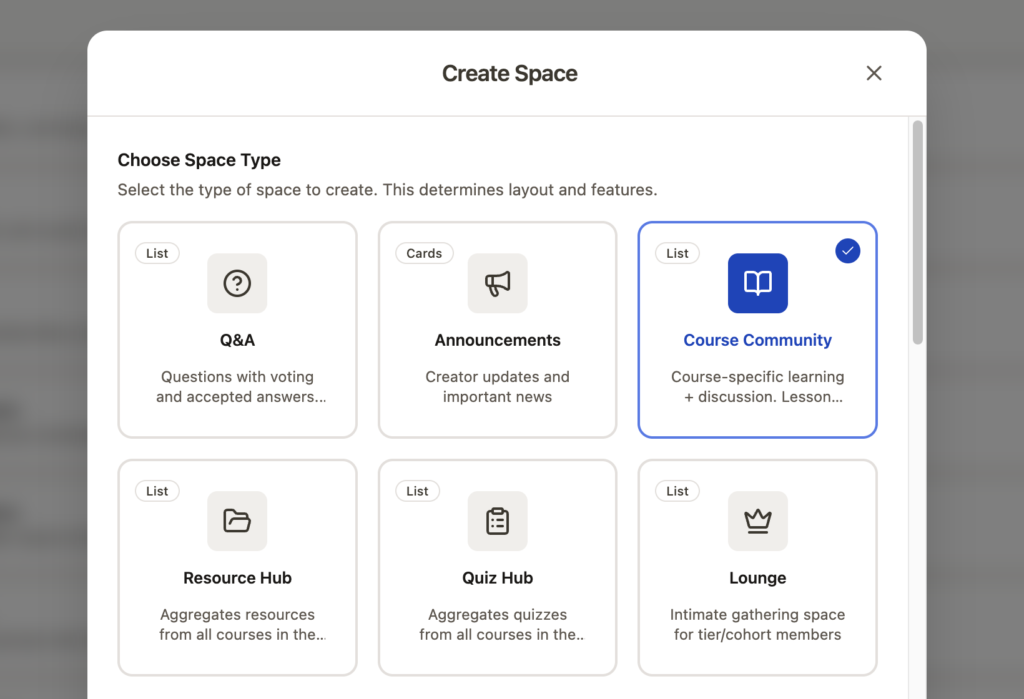
- Set the space to Public if it’s accessible by anyone who has access to your community.
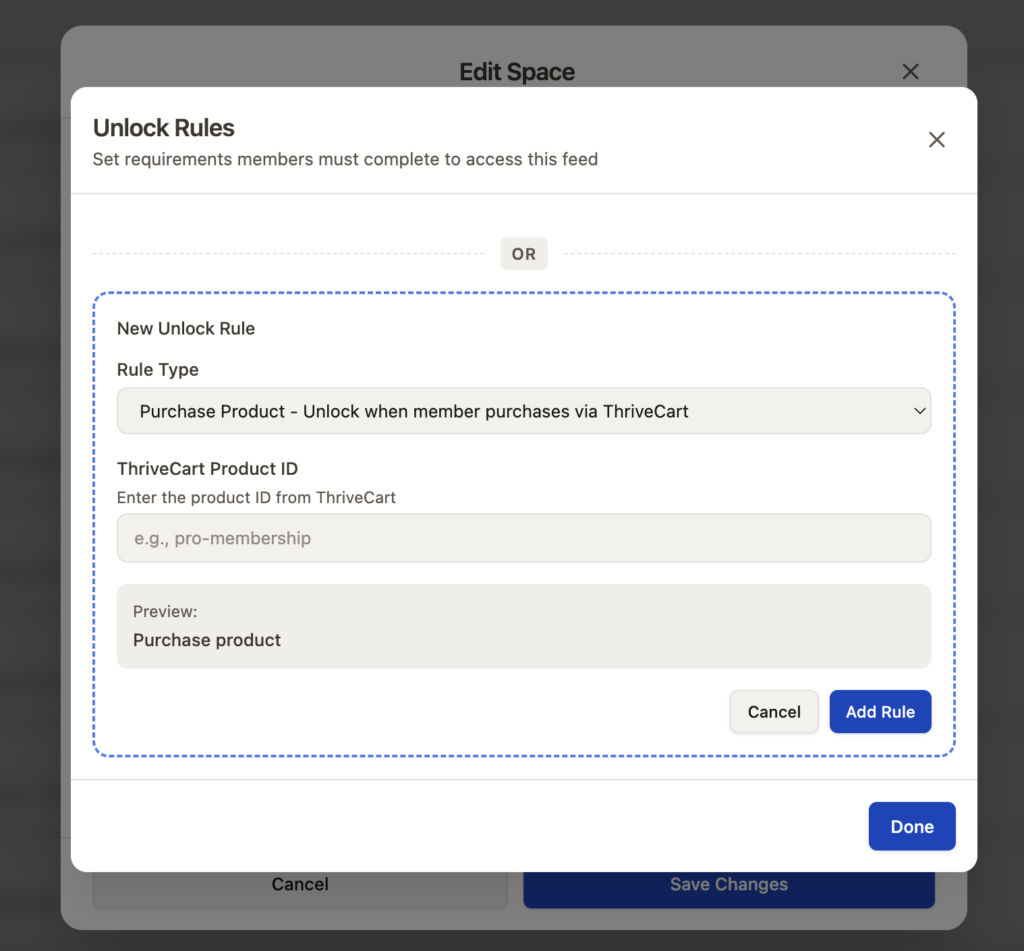
- If this is an additional course in the Community that requires a second purchase, set the space to Private or Unlocked.
- Set Unlock Rules to link your ThriveCart product (if linking your course to purchase)
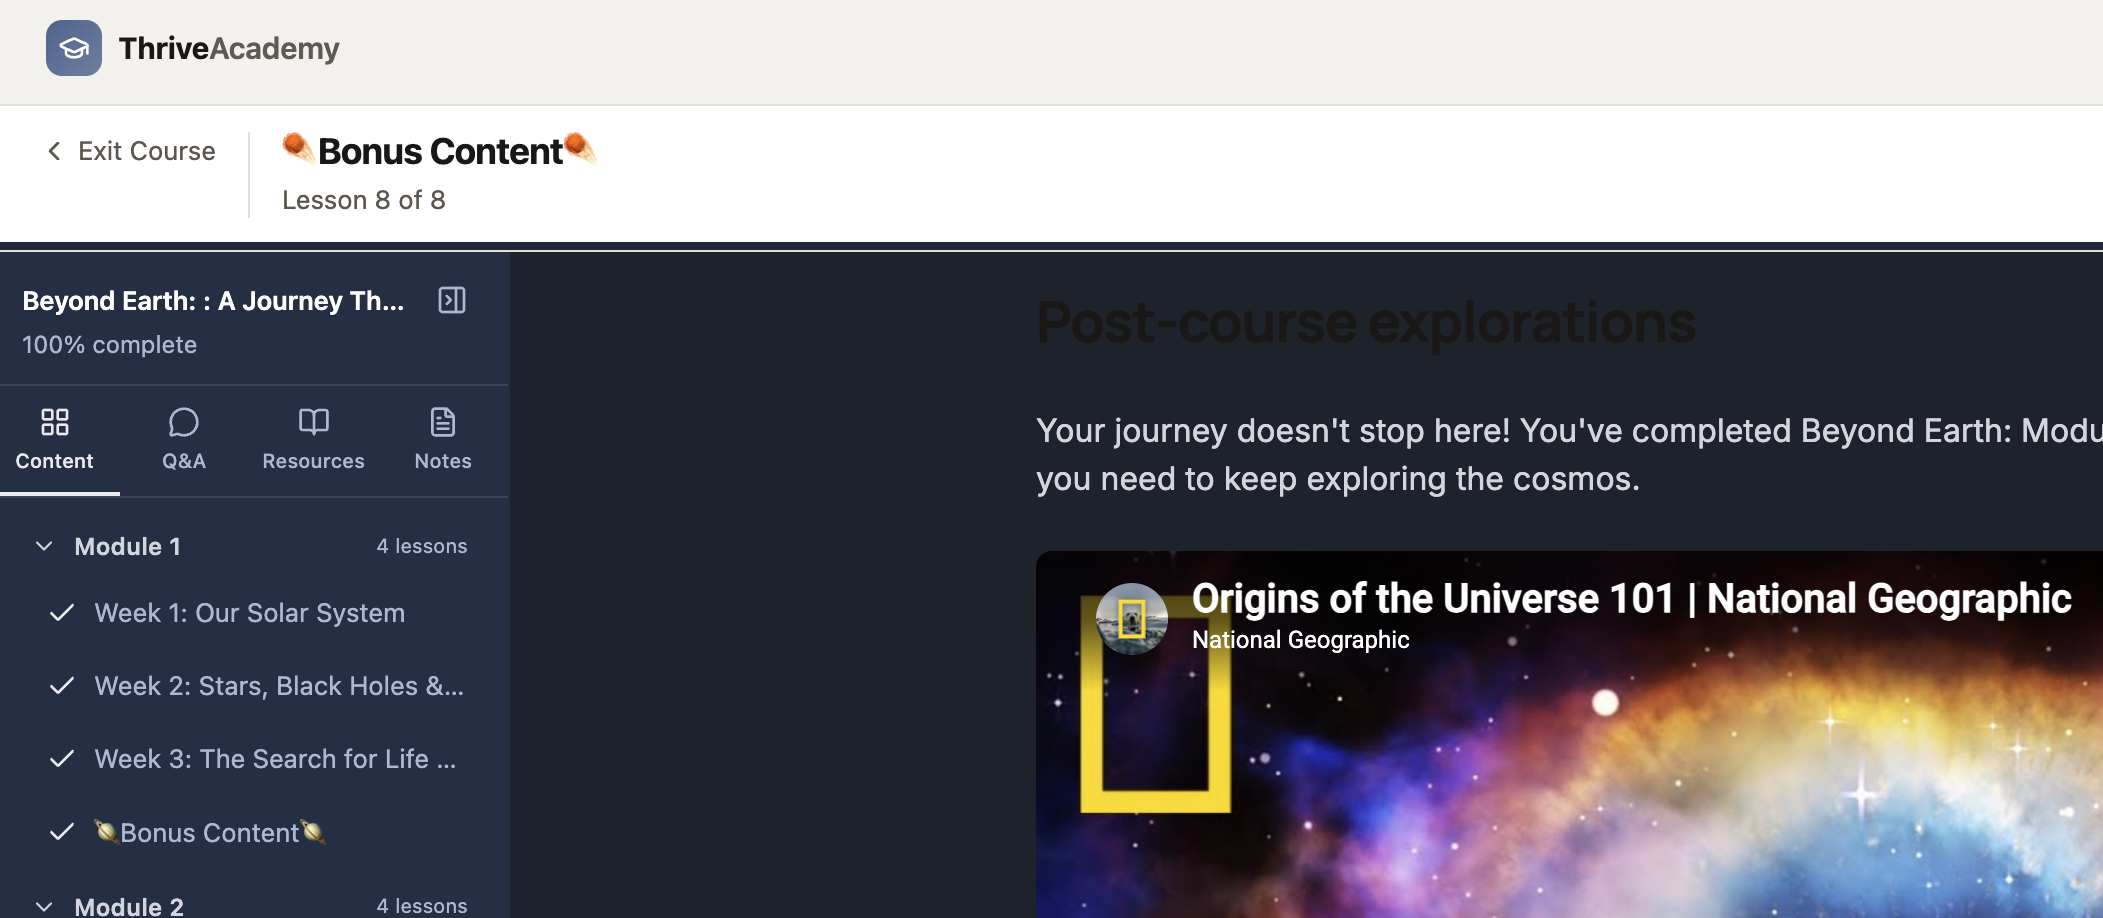
Once linked, students see your course under My Courses in the Community sidebar. The lesson player renders inside the Community wrapper — the sidebar, leaderboard, and Space navigation remain visible throughout every lesson, keeping students connected to the broader community while they learn.
If unlock rules are set on your Community’s Course Space, every purchase of that product automatically enrols the student, creates their Community account, and grants access to the course. Tags set in product linking are applied at the same time, triggering any tag-gated access rules you may have configured.
Student Experience
From the moment a student is given access to a course or a community with course space, the path to their first lesson takes under 60 seconds:
- ThriveAcademy creates the student’s account
- A magic link email is sent automatically — one click and the student is authenticated into your Community
- A short onboarding overlay guides the student through their profile and first steps, awarding XP for completion
- The student clicks “Start Learning” from their Community feed and lands on the course landing page — first module auto-expanded, first lesson ready to open
Inside the lesson player, the Community sidebar stays visible at all times allowing the student to access the course Q&A, resources, as well as their personal course notes.
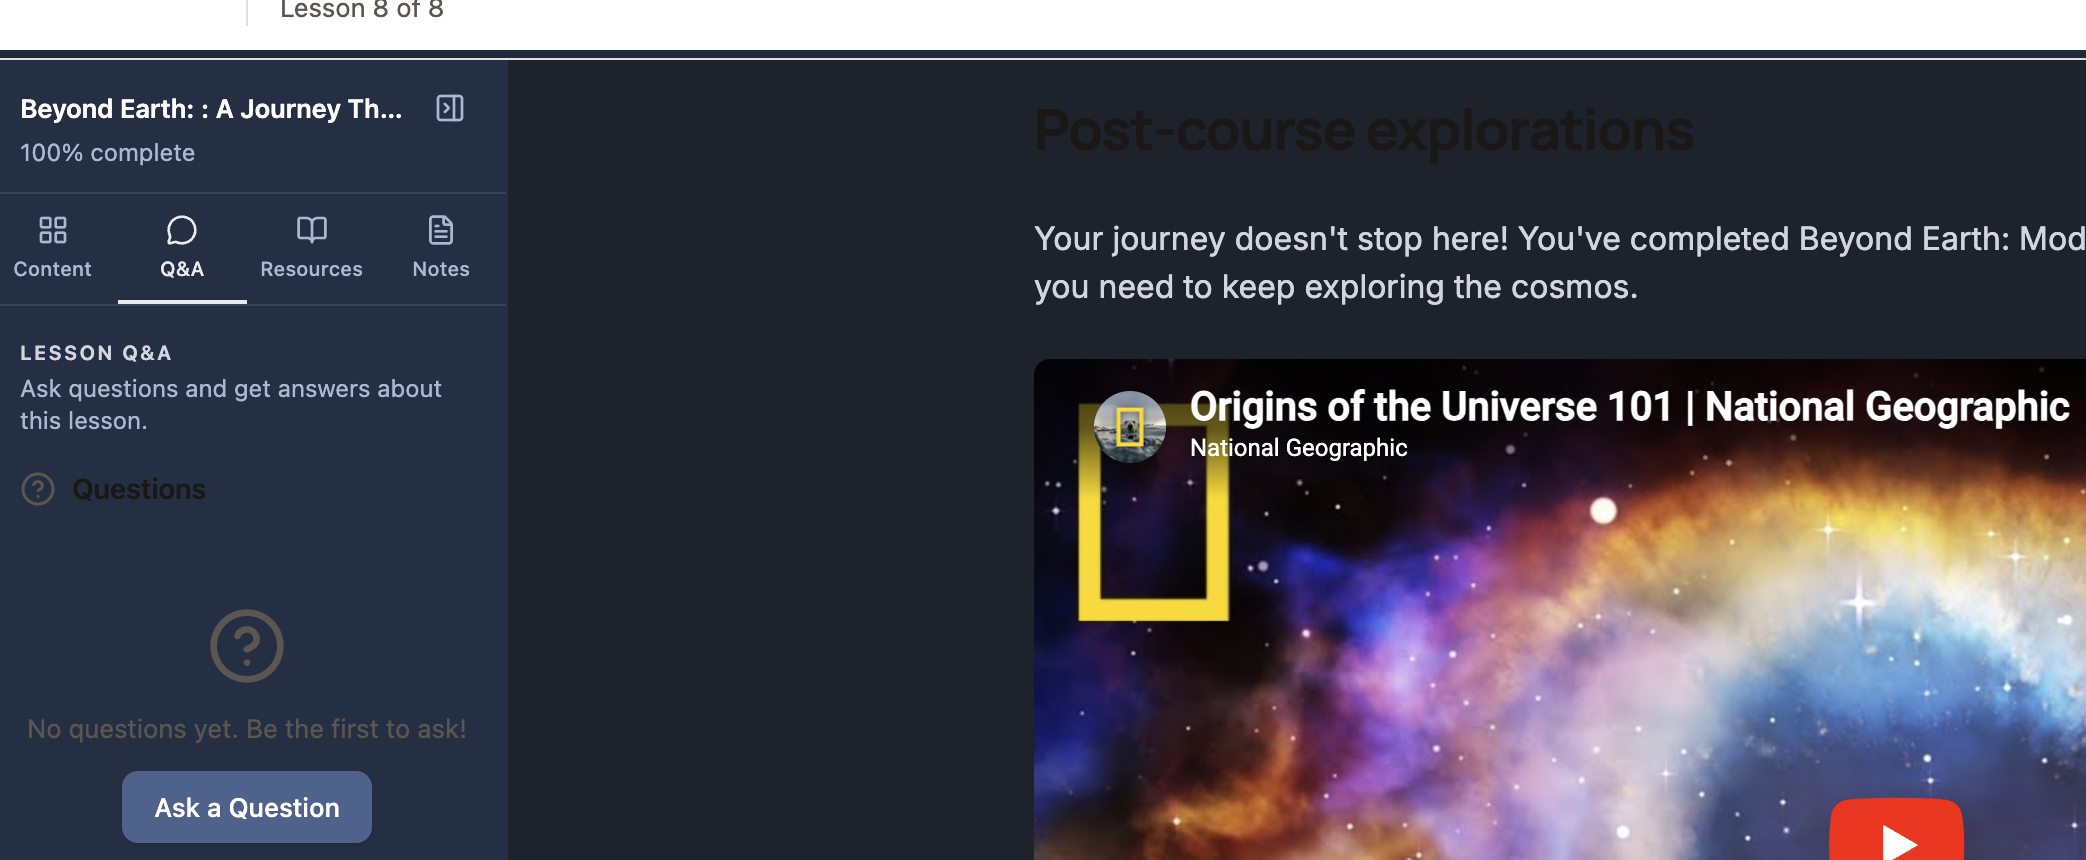
The Content section in the sidebar shows the student’s course progress bar, the full module list, completed lessons with tick marks, and any locked lessons with their unlock conditions.
Completing a lesson awards XP and posts a completion update to the Community activity feed (if configured in sequences), so the rest of the group sees progress happening in real time.
Frequently Asked Questions (FAQs)
- Q: Can I add lessons to a course after it has been published?
- Q: What happens to student progress if I delete a lesson?
- Q: Why is a student that should have access to a lesson seeing it as locked?
- Q: Can I use quiz-based access and drip scheduling on the same course?
- A: Yes, and they work independently. If a quiz requirement and a drip schedule conflict on the same lesson, the quiz requirement takes precedence — a student cannot proceed until they pass the quiz, regardless of when the drip rule says the next lesson should unlock.
- Can I run multiple courses inside a single Community?
- A: Yes. There is no limit to the number of courses you can link to a Community. Use Course Collections to group them into categories, and use tag-based access rules to control which students see which courses within the Community.