Simulating a customer funnel checkout flow is a vital step in ensuring a seamless purchase experience for your customers. Before going live, running test transactions allows you to confirm that your products, payment processors, and automations are all functioning exactly as expected.
Whether you’re testing a single product or an entire upsell sequence, ThriveCart checkout testing helps troubleshoot checkout errors by identifying potential issues with payment flows, taxes, fulfillment, or integrations before they impact real customers—saving time, revenue, and reputation. ThriveCart makes it simple to test your entire funnel from start to finish, so you can launch confidently knowing your checkout is secure, optimized, and conversion-ready.
In this test mode setup guide, we’re going to look at how you can test your checkout and see the flow from a customer’s perspective, without processing any live payments.
This article is broken down into several sections:
Setting your product to test mode
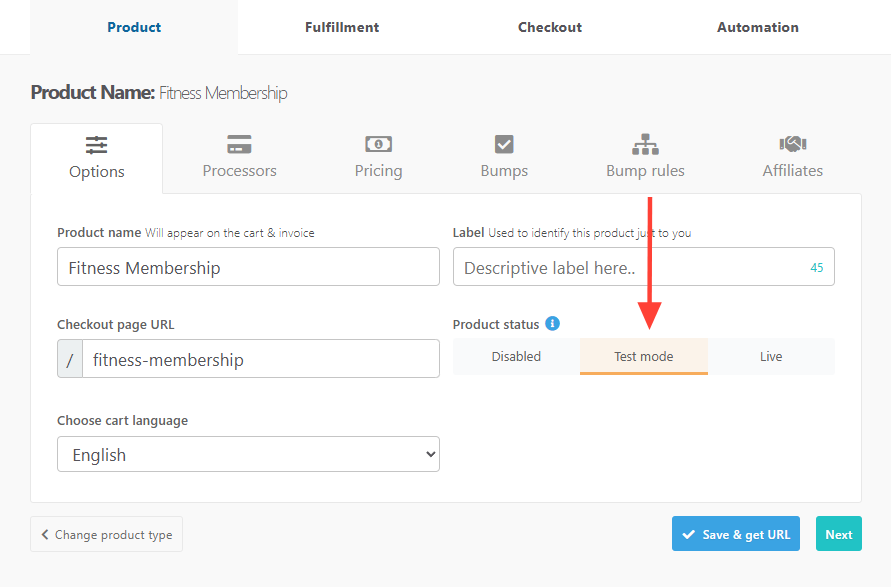
In your product settings, there are 3 statuses that can be set:
- Disabled
- Test mode
- Live
This can be set in your product settings under the first Options tab.
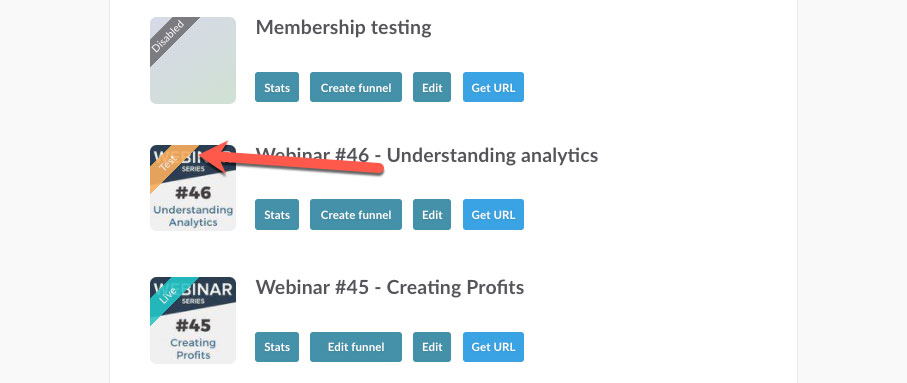
So that there is no confusion between a product in test mode and one that is ready to take real payments from customers we have a few easy identifiers.
1. The Product status is shown in your dashboard across the product thumbnail.
2. A banner across the top of your checkout page.
If you go to a cart URL you will easily see when it’s in test mode as you will have a clear orange banner running along the top warning you that no live payments will be processed.

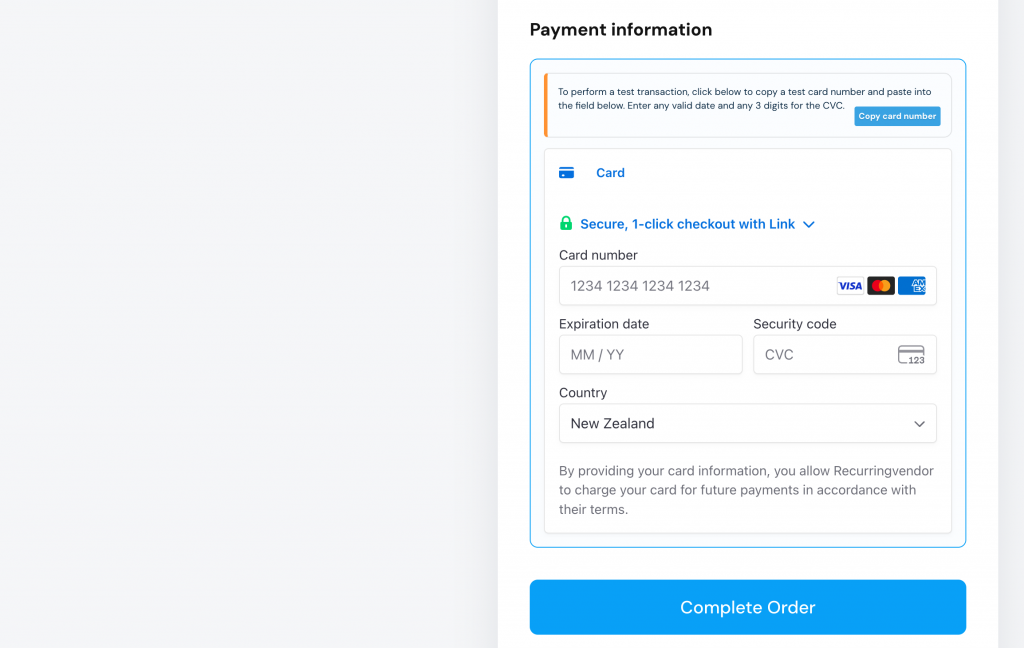
3. Payment fields will be either yellow or have a test mode warning above them.
If you’re using Stripe, you can copy the test card number (4242 4242 4242 4242) and any future expiry date and 3 digits for the CVC.
You can find other test card numbers for different results directly at Stripe here if you’re wanting to troubleshoot checkout errors and other different scenarios on your checkout (like 3DS scenarios or declines).
Testing your funnel
To test your funnel and go through as a customer would, you can simply complete your details and then click the complete order button. You will then either be taken through to the next step in your funnel (an upsell or success page).
Remember, this is a sandbox checkout process, but things like your automation rules, membership fulfillment, Zaps, and webhook notifications will also trigger. This lets you check all your integrations and make sure everything is working as you expect.
The email address you enter as the ‘customer’ will receive a receipt for the payment so you can see how the notifications to your customers appear.
Viewing test orders
By default, your dashboard only shows the live transactions and data in your account. However, you may wish to view the test mode order you process for scenarios where you want to process test refunds, or manage subscriptions to test further functionality around Zapier, webhooks, and other integrations.
To enable a selector in your transactions area, simply head to your Settings > Account-wide settings > Finances area and then change the option to toggle between modes.
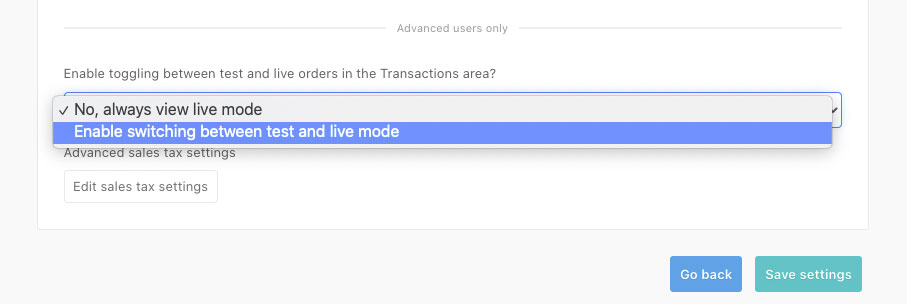
Once that’s been saved, if you head over to your Transactions area and check the bottom of the page, you will see that there is a selector to switch between live and test orders.
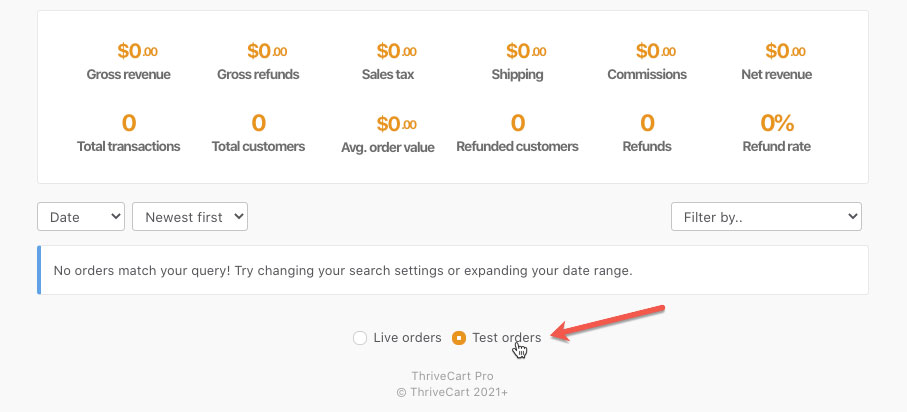
The system will change to an Orange color to symbolize your review of test mode data.
Final testing
Once you’ve completed all your testing and you’re happy that everything is set up exactly how you want it, you’re going to make the product live so you can start taking real payments from customers.
We always advise completing a live test as well through each processor as this helps ensure there are no issues on your payment processor’s end that wouldn’t be identified in test mode. This will allow you to troubleshoot checkout errors and verify the payment flow.
You can always reduce the price of your product down to a single dollar (or your currency equivalent), test with a live payment, and then put your price back to the correct price for your product. Or, you could use a coupon to bring the price down, then simply disable the coupon when you are done testing.
When testing with a live payment make sure you actually make a payment and don’t make the product free. If the product is free – then no real payment processing actually occurs.
We also don’t recommend doing all your testing whilst your product is Live as you’ll have all that data muddled with your live stats and transactions which can distort the real figures.