Offering a one-time payment option is a simple and effective way to attract customers who prefer upfront purchases over recurring billing.
With ThriveCart’s one-time payment setup, you can quickly create single payment products that are essentially a “pay in full” option to streamline the buying process, reduce friction, and boost conversion rates. It’s a great way to simplify your sales funnel and deliver a straightforward, hassle-free checkout experience.
How to create a one-time payment
To create a single payment product, you will need to head to the Product tab and click the Pricing tab to set your pricing options configuration.
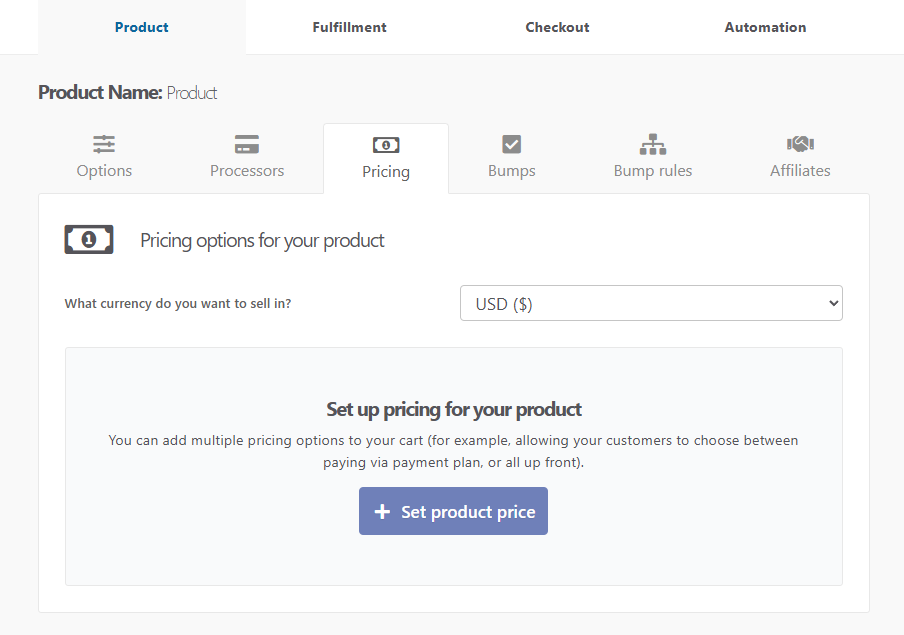
Currency – First, you will choose what currency you wish to charge your customers in for this product.
Next, we need to add our pricing option(s). We’re looking at creating a single payment product, so we’ll click the Add product price button.
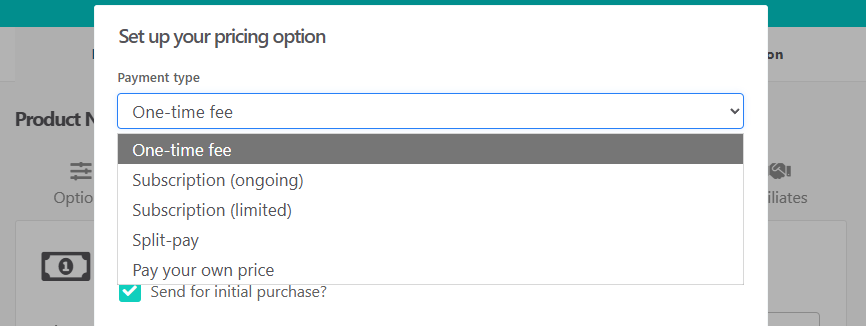
This will open a modal window where we can select our payment type of one-time fee
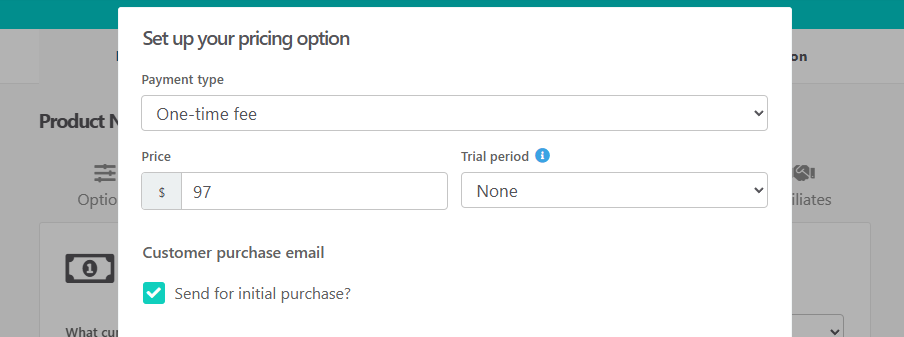
1. Price
Here we can enter our price for our product, and you can use whole numbers or decimals in the price field.
Please note that if you’re in a country that typically uses a comma to separate your price, then you will need to use a period in the price field. For example, if your price is displayed as 99,99€ then you would want to enter 99.99 in the price field. You do not need to enter the currency symbol for the price because this is taken from the currency field above.
2. Trial Period
If you’re looking to set a trial on your product, we have a dedicated article on trials here that can help you set this up.
3. Payment summary
Once you’ve completed your payment settings for your product, you will be given a clear precise breakdown of exactly what your customer will be charged. This is exceptionally helpful when dealing with other payment types, but also if you have set a trial in your one-time pricing options configuration.

4. Limit Quantity
You can choose to set a quantity limit for this pricing option so that it can only be used a specific number of times.
Once happy, you’ll want to click Next.

5. Set country availability
If you choose to restrict access for a pricing option to only customers in a specific region, you’ll be able to set this within your pricing option setup as well.
You’ll have a few options to choose from such as National, International Outside your location, Specific countries (to select which countries you’ll sell this price to), Specific US states, or you can choose Anywhere except to restrict to only the selected locations.

Once you’ve set your country restrictions, you’ll want to click the “Customer experience settings” button in order to choose what happens if the customer is excluded. You can display a message or redirect the customer to another page.

This is helpful if you want customers within the EU, for example, to purchase only products set to EUR and not purchase your USD products. You can block EU countries from seeing this product and automatically redirect them to your EUR-specific product.
6. Name this payment option
Here we can give our pricing option a descriptive name by changing the pre-filled text in the Name field with whatever you wish to name the pricing option (maximum 85 characters total). If you are planning on having multiple payment options on your checkout page, this is what will be displayed to the customer.

7. Allowing multiple purchases
If you enable this option, your customers will be able to add multiple quantities of this product to their order.
Finally, you need to click the Save button to save your pricing option.

Frequently Asked Questions (FAQs)
- Q: Can I set a trial on a one-time payment option?
- A: Yes! We have a great article covering free trials here, but when setting the trial period this will grant customers an automatic free trial as part of your ThriveCart one-time product setup.
- Q: Can I set a paid trial on a one-time pricing option?
- A: No, it’s not currently possible to set a today’s price as well as an additional price when setting a one-time pricing option – but you can set a subscription with a single recurring payment to achieve this.
- Q: How do I change the name that shows up for this product on invoice?
- A: When adding or editing a pricing option, you’ll be able to edit the name of it on the second stage in that pop-up window in the “Name this pricing option” field.
- A: When adding or editing a pricing option, you’ll be able to edit the name of it on the second stage in that pop-up window in the “Name this pricing option” field.