Level up your online courses by connecting your membership site to ThriveCart with the ThriveCart LifterLMS integration.
This seamless connection unlocks membership site automation, ensuring every new customer is instantly added to the right course or membership level without any manual steps. With flexible course enrollment setup, ThriveCart automatically grants access based on the products your customers purchase—giving you a smoother workflow, happier students, and a fully streamlined learning experience.
How to setup the ThriveCart LifterLMS Integration
In the video above, we look at how you can connect your LifterLMS site to ThriveCart so that you can automatically add customers to membership levels when their orders complete.
To enable LifterLMS, you will need to enter the below fields within ThriveCart:
- Your site name (the internal ThriveCart identifier in case you connect multiple LifterLMS accounts)
- Your WordPress site URL
- Your LifterLMS Consumer Key
- Your LifterLMS Consumer Secret
To access your key and secret, you’ll need to gather this from within your WordPress account.
- Head to LifterLMS > Settings
- Select Rest API
- Click Add API Key
- Set a description
- Make sure you select the admin user of your site
- API permissions need to be set to Read/Write
- Click Save
- You’ll be shown your Consumer Key and Secret
- In a new browser tab, open ThriveCart and head to Settings > Integrations > Membership Platforms > LifterLMS
- Copy/Paste your key & secret from WordPress into the fields within ThriveCart
- Click “Save this LifterLMS Site” to complete setup
What does this integration support?
When using ThriveCart to power your sales and sending customer information to LifterLMS, you will be able to
- Add customers to individual courses automatically when orders complete.
- Add customers to Memberships (multiple courses) automatically when orders complete.
- Revoke access automatically for single payment products when refunded.
- Revoke access automatically for subscriptions when cancelled.
How to add customers to LifterLMS automatically
To automatically add customers to LifterLMS when they buy your product, you will set this up under your products Fulfillment tab.
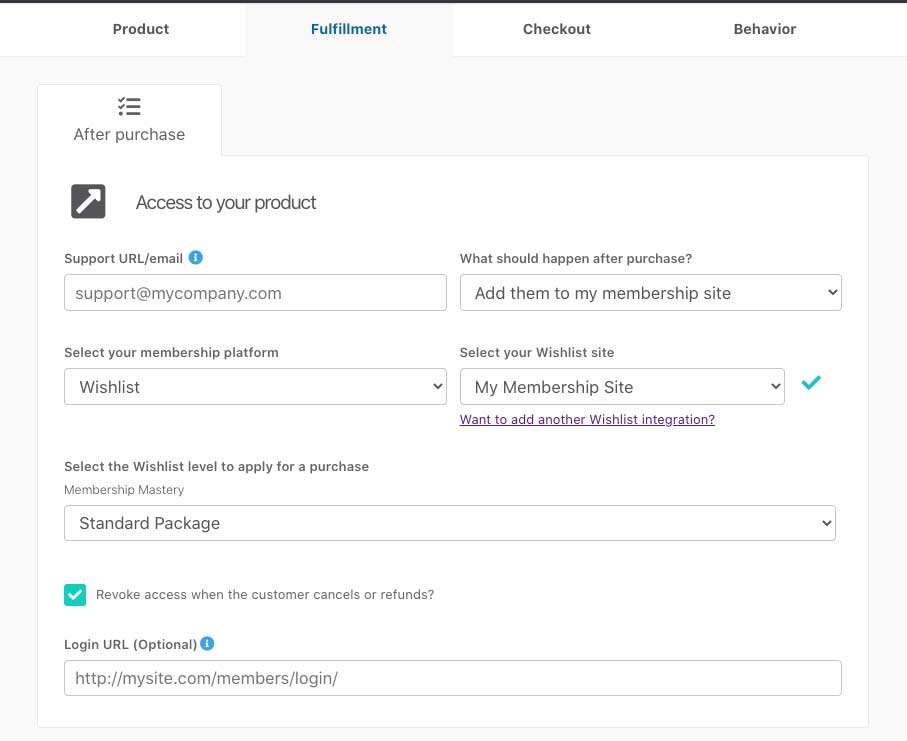
You will want to select the option to ‘Add them to my membership site’, followed by selecting what membership fulfilment you’re looking to use followed by what specific website for that platform.
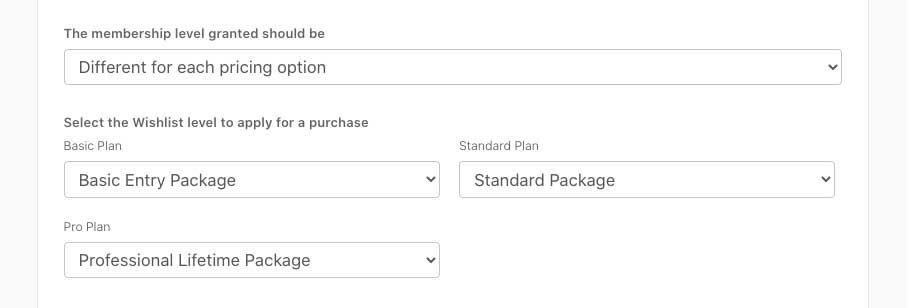
If you have multiple pricing/product options set up, then you can also choose to apply the customer to the same level for all pricing options, or set different levels for different options.
If you have a bump product enabled on your checkout, then you will also have the option to set what level you wish to apply to the customer should they purchase the bump offer.
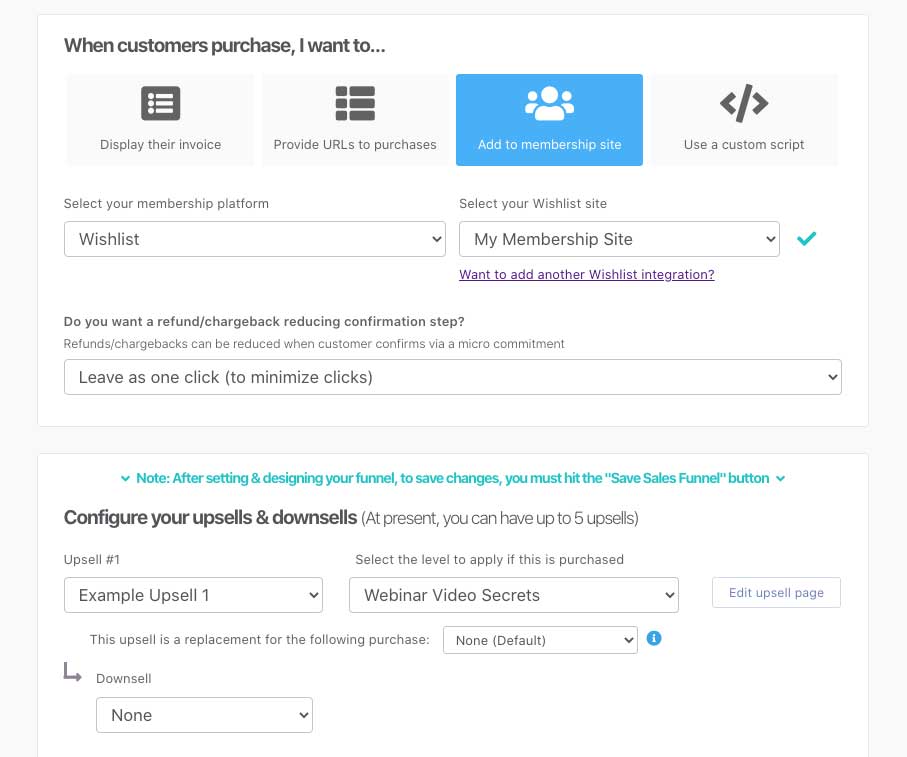
For your upsells, you will set the fulfilment under your funnel settings for the product.
How do customers get their login details?
After your customer’s order completes, ThriveCart will send your customer information to LifterLMS which will automatically have their account created, if they don’t already have one associated with the email address entered at checkout.
If the customer already has an account on your site under that email address, their new membership levels will simply be added to their existing account.
New users are sent an email with access information (which can typically be modified within your membership platform settings in their system).
WordPress looks to typically send welcome emails with login information only for new users. It’s worth noting that ThriveCart does not send the login details via email – this is sent directly from your website.
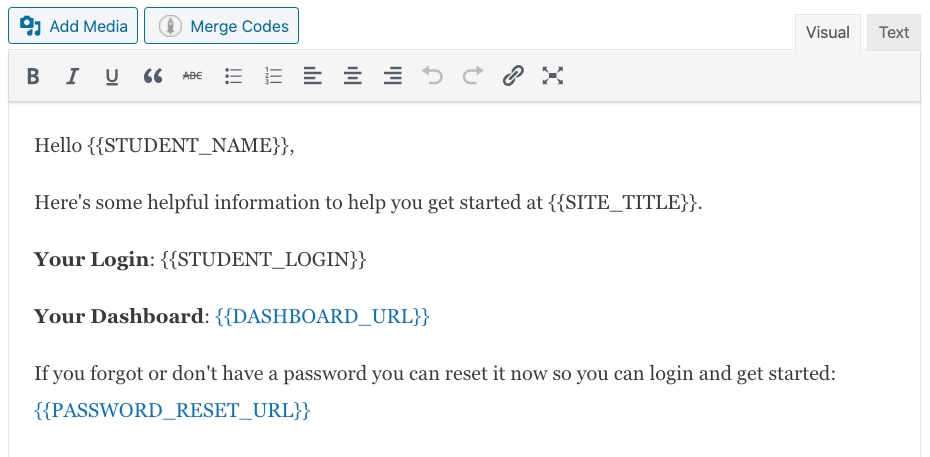
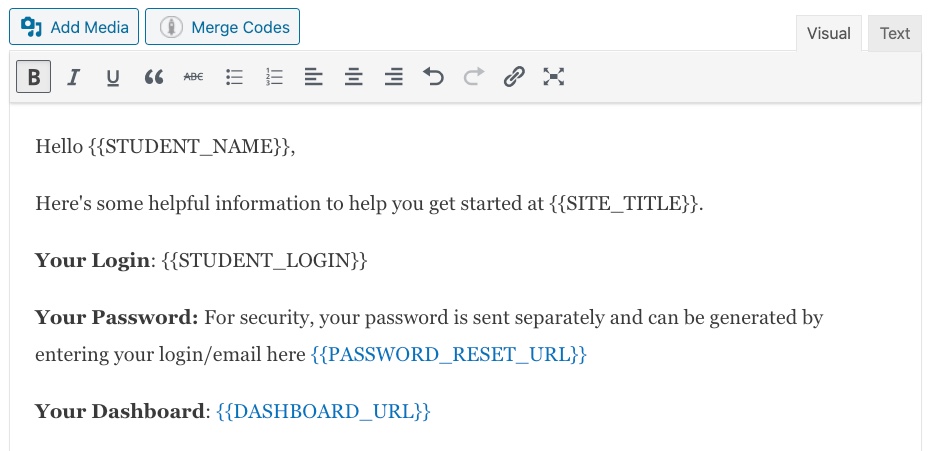
When new customers are added to your WordPress/LifterLMS site, they’ll automatically send the ‘welcome email’ to your customer. This email includes their login username, a link to the dashboard, and a link to set their password. We recommend tweaking the default email so that it’s clearer for your customers.
You can find this under your LifterLMS > Settings > Notifications > Student Welcome area in your WordPress site.
The default email:
We’d recommend maybe having something like this:
If your website is not sending this welcome email, check our general membership troubleshooting tips here.