Elementor is a popular WordPress plugin for building pages and theme. With Elementor Pro, you can easily trigger your modal or popup cart checkouts on your site.
To get started, you first need to create your element that will be used to trigger your popup checkout, that could be a button, image, or something that can have a link attributed with it.
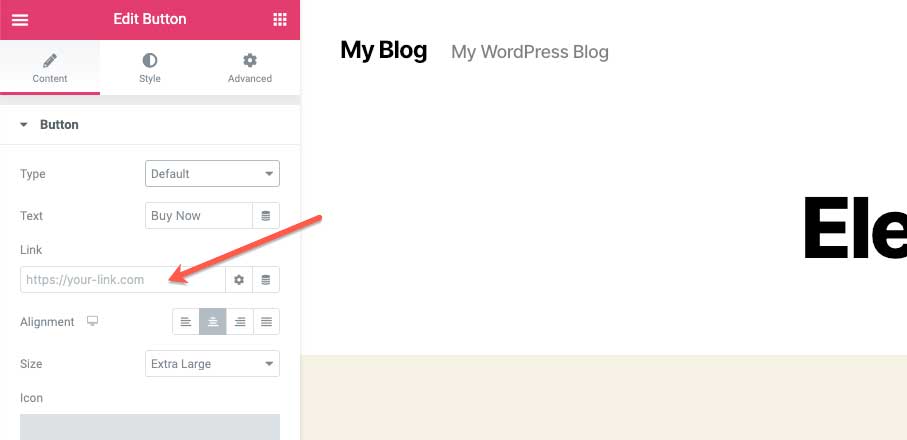
Step 1 – Set the link text
For this field, under the ‘content’ tab, you’ll want to leave this blank. Do not enter anything in this field.
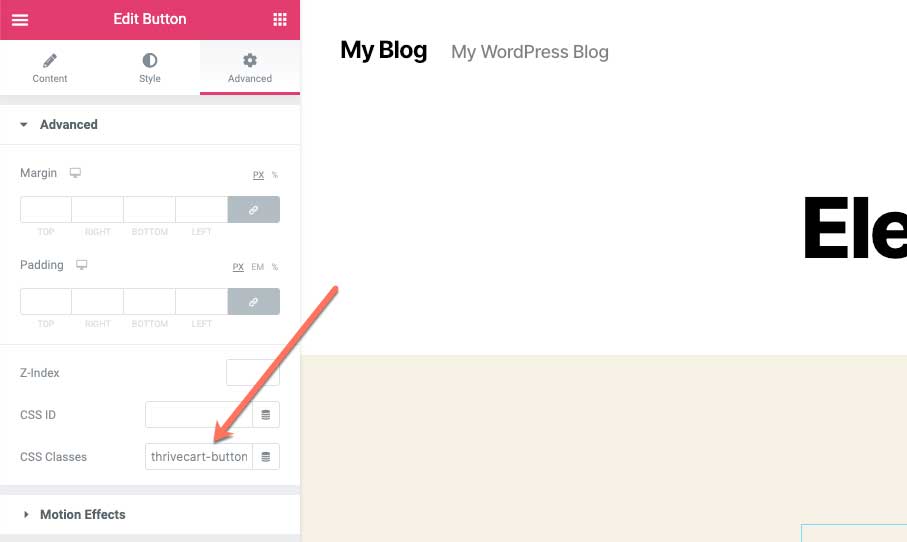
Step 2 – Set the CSS Classes
Under the ‘advanced’ tab you need to set the CSS Classes field to include thrivecart-button
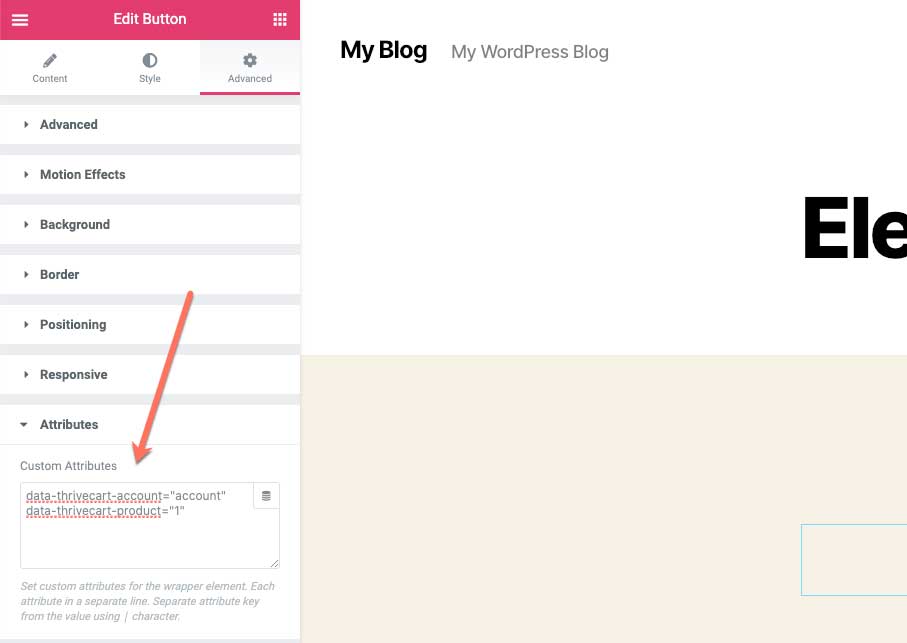
Step 3 – Set the Attributes
Under the ‘advanced’ tab again, you’ll need to head down to the Attributes section. Here we set the details about your ThriveCart Account (subdomain) and the Product ID that we’re requesting to load the popup cart.
Your ThriveCart Product ID can be found next to your product’s name, in the address bar of your browser when editing a product, or by looking at the embed code when you save your modal cart design.
data-thrivecart-account="account"
data-thrivecart-product="1"
Simply copy and paste the above into this field and replace ‘account’ with your subdomain and the product ID ‘1’ with your own product ID
Note: depending on your version of Elementor, you may need to format the above information as below:
data-thrivecart-account|account
data-thrivecart-product|1
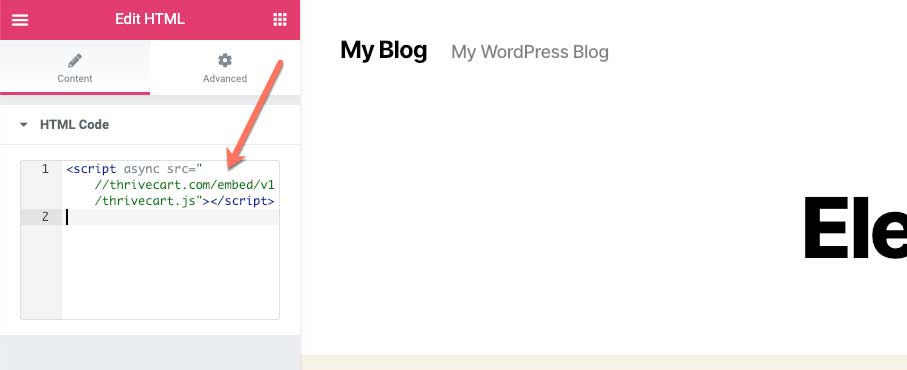
Step 4 – Adding the ThriveCart script to the page
Finally, the last thing we need to do is add the ThriveCart script to your page which allows the above to all work.
You’ll need to use a Custom HTML element on your page to add the script and then add the following code to your HTML widget.
<script async src="//thrivecart.com/embed/v1/thrivecart.js"></script>
Step 5 – Save your changes
Congratulations!y You’ve now set up your Elementor button/image/etc to launch your modal cart for ThriveCart.