Boost your AOV by 19% with Multiple Order Bumps
Your checkout just got smarter. Available exclusively for users with Stripe Connect+ enabled, Multiple Order Bumps in ThriveCart Pro+ allows you to add up to six digital order bumps per product, each strategically placed to boost conversions and personalize the buyer journey. Whether you’re selling online courses, memberships, or digital downloads, you can now upsell smarter, faster, and more efficiently, no external tools required
Your checkout page isn’t just the final step; it’s your most powerful sales opportunity. With Multiple Order Bumps, you can:
- Present complementary or premium offers right in your checkout.
- Personalize bump offers using conditional logic based on customer selections.
- Copy bumps across products to save time when building funnels.
- Deliver a smoother checkout with a scrolling interface optimized for multi-bump layouts.
With Pro+, you’re no longer limited to just one bump per product. Now, you can add up to 6 order bumps per digital product—each one an opportunity to increase revenue, present relevant offers, and enhance your customer’s experience at checkout.
You can even use Conditional Logic to show or hide bumps based on customer selections—helping you create a smarter, more personalized path to purchase.
Example: If a customer selects Bump #2, you can automatically hide Bump #3 and show Bump #4 instead.
Other time-saving features include:
- Copy bumps from one product to another to speed up funnel builds
- A scrolling UI to support multi-bump setups with a smooth checkout experience
Setup
How to Create Multiple Order Bumps
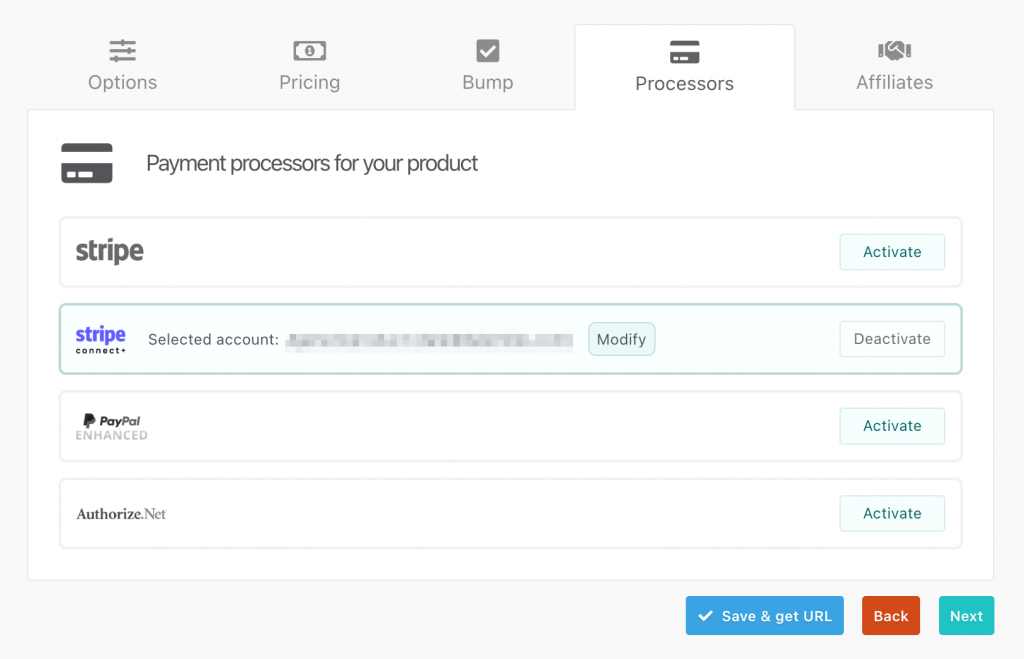
1. Enable Stripe Connect+ as your payment processor under the Processors tab of your product.
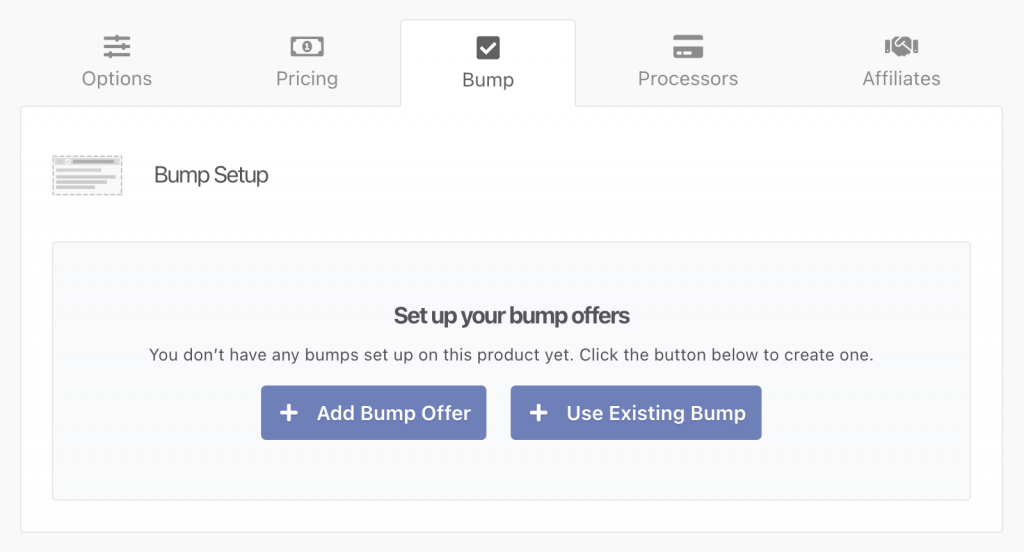
2. Go to the Bump tab and click Add Bump Offer.
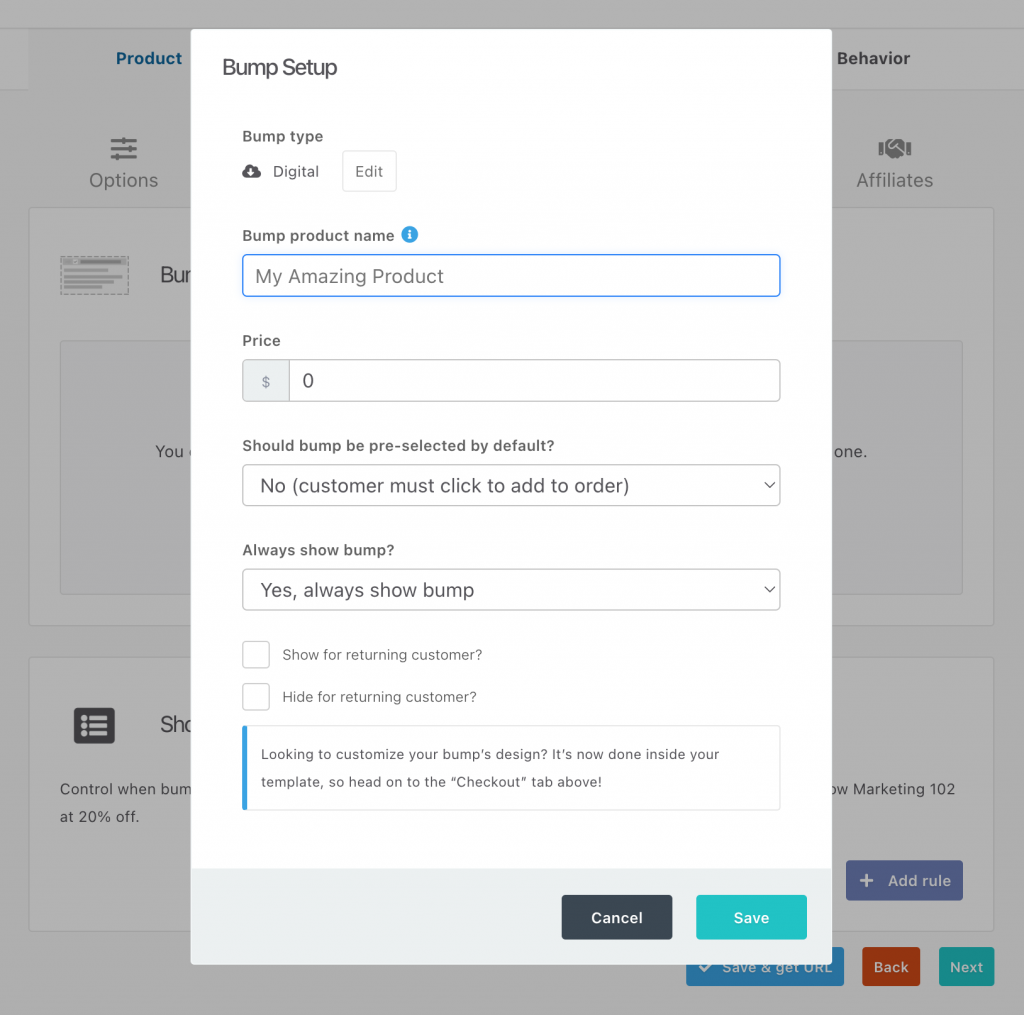
3. Fill out the bump setup details (product type, price, visibility rules).
4. Save and repeat to add up to 6 bumps per product.

With each new bump, you increase your potential for upsells and higher revenue, all while keeping your checkout flow seamless and conversion-focused.
Showing bumps based on customer purchase history
Personalization is key to driving repeat purchases. ThriveCart Pro+ now lets you automatically pre-select bump offers based on a customer’s previous purchases.
For example:
- If a customer previously bought Product A, you can automatically pre-select bumps for Product B and C during their next checkout.
- If they bought Product C, you could show them Product D and E instead.
This rule-based logic uses local storage (like cookies, without storing personal data) to remember a customer’s behavior and show the most relevant offers, no tagging or CRM integration required.
How to Show Bumps to Returning Customers
- Go to Products → Select any product → Bump tab.
- Add or edit a bump offer.
- Enable the checkbox: “Show for returning customers?”
- From the dropdown, select the products that should trigger this bump for returning customers.
- Selected products will appear in a list below — you can remove any by clicking the ❌ icon.
How It Works at Checkout
- When a returning customer qualifies, the relevant bump will appear and be pre-selected automatically.
- If they don’t meet the trigger condition, the bump will remain hidden, ensuring a frictionless and relevant checkout experience.
- This happens silently — no tagging or customer login is required.
- The reverse logic would be applied when enabling the “Hide for returning customers”checkbox.
Using Show/Hide Rules for Dynamic Checkout Logic
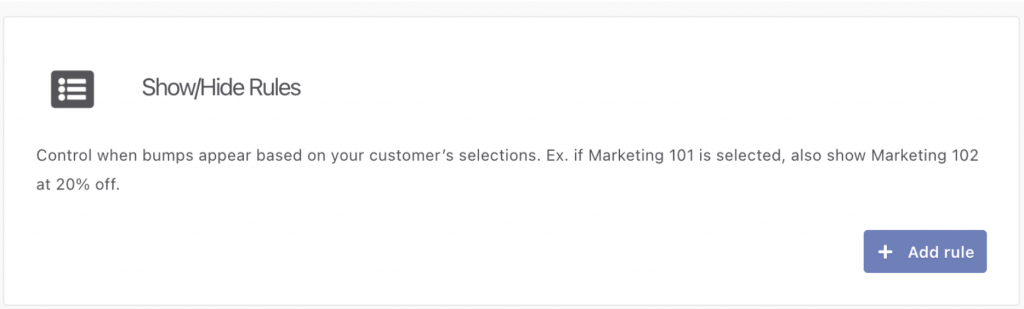
ThriveCart’s Show/Hide Rules allow you to control which bump offers appear to your customers during checkout, based on real-time customer actions, creating a dynamic and personalized checkout experience.
For example:
If a customer adds the bump “Marketing 101” to their cart, you can set a rule to automatically display “Marketing 102” as an additional bump. If they don’t select the first bump, the second one won’t appear.
How to Set Up Bump Rules
- Ensure Stripe Connect+ is enabled in the Processors tab for the product.
- In the Bump tab, add at least two bump offers.
- Click on the Bump Rules tab and click “Add rule”.
- In the modal that opens, define your logic using the dropdowns:
- When [Bump A] is [selected/deselected], then [show/hide] [Bump B].
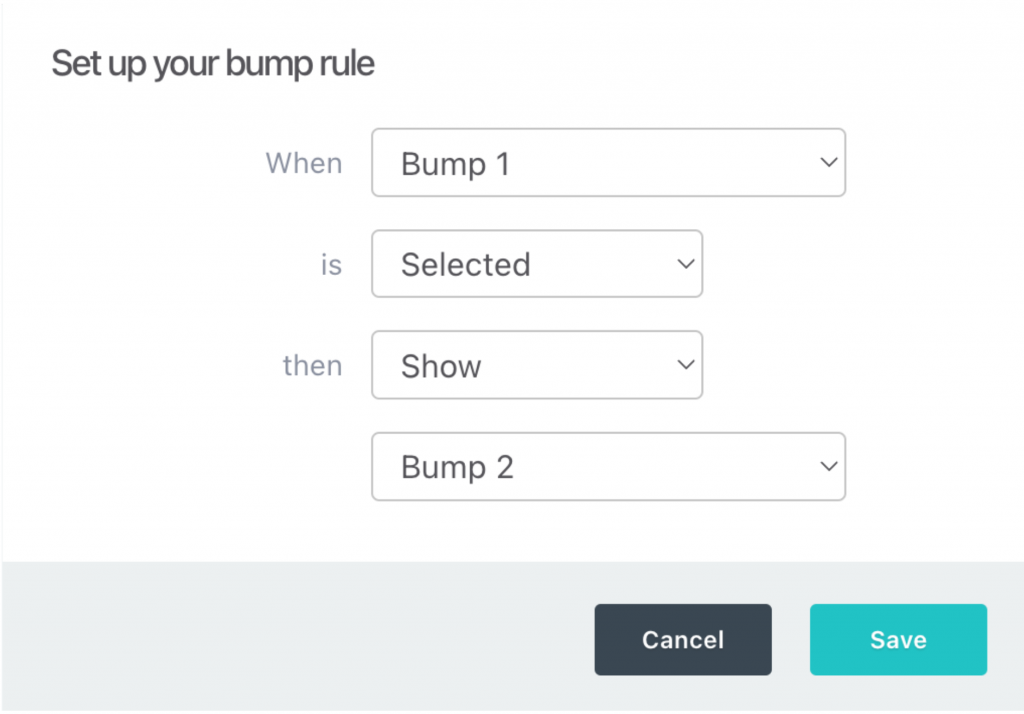
- Click Save to apply the rule. It will now appear in a list format within the Show/Hide Rules card.
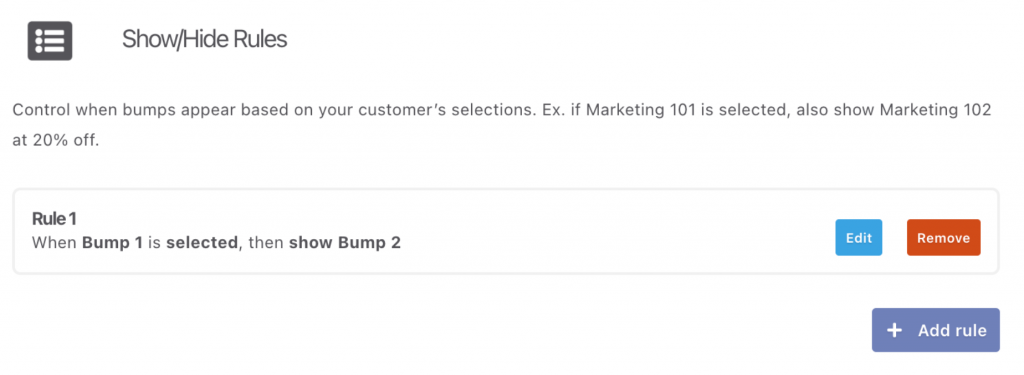
- You can edit or delete existing rules by using the menu beside each rule.
Things to Keep in Mind
- Each bump can have only one rule associated with it.
- A bump cannot control its own visibility (e.g., “If Bump A is selected, show Bump A”).
- You cannot create duplicate or conflicting rules.
- “No bumps selected” is no longer a valid condition — all rules require a specific bump as the trigger.
The default visibility state (show/hide) for each bump is defined at setup. The show/hide rule only adjusts this based on what the user does at checkout.
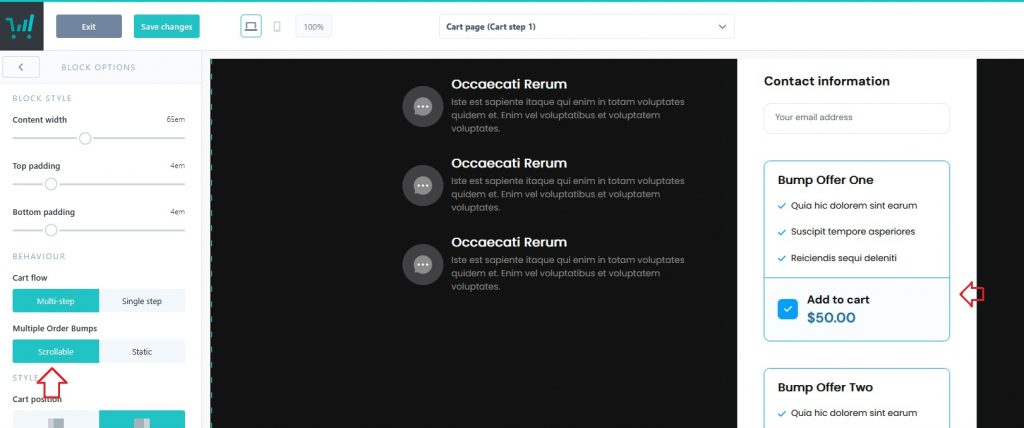
Adding a Scrollbar
To add a scrollbar to your page with multiple bumps, navigate to the ‘Checkout’ tab, click on ‘Launch Editor’, select the main checkout section in your page, and then select ‘Scrollable’ to add scroll bars to your checkout page.
Frequently Asked Questions (FAQs)
- Q: How many order bumps can I add to a single product?
- A: You can add up to 6 digital order bumps per product when using ThriveCart Pro+ with Stripe Connect+ enabled.
- Q: Can I mix digital and physical products in order bumps?
- A: No. Only digital products are supported for multiple bumps. Mixing physical and digital bumps on the same checkout is not supported.
- Q: How do I personalize bumps for returning customers?
- A: Use the “Show for returning customers?” setting under the Bump tab. Bumps can be pre-selected based on a customer’s previous purchases, without needing CRM tagging or email tools.
- Q: What are Show/Hide Rules and how do they work?
- A: These rules allow you to dynamically show or hide bumps based on which other bumps a customer selects, perfect for smart, conditional bump offers. Each bump can have one rule, and rules are one-directional.
- Q: How do I enable scrolling for multiple bumps on my checkout page?
- A: In your Checkout editor, select the main checkout section and enable the “Scrollable” option. This keeps your layout clean and mobile-friendly when showing several bumps.